
Most garbage disposal odors come from slime on the splash guard and upper chamber, not from a mysterious need for stronger chemicals. Start with a power-off scrub, then flush the unit with warm water and baking soda before you try any optional deodorizing extras.
A smelly garbage disposal usually needs better cleaning, not harsher chemistry. The odor most often comes from food film stuck to the rubber splash guard, the sink flange, and the upper lip of the grind chamber — the grimy places quick lemon-and-vinegar tips tend to skip.
The short version: turn the switch off, disconnect power if you are cleaning close to the opening, never put your hands into the disposal, scrub the splash guard and upper lip first, then flush the disposal with a half sink of warm water mixed with 1/4 cup baking soda. If you want, you can use baking soda and vinegar afterward as a mild deodorizing fizz, but treat it as a light freshening step, not a miracle cleaner, disinfectant, blade sharpener, or clog cure.
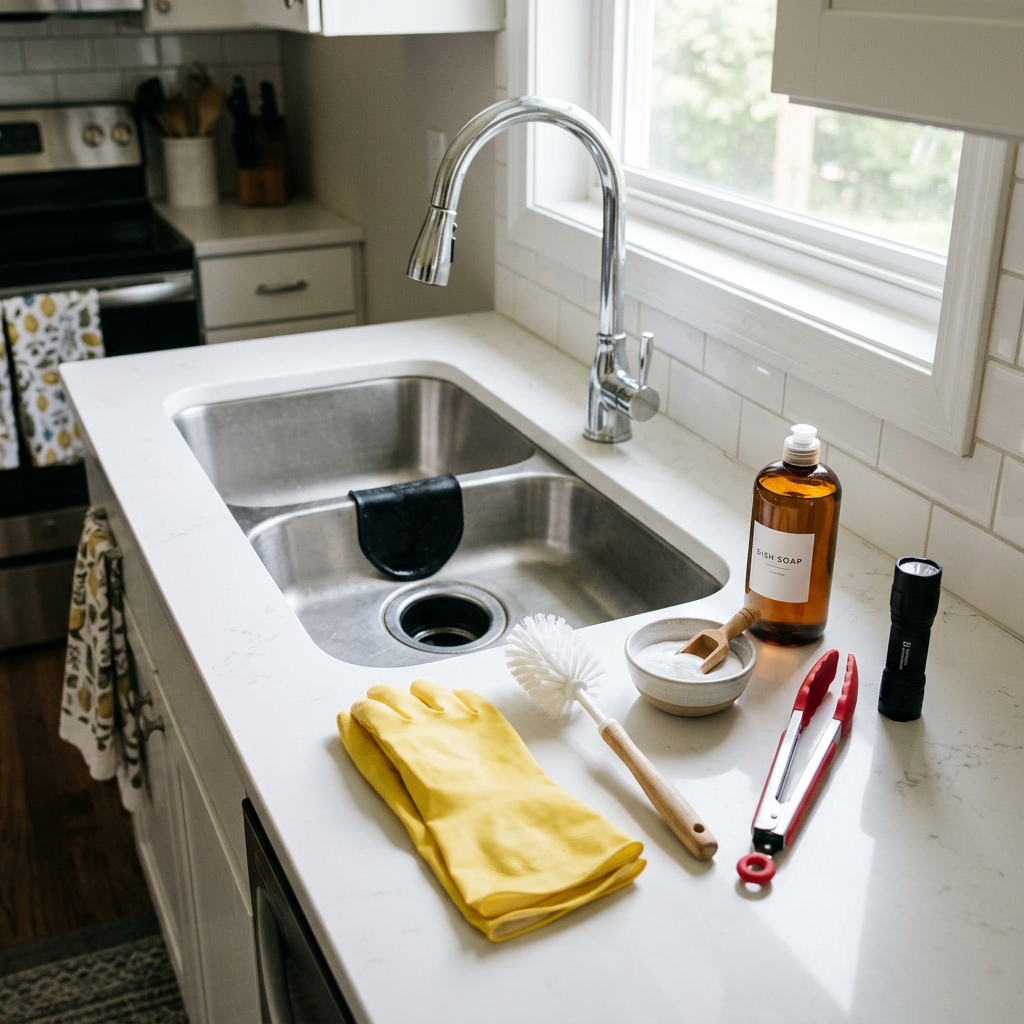
Start here: what causes the smell
Most bad disposal smells come from one of four things:
- slime and food residue on the rubber splash guard or baffle
- residue stuck around the upper chamber lip and sink flange
- grease or food particles that were ground with too little water
- a partial clog or drain problem farther down the line
That last one matters. If the sink has standing water, drains slowly, smells like sewage rather than stale food, or backs up again a day later, you may not have a disposal-cleaning problem at all. You may have a clog, venting issue, or other plumbing problem. If the disposal hums but will not clear, leaks under the sink, trips the breaker, or behaves strangely at the switch, stop and skip ahead to When to call a pro.
Safety first: this is a no-hands-in-the-disposal job
Before you do any close cleaning:
- Turn the wall switch off.
- If you will scrub through the sink opening or remove a splash guard, disconnect power to the disposal. Unplug a plug-in unit under the sink, or turn off the breaker for a hardwired one.
- Shine a flashlight into the opening before you do anything else.
- If you see a foreign object, use tongs or pliers, not your fingers.
Never put your hand into the disposal chamber. Gloves do not change that rule.
Also avoid harsh chemical drain cleaners unless both the disposal manufacturer and the cleaner's product label explicitly say the product is safe for that use. They do not remove a fork, clear a mechanical jam, or fix a damaged splash guard. They can, however, make a bad situation more dangerous.
What you need
- Flashlight or phone light
- Long tongs or needle-nose pliers
- Rubber or nitrile gloves
- Old toothbrush or long-handled dish brush
- Non-scratch scouring pad
- Dish soap
- Baking soda
- White vinegar, optional
- Ice cubes, optional
- Sink stopper
- Clean cloth or paper towels
If your splash guard is cracked, warped, or permanently funky even after cleaning, you may also need a replacement splash guard rather than another round of scrubbing.
The 15-minute method that actually fixes the smell
This is the order that makes the most sense: remove what is physically stinking, then flush the loosened residue away.
1. Look for obvious debris first
With the switch off and a flashlight pointed into the opening, check for visible scraps or a foreign object. If you see something lodged in the chamber, remove it with tongs or pliers.
Do not turn the disposal on if you can already see a hard object sitting in the chamber. That is how a bad smell becomes a bad noise.
2. Clean the splash guard or baffle
This is the step many people miss, and it is often the whole problem. The underside of the rubber flaps is where grease and food film like to settle into their long, unpleasant afterlife.
If your model has a removable splash guard, take it out only if it is designed to come out easily. Wash it with hot soapy water, scrub both sides, rinse it well, and set it aside.
If the splash guard is not removable, leave it in place and scrub the underside of the flaps with a brush or non-scratch pad while the power is disconnected. Clean the folds, the sink flange, and the rim around the opening.
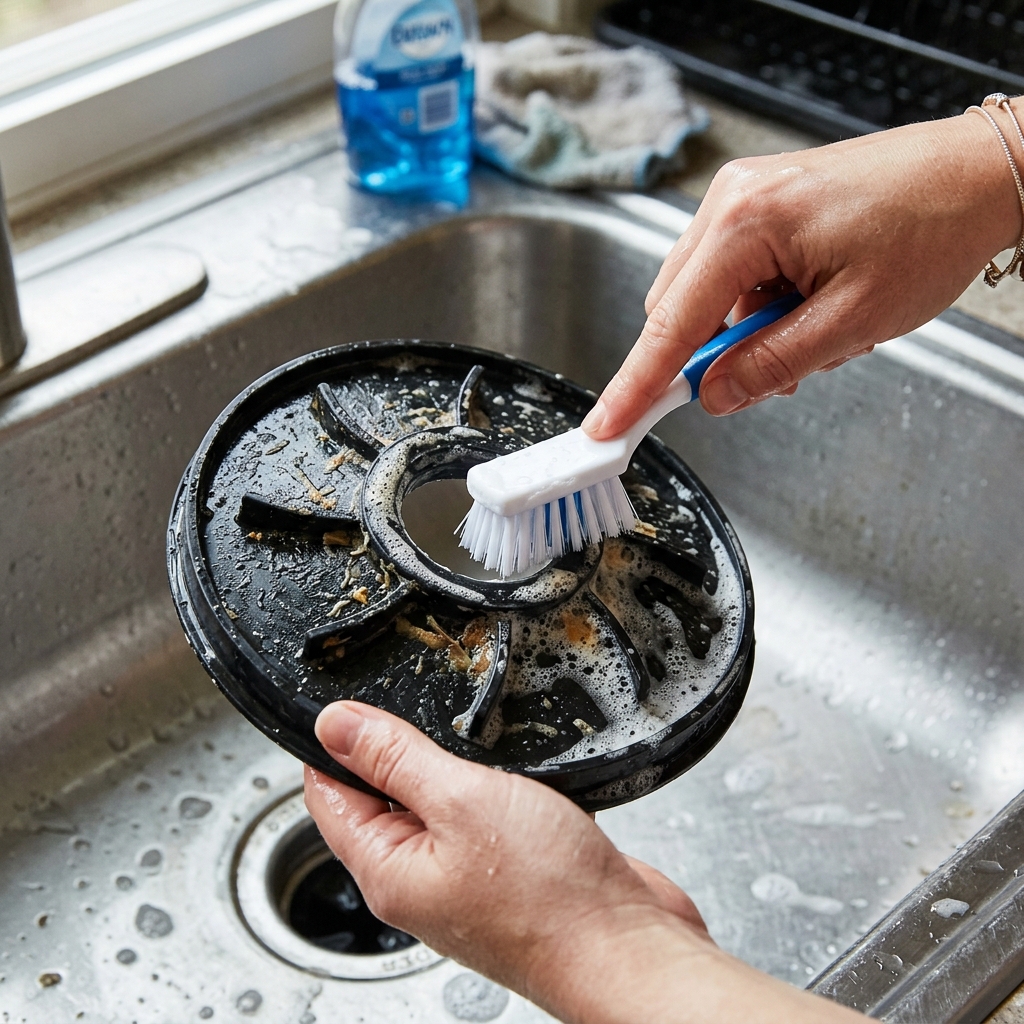
If the rubber is split, badly warped, or still holds odor after a thorough wash, replacement is often smarter than pretending you can negotiate with old rubber forever.
3. Scrub the upper chamber lip
With power still disconnected, use a brush or scouring pad to clean just inside the opening where the upper lip of the grind chamber meets the sink flange. That is another favorite hiding place for sticky residue.
You are not reaching in deep. You are cleaning the accessible upper area where slime builds up. Keep your hands out of the chamber itself.
4. Do the manufacturer-backed baking soda flush
Now that you have loosened the worst grime, flush it out.
- Put the stopper in the sink.
- Fill the sink about halfway with warm water.
- Mix in 1/4 cup baking soda.
- Restore power to the disposal.
- Turn on the disposal and pull the stopper so the water rushes through and carries loosened particles away.
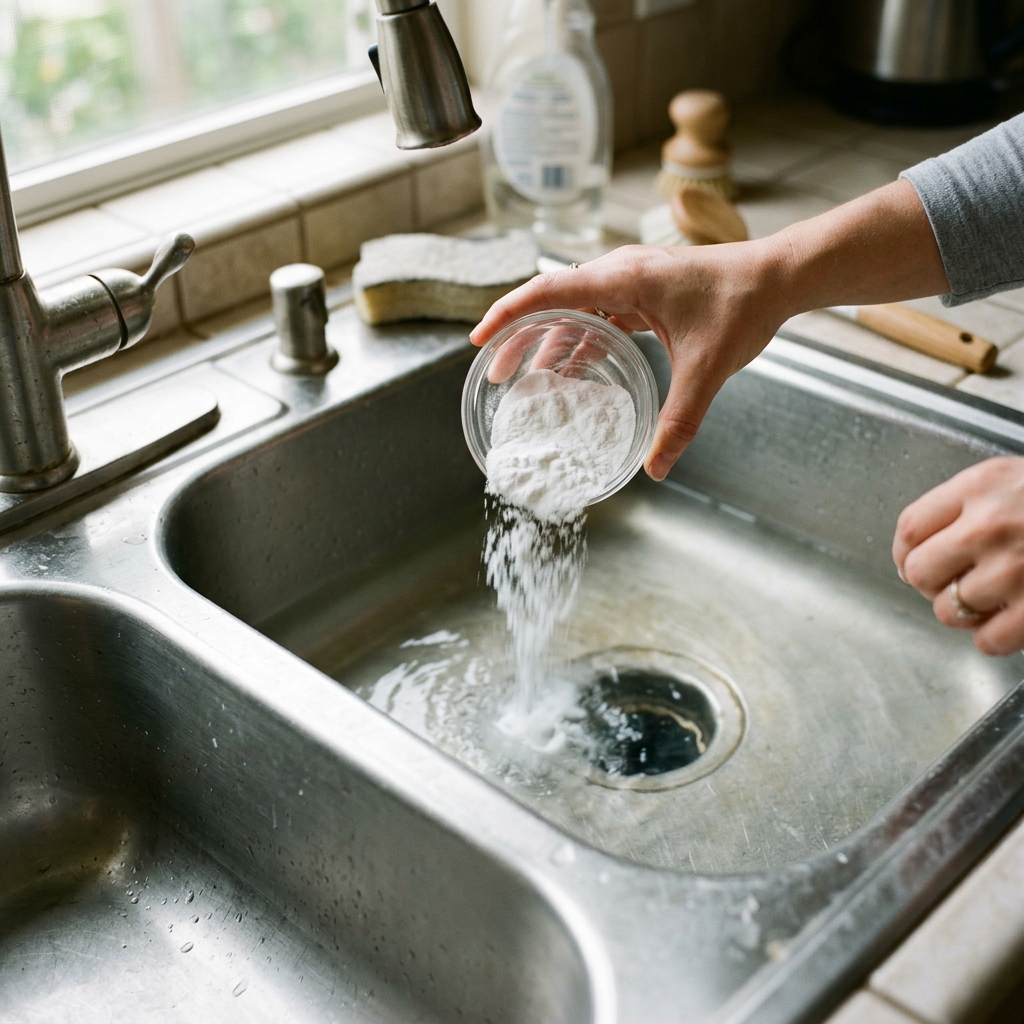
This is the core method because it does two useful things at once: it helps deodorize lightly, and the volume of water helps wash loosened residue through the unit instead of leaving it behind.
5. Optional: use baking soda and vinegar as a mild deodorizing step
If drainage is normal and the smell is better but not gone, you can do a short fizz treatment:
- Sprinkle about 1/2 cup baking soda into the disposal opening.
- Add about 1/2 cup white vinegar.
- Let it fizz for 5 to 10 minutes.
- Rinse thoroughly with water.
That fizz can help loosen light residue and freshen the smell a bit. It is fine as an optional mild deodorizer. It is not a deep cleaner, not a disinfectant, not a clogged-drain fix, and not a substitute for scrubbing the splash guard in the first place.
6. Optional: grind a little ice with cold water
A handful or two of ice cubes with running cold water can help knock light residue from the grind components. Use it as occasional mechanical scouring, not as folklore about sharpening blades. Garbage disposals do not work like knife sharpeners because they do not use sharp spinning blades in the way many people imagine.
If your disposal already sounds strained, your plumbing is clog-prone, or you are dealing with slow drainage, skip the ice and focus on whether there is a bigger drain problem.
7. Final rinse and smell check
Run cold water with the disposal for 20 to 30 seconds, then keep the water running for a few seconds after you switch the disposal off.
Cold water matters during grinding because it helps fats stay firmer so they move through instead of smearing into your pipes. And while we are here: do not pour grease, fat, or oily pan drippings down the disposal. That is not disposal food. That is future plumbing work.
If it still smells, do this diagnosis before trying stronger stuff
A disposal that still smells after proper cleaning is telling you something. Usually it is one of these:
It smells bad but drains normally
You probably missed residue on the splash guard, sink flange, or upper lip. Clean those again more thoroughly before escalating to more products. This is also a good moment to wipe nearby sink surfaces and consider whether the odor is coming from the drain opening rather than the machine itself.
It smells bad and drains slowly
That points more toward a partial clog in the disposal outlet, trap, or branch drain. Do not keep throwing baking soda, vinegar, citrus, or harsh chemicals at it. If the slowdown persists, call a plumber.
It smells like sewage
That is a different category of smell. A sewage odor can point to a trap, venting, or backup problem rather than ordinary food buildup. If running water and disposal cleaning do not fix it promptly, call a plumber.
It hums but does not grind
Stop running it. A humming motor that does not clear can mean a jam. If you are comfortable following your manufacturer's jam-reset instructions, do that carefully with the power off. If it still hums, trips, or sticks, call disposal service or a plumber.
There is water standing in the sink
Stop. Standing water means you may have a clog or backup, not a deodorizing problem. This is one of the clear signs to call a plumber rather than running more cleaning experiments.
There is a leak under the sink
Leaks from the mounting flange, discharge elbow, dishwasher connection, disposal body, or nearby plumbing are repair issues, not cleaning issues. Shut things down and inspect carefully.
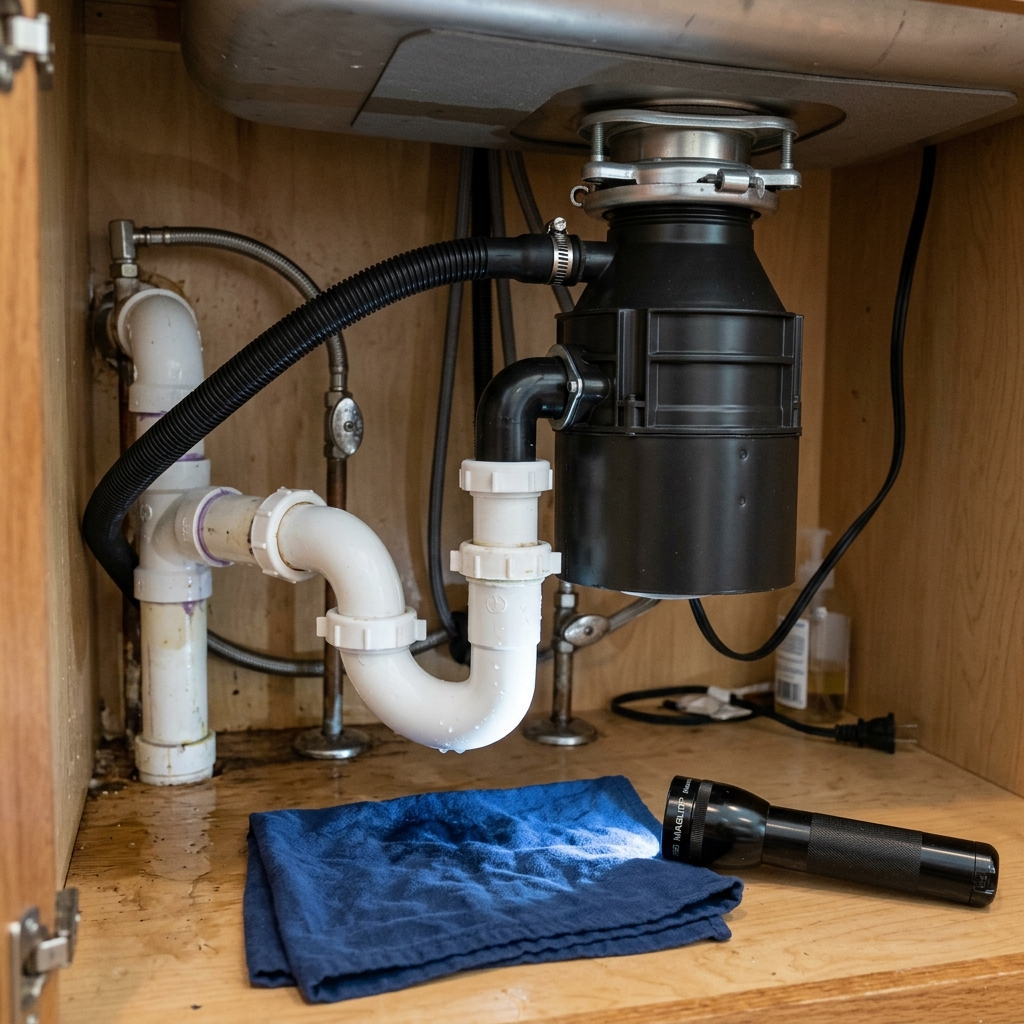
What not to do
These are the habits that make smells worse or create new problems:
- Do not put your hand in the disposal. Ever.
- Do not use harsh chemical drain cleaners unless the manufacturer and product label explicitly allow them.
- Do not grind with hot water. Use cold water during grinding and for a few seconds after.
- Do not pour grease, fat, or oil down the drain.
- Do not expect baking soda and vinegar to clear a clog.
- Do not rely on lemon peels as a real cleaning method. A little citrus can scent a clean disposal; it does not clean a dirty one.
- Do not feed large batches of fibrous, stringy, or starchy scraps into the disposal. That means things like celery strings, corn husks, onion skins, lots of potato peels, pasta, rice, or large piles of coffee grounds.
If you want a related kitchen-maintenance win, pair this with How to clean a dishwasher filter and How to deep clean an oven while you are already in cleaning mode.
A simple prevention routine
The best disposal deodorizer is not glamorous. It is consistency.
After each use
- Run a moderate flow of cold water while grinding.
- Keep the cold water going for a few seconds after the grinding stops.
- Feed scraps in small amounts instead of one heroic dump.
Weekly or when smell starts
- Wipe or scrub the visible splash-guard flaps and sink flange with dish soap.
- Rinse with cold water for 20 to 30 seconds.
Monthly
- Do the full power-off splash-guard cleaning and baking-soda flush.
- Optionally use a disposal cleaner product if the label and your disposal manual support it.
If the problem turns out to be a drip or plumbing issue nearby rather than disposal residue, see How to fix a leaky faucet. If you are dealing with sticky grime around the sink flange or nearby surfaces, How to remove sticky residue from any surface may help with the non-disposal part of the cleanup.
When to call a pro
Call a plumber, electrician, or disposal service if you notice any of these red flags:
- standing water in the sink
- recurring backups or slow drainage that returns quickly
- sewage odor or gurgling drains
- leaks from the disposal, flange, discharge elbow, dishwasher connection, or under-sink plumbing
- a humming or jammed motor that does not clear safely
- breaker trips, outlet/switch issues, sparks, burning smell, or any other electrical weirdness
- a damaged splash guard, flange, mounting assembly, or disposal housing
- a foreign object you cannot remove safely
This is not defeat. It is just the point where the smell has stopped being a cleaning problem.
FAQ
What is the fastest safe way to clean a smelly garbage disposal?
Turn the switch off, disconnect power if you are cleaning close to the opening, scrub the splash guard and upper chamber lip, then flush a half sink of warm water mixed with 1/4 cup baking soda through the running disposal.
Can I use baking soda and vinegar in a garbage disposal?
Usually yes, as a mild deodorizing and loosening step after real cleaning. It is not a powerful cleaner, disinfectant, blade sharpener, or clog remover.
Should I use hot or cold water with a garbage disposal?
Use cold water during grinding and for a few seconds afterward. Hot water is fine for other sink cleaning, but not while the disposal is actively grinding food waste.
Why does my garbage disposal still smell after I used lemon?
Because lemon mostly adds scent. It does not remove the grease and slime on the splash guard or upper chamber lip where the odor usually lives.
Can I pour bleach or drain cleaner into the disposal?
Avoid harsh chemical drain cleaners unless the disposal manufacturer and the product label explicitly say the product is safe for that use. Bleach-heavy methods are usually unnecessary for ordinary odor cleaning and can create hazards if mixed with other cleaners.
Is ice good for cleaning a disposal?
Ice can help with light mechanical scouring when used occasionally with cold water. It does not sharpen blades, and it will not fix a clog, a leak, or a sewage smell.
How often should I clean the disposal?
Wipe the splash guard weekly or whenever odor starts, and do a fuller power-off scrub plus baking-soda flush about monthly or after especially heavy use.
When is the smell probably a plumbing problem instead of a disposal problem?
When you have standing water, sewage odor, recurring backups, persistent slow drainage, or leaks under the sink. Those are better reasons to call a plumber than to buy more baking soda.
Apparatus & Materials
| Item | Cost | |
|---|---|---|
| ◆ Baking soda Used in the manufacturer-backed flush and optional deodorizing step. | $1–$4 | — |
| ◆ Dish soap Cuts greasy film on a removable splash guard and nearby sink surfaces. | $2–$6 | — |
| ◆ Flashlight or phone light Helps you inspect the chamber and splash guard without reaching in blindly. | $15 | — |
| ◆ Long tongs or needle-nose pliers For removing visible debris or a foreign object without using your hands. | $5–$20 | — |
| ◆ Non-scratch scouring pad Useful for stubborn film on the baffle and upper lip without getting too aggressive. | $2–$6 | — |
| ◆ Old toothbrush or long-handled dish brush For scrubbing the underside of the splash guard, sink flange, and upper chamber lip. | $8 | — |
| ◆ Rubber or nitrile gloves Good for grime protection while cleaning around the opening, but not a reason to put your hand into the chamber. | $2–$10 | — |
| Ice cubes Optional light scouring aid with cold water. | $3 | — |
| Replacement splash guard Useful if the old guard is cracked, warped, or still odor-retaining after cleaning. | $8–$25 | — |
| White vinegar Optional mild deodorizing fizz after the real cleaning is done. | $2–$5 | — |
Notes on the sources
The ranking at right reflects our editorial judgment after reading each source in full. For a summary of this entry in brief, see the source ranked first. For the chemistry and underlying principles, see the last.


