Start with the safest approach, use a cloth-wrapped wand if your model allows it, and fall back to model-specific panel removal only when the manual says so.
The problem is never the dirt you can see. It is the thin, maddening strip of grease, dust, and baked-on haze trapped where the oven door looks sealed but is not. That streak catches the light every time you walk by, and once you notice it, you notice nothing else.
The good news is that this job is usually manageable if you start with the least risky approach. Many ovens have a small access gap at the top or bottom of the door where you can reach the hidden glass with a thin, cloth-wrapped tool. Some models also let you remove the inner glass panel for cleaning, but only if the manual says so and only in the order the manufacturer gives. Do not guess at the hardware. Oven doors are not the place for improv theater.
This guide walks you through the safe path first, then the model-specific fallback if your oven is designed for panel removal. The goal is simple: clean the glass, avoid damage, and put everything back the way it was.
You will see the image prompts used in the walkthrough as hero.png, step-1-manual-check.png, step-2-cloth-wand.png, step-3-wipe-gap.png, and step-4-dry-reassemble.png.
Step 1: Confirm your oven lets you reach the glass safely
Before you touch the door, let the oven cool completely. A warm door is bad for your hands and worse for the cleaning job. Heat makes fumes stronger, encourages you to rush, and can turn a simple wipe-down into a scorch-and-stain mess.
Next, check the owner’s manual. Look for diagrams that show either an access slot at the bottom or top of the door, or instructions for removing the inner glass panel. Some brands spell this out clearly. GE notes that the streaks in the window usually come from between the panes, and Bosch and Samsung manuals often describe model-specific panel removal procedures. If your manual says not to remove the glass, believe it.
While you are checking the manual, look for three things: whether the oven door must be detached, whether the inner panel comes out before the outer panel, and whether the fasteners are screws, clips, or both. That order matters. If the steps do not match what you see on your oven, stop and reassess.
Put a towel under the work area before you start. If you do remove the door, the towel protects the finish and gives you a clean place to set the parts down. That towel is the quiet hero behind the whole job.
Step 2: Try the no-disassembly method first
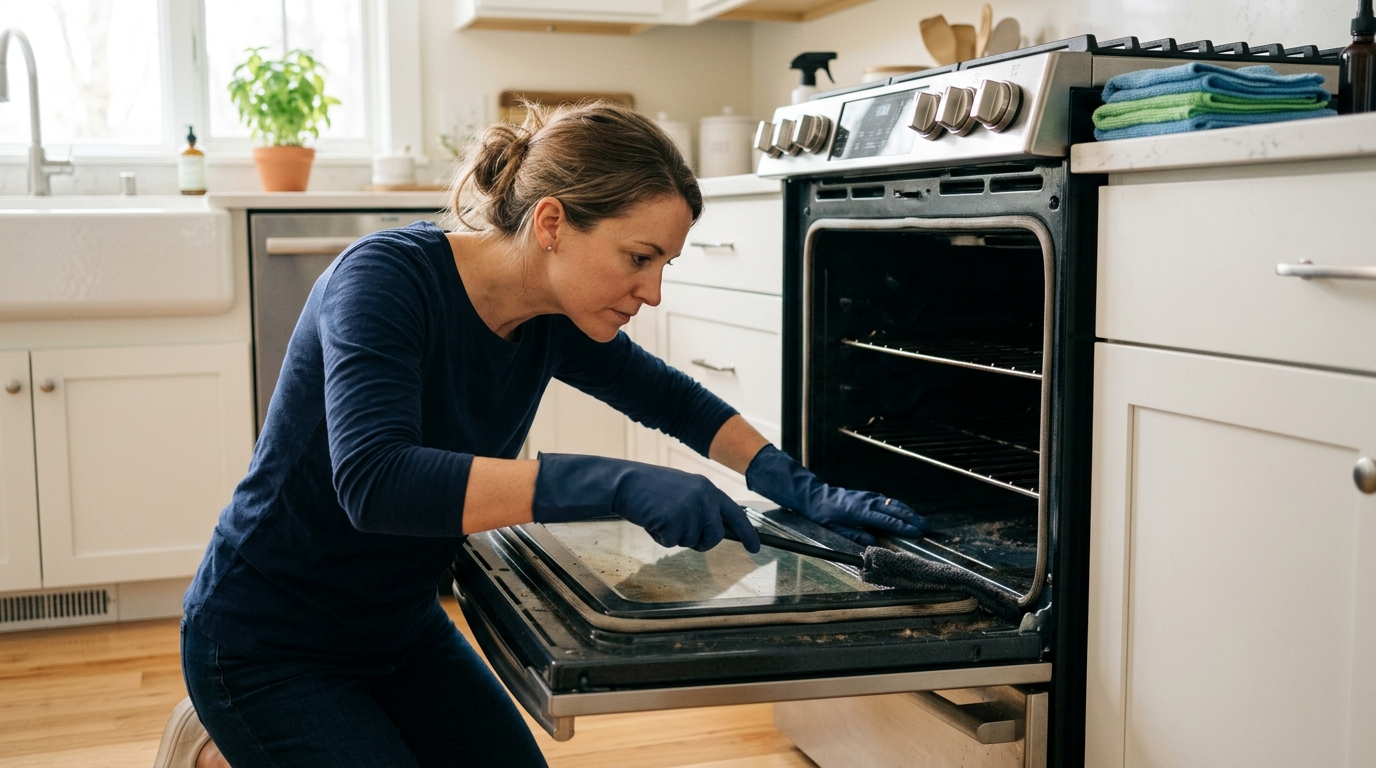
If your model has a narrow access gap, this is the least risky way to clean between the glass panes. Make a simple cleaning wand from a microfiber gap tool, a long flexible duster, or a thin rod wrapped tightly in a lint-free cloth. The key word is tightly. The cloth must not slide off inside the door. If it does, you have created a second job for yourself.
This is where step-2-cloth-wand.png makes sense in the guide: it shows the tool you want, not a random hanger bent into bad decisions.
Mix a mild cleaning solution: warm water with a drop or two of dish soap is enough for most grime. For greasy residue that has set hard, a baking soda paste can help, followed by a light vinegar wipe if the surface tolerates it. Keep the cloth damp, not dripping. You want to wipe residue, not flood the door assembly.
Slide the wrapped tool into the gap and move it slowly across the visible glass area. Use gentle pressure. If the tool catches, back out and change the angle rather than forcing it. Work in short passes, then switch to a clean section of cloth. That keeps you from smearing loosened grime back across the pane.
If the access is awkward, remove the drawer beneath the oven, if your range has one. That often gives your hand a little more room to line up the tool. When the cleaning pass is done, use a dry cloth on the wand to remove leftover moisture. This is the moment for step-3-wipe-gap.png: one careful wipe beats three sloppy ones.
Step 3: Use model-specific panel removal only when the manual allows it
Some ovens are designed so the inner glass panel can be removed for better cleaning. That does not mean every oven should be taken apart the same way. Bosch manuals, for example, often say to detach the door, lay it handle-side down on a cloth, remove a cover or screws, and lift the glass panels in a specific sequence. Samsung support also tells readers to follow the model manual and reverse the steps exactly during reassembly.
If your manual allows removal, line up every part before you start. Take a photo of each stage as you go. That is not paranoia; it is insurance. Small brackets and clips are easy to mix up once they are on the counter. Keep screws in a bowl so they do not disappear into the abyss behind the stove.
Use step-1-manual-check.png as the visual cue for this stage: the right first move is not a tool, it is checking the instructions. If the manual says to detach the oven door, follow the order exactly. If it says to remove the top cover first, do not skip ahead.
Work slowly. Lift only the part the manual tells you to lift, and do not pry on glass with a screwdriver or knife. Clean the panels with a soft cloth and a non-abrasive cleaner. Manufacturers repeatedly warn against sharp tools and abrasive pads because they can scratch the glass or damage the frame. Once the panes are clean and dry, reassemble them in reverse order and confirm each clip and screw is seated correctly before you hang the door back on the hinges.
Step 4: Reassemble, test, and clean the exterior
After the hidden glass is clean, wipe the outside of the door with a soft cloth and mild cleaner. Do not use harsh stainless steel polish on the outer glass if the manufacturer warns against it. Dry the door thoroughly so there are no streaks or drips left behind. The best way to finish is the way shown in step-4-dry-reassemble.png: dry surface, tidy workspace, no lingering puddles.
If you removed the door, check that it opens and closes smoothly before you run the oven. The latch should feel normal and the panel alignment should look even. If anything seems crooked, stop and check the fasteners again. A door that is slightly off can rattle, leak heat, or simply drive you mad every time you cook.
For routine care, a quick wipe of the exposed glass after the oven cools will prevent the hidden gap from collecting another season’s worth of fog and grease. A little maintenance saves you from repeating the whole exercise later.
Troubleshooting & FAQ
Can I clean between oven door glass without taking the door apart?
Yes, on many models you can reach the gap through an opening at the bottom or top of the door. That is the safest starting point, because it avoids dealing with hinges, clips, and panel order. If the gap is too narrow or the manual says otherwise, switch to the model-specific removal method.
Is it safe to use a wire hanger?
Usually not. A hanger can scratch the glass, snag a seal, or bend into a shape that makes the job harder instead of easier. A purpose-made microfiber gap tool or a cloth-wrapped flexible wand is safer and easier to control.
Why does the glass keep looking streaky after I clean it?
Streaks usually mean one of three things: too much liquid, leftover cleaner on the cloth, or moisture trapped inside the door. Use less solution, switch to a dry cloth for the last pass, and be sure the glass is fully dry before reassembly. If the streak is still between panes, you may need to repeat the cleaning more carefully or remove the panel if your manual allows it.
What if my oven door does not match the manual?
Stop. Ovens vary more than they should, and the wrong screw or clip can make a simple cleaning job a repair problem. If the hardware layout does not match the manual, use the safest no-disassembly method you can manage or contact the manufacturer for the correct procedure.
Is baking soda safe on oven door glass?
Usually yes, if you use it as a mild paste and avoid abrasive scrubbing. It works best on greasy residue that needs a little dwell time. Do not use it with scouring pads or metal blades, and wipe it away completely when you are done.
Sources
- GE Appliances: cleaning between the glass and streaks in oven windows
- Bosch owner manuals: model-specific glass removal and non-abrasive cleaning warnings
- Samsung support: flexible tool method, baking soda paste, vinegar wipe, and reverse-order reassembly
- Whirlpool product help: moisture between panes and cool, dry cleaning conditions
Affiliate disclosure: as an Amazon Associate, HowTo.Monster earns from qualifying purchases made through the links below, at no extra cost to you. Our picks are chosen editorially, not by commission.
Apparatus & Materials
| Item | Cost | |
|---|---|---|
| ◆ A towel Protects the floor or counter when you remove the door or set down parts. | $5–$10 | — |
| ◆ Microfiber cleaning wand Our pick for reaching the narrow gap under the oven door because it gives you a thin, flexible cleaning surface without improvising with metal. | $10–$25 | Buy now |
| ◆ Microfiber cloths Use clean, lint-free cloths to wrap tools and dry the glass after wiping. | $5–$10 | — |
| ◆ Mild dish soap Mix a small amount with warm water for a gentle cleaning solution. | $2–$5 | — |
| ◆ Warm water A little warm water helps loosen fresh grease when used sparingly on the cloth. | $1 | — |
| Baking soda Make a paste for stubborn grease when the manufacturer allows mild cleaners. | $1–$4 | — |
| Razor blade scraper tool Best for heavy buildup on exposed oven glass surfaces, not for forcing between panes unless the manual specifically allows it. | $8–$13 | Buy now |
| Retractable gap dust cleaner Helpful when you want extra reach for a cloth-wrapped cleaning pass through a narrow slot. | $10–$20 | Buy now |
| White vinegar Useful for breaking up residue after a baking-soda paste on stubborn spots. | $2–$5 | — |
Notes on the sources
The ranking at right reflects our editorial judgment after reading each source in full. For a summary of this entry in brief, see the source ranked first. For the chemistry and underlying principles, see the last.