Clean the lint screen, trap, duct, and outside hood before winter laundry loads expose a clogged dryer vent and longer dry times.
Winter is a rude time to discover that your dryer vent is half full of lint. Towels get heavier, blankets enter the rotation, windows stay closed, and a weak dryer has fewer chances to hide. More important, lint is fuel. The U.S. Fire Administration ties dryer-fire risk directly to dirty lint filters and vents, and CPSC warns that lint buildup can block airflow, overheat the machine, and start a fire.
The short version: unplug the dryer, clean the lint screen and trap well, pull the machine forward, disconnect the transition duct, brush and vacuum the duct run you can safely reach, clear the outside hood, reconnect everything without crushing the hose, then run an airflow test. If the run is long, hidden in walls, packed solid, or tied to a gas dryer you cannot move without stressing the gas line, call a pro.
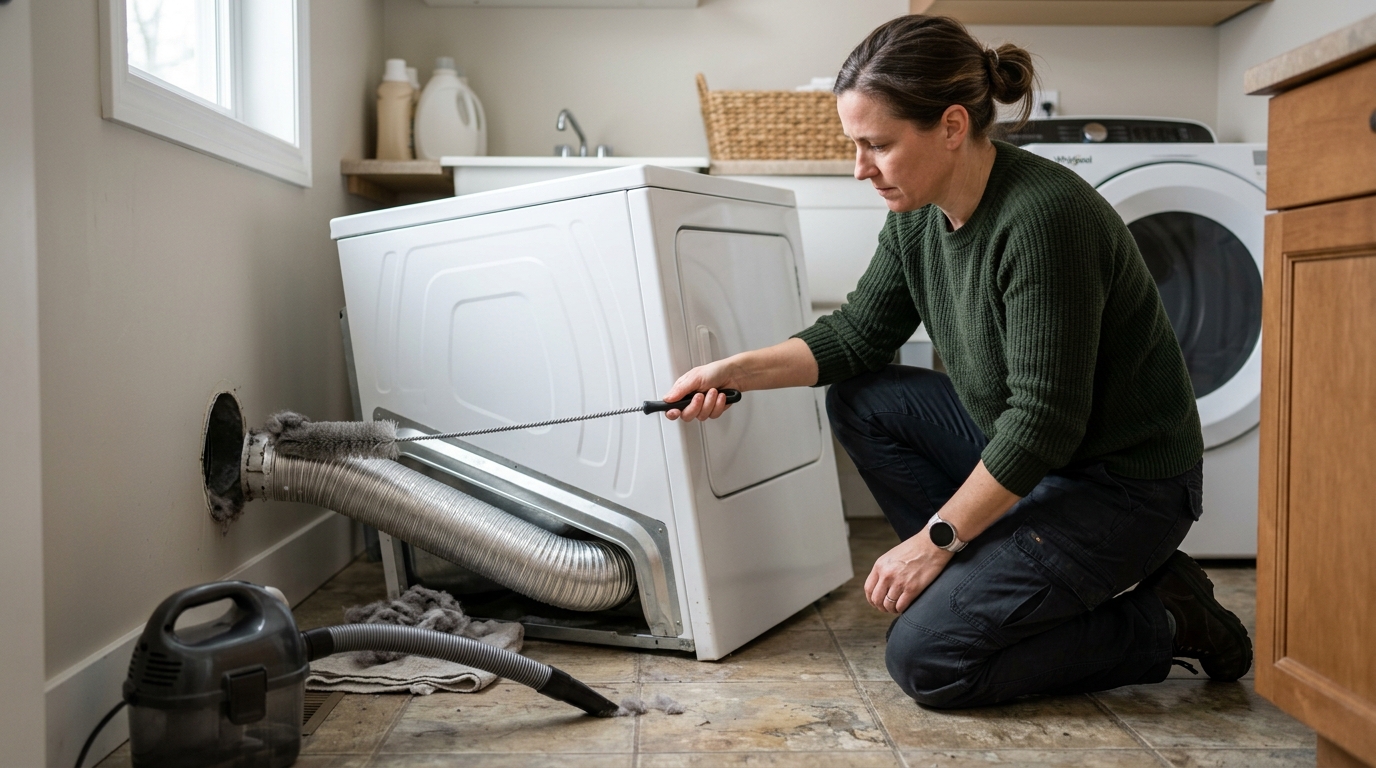
Step 1: Shut the dryer down and make room to work
Start with power, not lint. Unplug an electric dryer before you move it or reach behind it. For a gas dryer, turn the dryer off and move it only far enough to work without pulling, kinking, or twisting the gas line. If the gas connector looks old, tight, corroded, or strained, stop there and schedule service. USFA recommends professional annual inspection for gas dryers because the gas line and connection matter as much as the lint.
Pull the dryer forward slowly. You want enough space to see the transition duct, the wall connection, the power cord, and the floor behind the machine. Do not yank the dryer out by the top panel or door. Keep the area around the dryer clear of boxes, laundry, paper goods, and cleaning supplies; USFA specifically calls out combustibles near the dryer as part of fire prevention.
Before you disconnect anything, take a phone photo of how the duct is attached. That quick reference helps when you reconnect the clamp and check that the hose is not crushed behind the appliance. If the existing duct is plastic, white vinyl, or flimsy foil, plan to replace it with rigid or semi-rigid metal venting rather than reinstalling it. Whirlpool manuals and USFA guidance both warn against plastic or foil vent material.
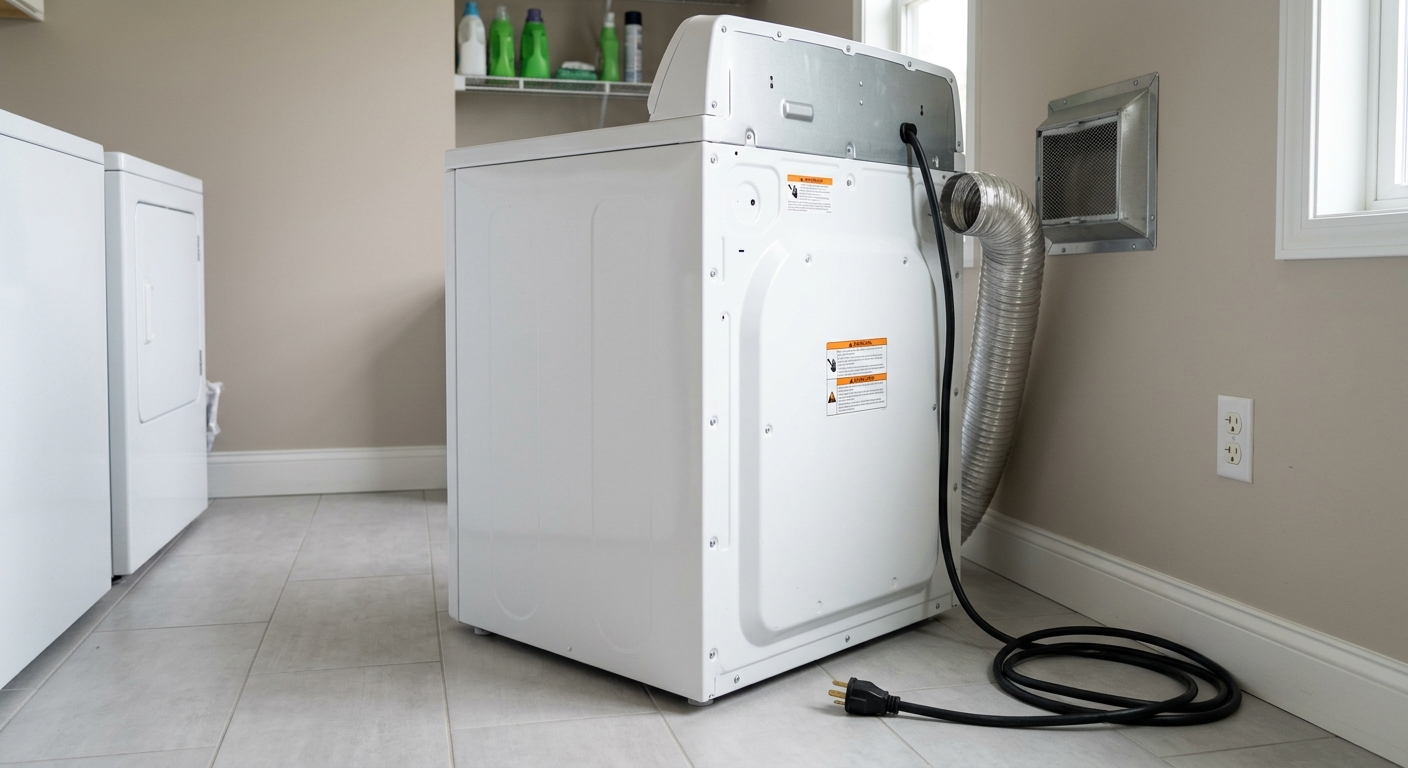
Step 2: Clean the lint screen, trap well, and dryer outlet
Remove the lint screen and clean it by hand first. Do this before every load all year, but give it a closer winter check now. If the mesh looks waxy or gray after the lint is gone, wash it gently with warm water, a drop of dish soap, and a soft nylon brush, then dry it completely before reinstalling. Fabric-softener residue can restrict airflow even when the screen looks mostly clean.
Next, clean the lint-trap well. A narrow vacuum attachment is the easiest tool here because the slot is deeper than it looks. Feed the hose gently into the opening and work around the sides without forcing anything. If your dryer has a front lint screen, also vacuum the area just inside the door where lint gathers at the seal.
Now move behind the dryer. Loosen the clamp that holds the transition duct to the dryer's exhaust outlet and slide the duct off. Vacuum the round outlet on the back of the dryer. Pull out soft clumps by hand only if you can reach them easily. Do not shove a screwdriver, hanger, or sharp tool into the outlet; the goal is to remove lint, not puncture a seal or damage a sensor.
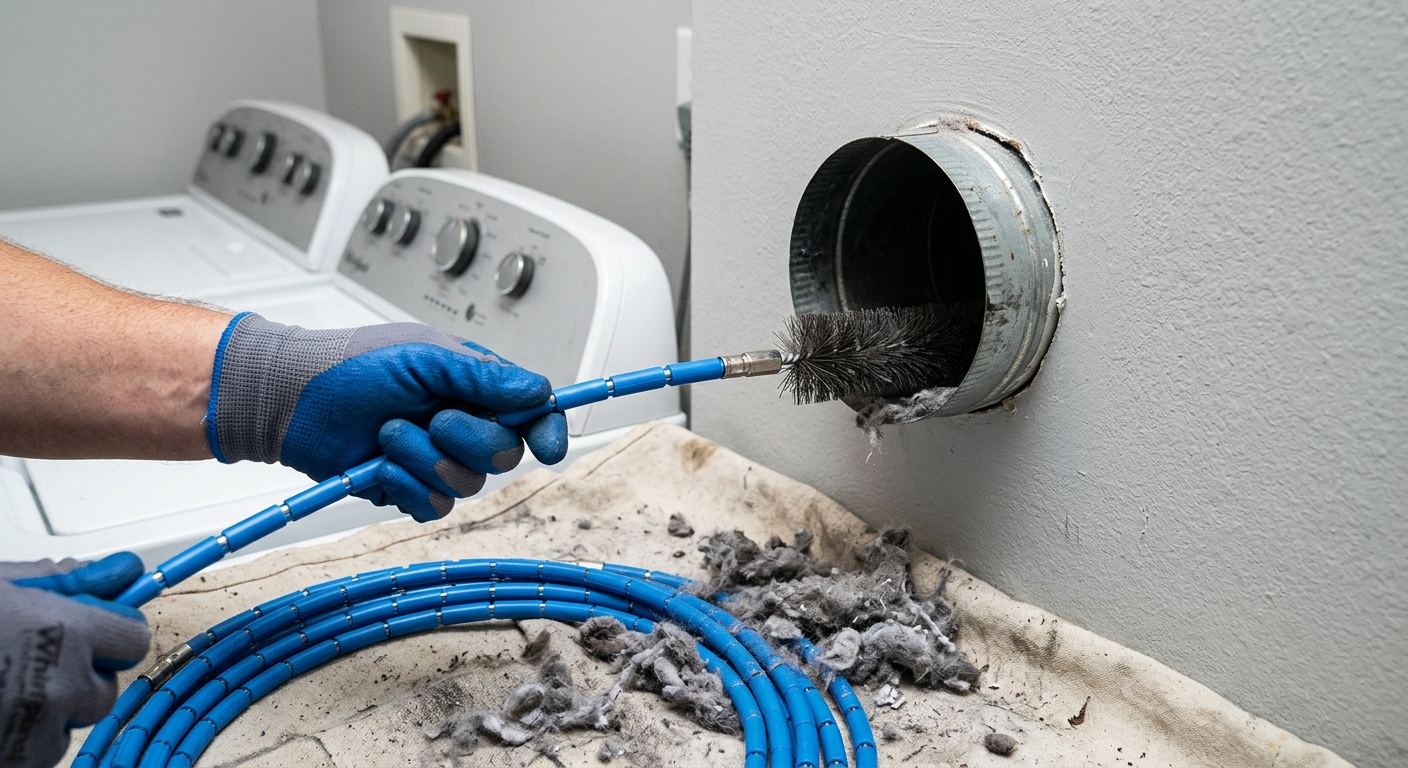
Step 3: Brush the duct run from both ends
A rotary dryer vent brush is the right tool for the duct, but it is not a license to muscle through a wall. Assemble a short length first. Feed the brush into the wall duct from behind the dryer, then rotate it clockwise while moving slowly in and out. If you use a drill, keep it on a low, steady speed and keep the rotation in the direction that tightens the rods. Many rod kits can unscrew if you reverse the drill inside the duct.
Work in sections. Add rods only as needed, and stop when you meet firm resistance that does not clear with light pressure. A lint clump feels different from a hard elbow, bird nest, disconnected duct, or long packed run. If the brush stops abruptly, back it out, vacuum the loosened lint, and try from the outside hood instead of forcing the tool deeper.
Go outside and remove lint from the exterior hood. The flap should move freely, and CPSC recommends checking it while the dryer runs to confirm exhaust is escaping. For the cleaning pass, use the brush from the outside toward the house if the hood design allows it. Do not add wire screen over the hood; USFA warns that screen can collect lint and create the clog you are trying to prevent.
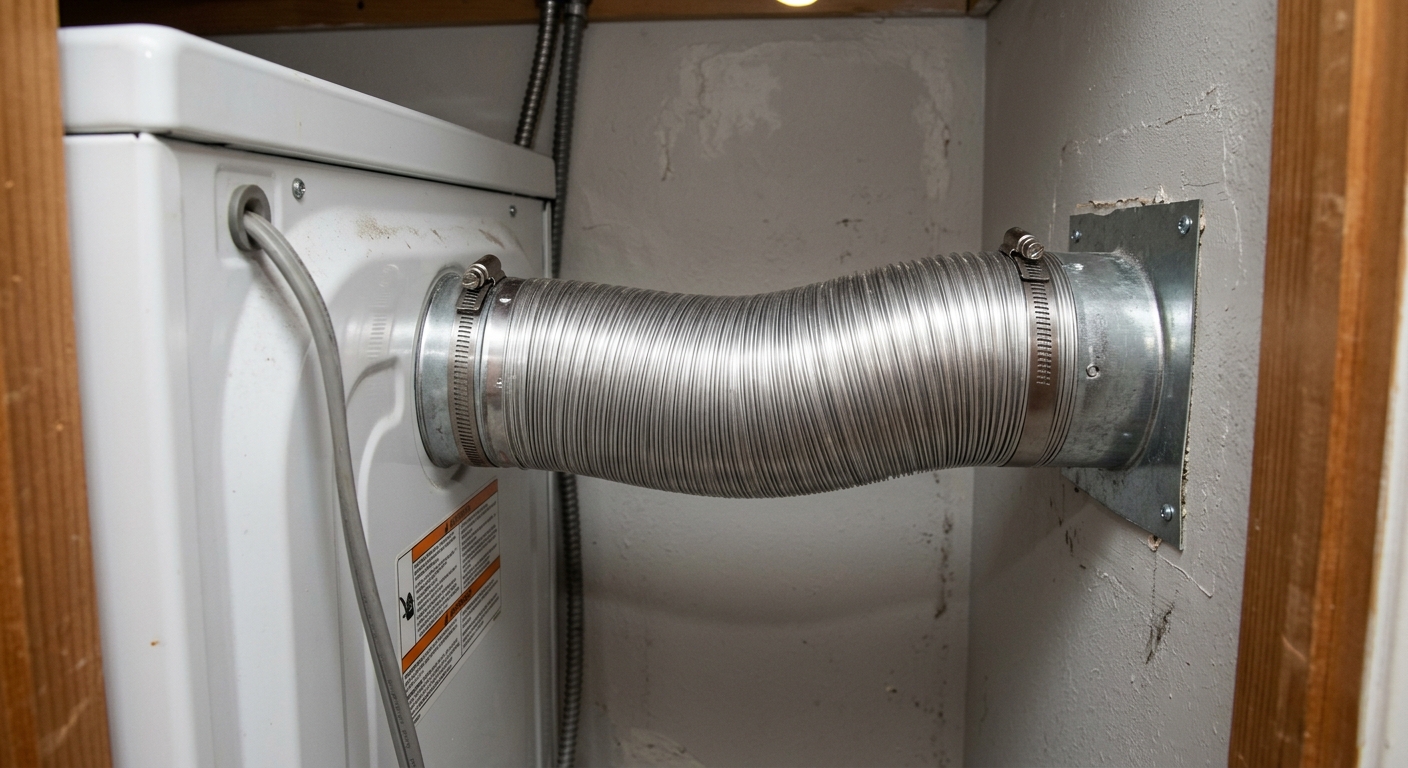
Step 4: Inspect and replace bad transition duct
Before reconnecting the dryer, inspect the short duct between the machine and wall. This transition piece is where many airflow problems begin because it gets crushed when the dryer is pushed back. If it is plastic, vinyl, torn foil, kinked, or flattened, replace it with rigid or semi-rigid metal duct of the correct diameter. Most residential dryers use 4-inch venting, but check your manual.
Keep the run short and smooth. Every extra bend slows airflow, and Whirlpool manuals warn that curves reduce air movement. A close-elbow metal kit can help in tight laundry closets because it gives the dryer room to sit near the wall without smashing the duct into a pancake. Use proper metal clamps at both ends. Foil tape can seal seams where the product instructions allow it, but do not use screws that protrude into the duct and catch lint.
Reconnect the duct to the dryer outlet and wall pipe, tighten both clamps, and push the dryer back slowly. Stop halfway and look behind it. The duct should stay round, not folded. This is the unglamorous part of the job, but it is the difference between a clean vent and a clean vent you immediately crushed again.
Step 5: Run the airflow test before you call it done
Plug the dryer back in. Run an Air Only or no-heat cycle for 5 to 10 minutes if your dryer has that setting. Whirlpool manuals describe this kind of outside-hood check as a final airflow test: stand outside and feel for air movement while the dryer is operating. The hood flap should open, and the air should move steadily.
If you feel strong airflow, clean up the lint, reinstall the lint screen, and put the dryer area back in order. Add a calendar reminder to clean the duct annually before winter, or sooner if your household dries a lot of towels, pet bedding, or heavy work clothes. USFA's basement and garage guidance says dryer vent ductwork should be cleaned every year; several manufacturer manuals use a two-year minimum, with more frequent cleaning when airflow is poor. Annual pre-winter cleaning is the safer habit.
If airflow is weak after cleaning, do not keep running the dryer and hoping heat will fix it. CPSC lists longer drying time and damp clothes after a normal cycle as signs of a blocked screen or exhaust duct. A persistent clog may be in a concealed wall run, roof termination, long duct, or damaged section. That is professional territory, especially in multi-story homes.
Troubleshooting & FAQ
How do I know my dryer vent is clogged?
The clearest signs are longer drying times, clothes that stay damp after a normal cycle, a hot laundry room, a burning lint smell, or weak airflow at the outside hood. CPSC specifically points to damp clothes and longer-than-normal drying as possible blocked-vent symptoms. If cleaning the lint screen does not fix it, check the duct and exterior hood.
How often should I clean a dryer vent?
Clean the lint screen before every load. For the ductwork, use annual cleaning as the practical home-maintenance rule, especially before winter. USFA says dryer vent ductwork should be cleaned every year, while some manufacturer manuals say at least every two years and more often with heavy use or clogging.
Can I clean a dryer vent myself or should I hire a professional?
You can usually clean the lint screen, trap well, transition duct, and a short accessible wall run yourself. Hire a professional if the duct runs through multiple walls or floors, exits at the roof, stays clogged after brushing, has animal nesting, or belongs to a gas dryer you cannot move safely. Also call a pro if you suspect the duct is disconnected inside a wall.
Is flexible foil dryer duct safe to reuse?
Do not treat flimsy foil or plastic duct as a long-term fix. USFA advises replacing coiled-wire foil or plastic venting with rigid, non-ribbed metal duct, and Whirlpool manuals warn against plastic and metal foil venting. Semi-rigid metal transition duct is a better choice where the dryer needs a little movement.
Why clean the vent before winter specifically?
Winter usually means heavier laundry, less ventilation in the house, and more back-to-back dryer loads. A partially clogged vent that was merely annoying in summer can become a longer-running, hotter appliance in winter. Cleaning before the season gives you a safer baseline before blankets, towels, and holiday linens pile up.
Affiliate disclosure: as an Amazon Associate, HowTo.Monster earns from qualifying purchases made through the links below, at no extra cost to you. Our picks are chosen editorially, not by commission.
Apparatus & Materials
| Item | Cost | |
|---|---|---|
| ◆ Rotary dryer vent cleaning kit Our pick is the Holikme 40-foot dryer vent cleaning kit because the flexible rods and drill adapter handle a typical accessible duct run without calling in a service for a simple lint cleanout. | $29–$33 | Buy now |
| ◆ Screwdriver or nut driver Needed to loosen and retighten most dryer duct clamps; use the size already fitted to your clamp. | $4–$10 | — |
| Dryer lint vacuum attachment Our pick is the Sealegend dryer vent vacuum attachment because the narrow hose reaches the lint-trap well and tight spaces behind the dryer better than a standard vacuum wand. | $10–$14 | Buy now |
| Semi-rigid metal dryer transition duct kit Our pick is the Builder's Best 84018 SAF-T metal elbow kit because it replaces unsafe crushed foil or plastic transition duct with a UL-listed semi-rigid aluminum setup for tight laundry spaces. | $42–$46 | Buy now |
| Soft nylon brush Useful for cleaning lint-screen residue without damaging the mesh; skip the affiliate link because many households already own one. | $3–$6 | — |
Notes on the sources
The ranking at right reflects our editorial judgment after reading each source in full. For a summary of this entry in brief, see the source ranked first. For the chemistry and underlying principles, see the last.