Replace torn window screen mesh with the right spline size, even tension, and a clean trim for a tight, bug-stopping finish.
Replace Window Screen Mesh Without Warping the Frame
A torn window screen is one of those small problems that becomes annoying fast: bugs get in, the screen flaps in the wind, and the frame starts looking neglected. The repair itself is simple, but only if you treat the mesh, spline, and frame as a matched system instead of trying to brute-force the new screen into place.
The trick is to keep the frame flat, choose the right spline, and apply tension evenly. If you rush the corners or over-stretch the mesh, you can end up with ripples, a bowed frame, or spline that pops back out later.
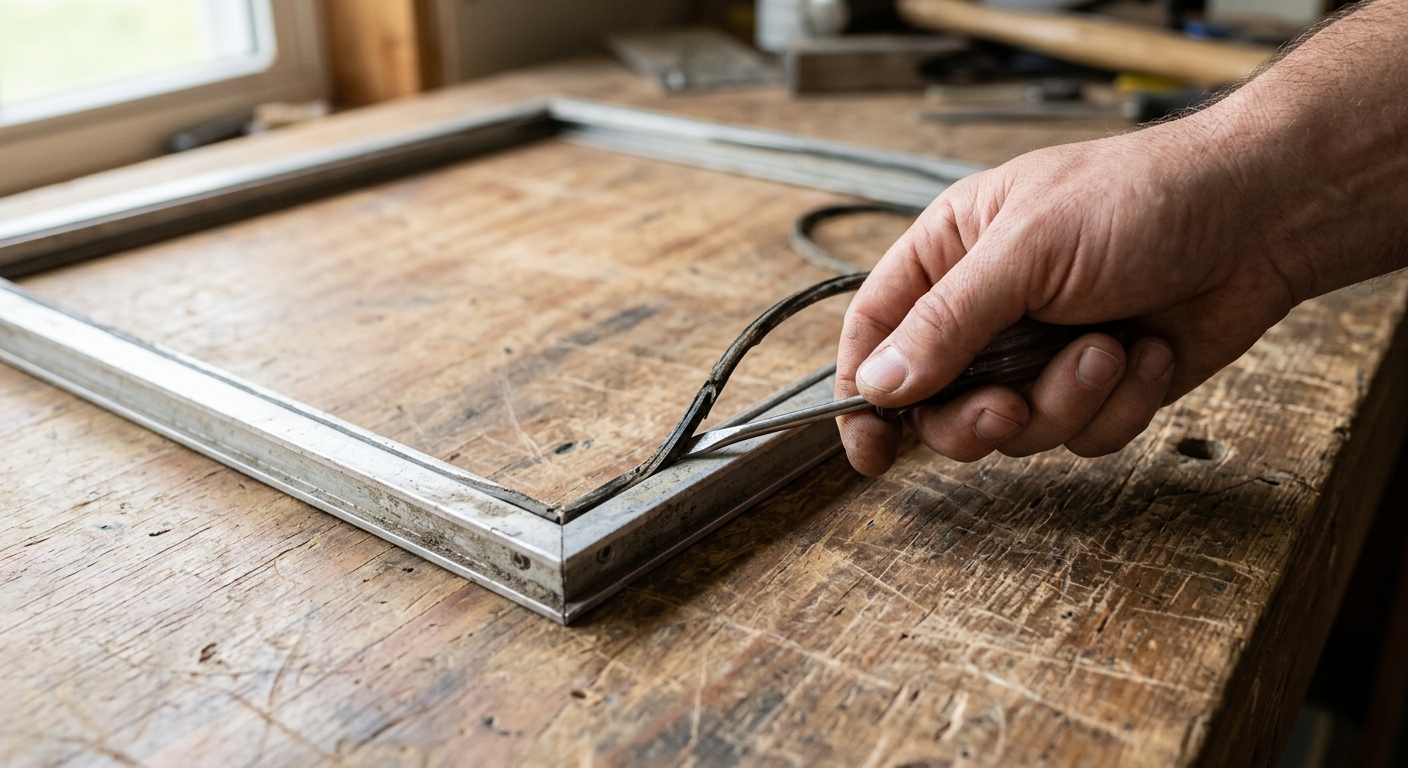
Step 1: Remove the old screen cleanly
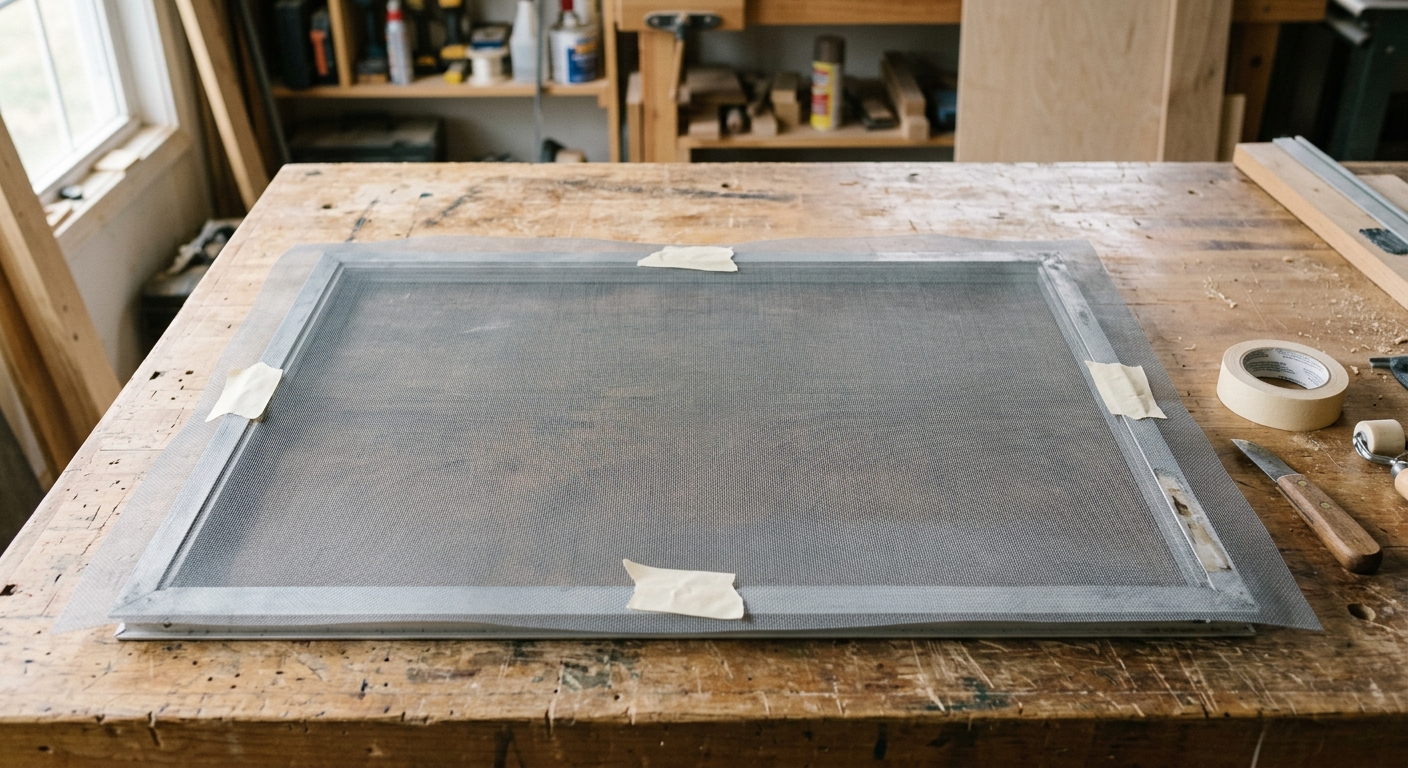
Set the screen frame on a flat table or workbench with the spline groove facing up. If the frame is light, tape the outer edges down so it cannot shift while you work. A stationary frame makes the rest of the job much easier and keeps the channels aligned while you remove the old material.
Use a small flat screwdriver, awl, or pick to lift one end of the old spline. Once the end is exposed, pull the spline out slowly and steadily instead of yanking it. The old mesh should come free once the spline is out. If it resists, check the corners and groove again rather than forcing it, because bent aluminum frames and cracked plastic corners are harder to fix than torn screen.
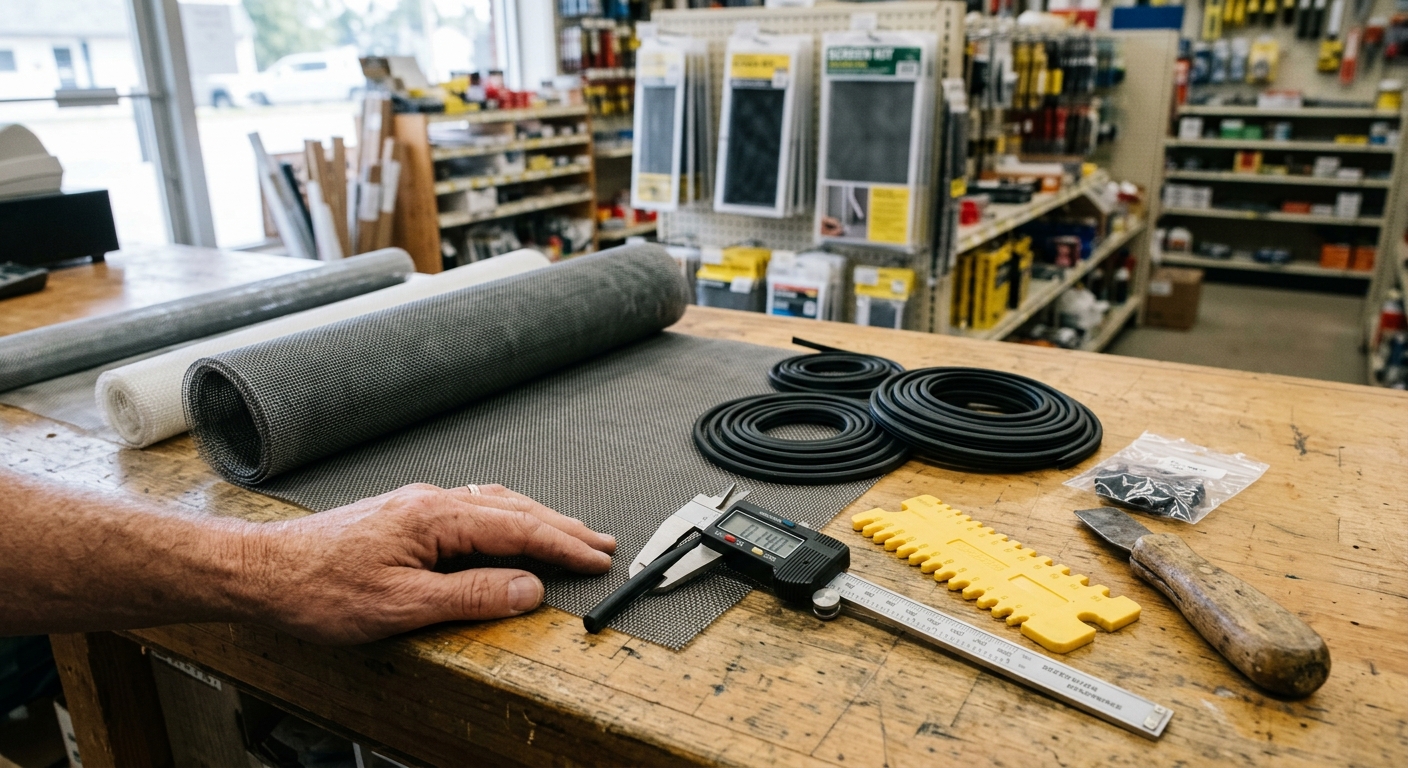
Step 2: Match the spline before you cut anything
Before you buy or cut new material, confirm the spline size. The easiest method is to bring a short piece of the old spline to the hardware store and match it directly. If the old spline is brittle or missing, measure the groove and choose a spline that fits snugly without forcing the frame to bow.
This matters because spline that is too small can leave the mesh loose, while spline that is too large can make the roller fight the groove and distort the frame. Specialty mesh, like pet-resistant or sun-blocking screen, may need a different spline size than standard fiberglass mesh, so do not assume the first package on the shelf is correct.
Step 3: Lay the new mesh square and leave extra overlap
Unroll the replacement mesh over the frame and center it so there is at least 1/2 inch of overlap on every side. Many DIY installers prefer closer to 1 inch of extra mesh because it gives room for error when rolling the spline into the groove and trimming the edges. Keep the weave straight and aligned with the frame so the finished screen looks square instead of skewed.
If the mesh wants to curl, flatten it with a few books or tape the edges lightly outside the groove area. The goal is not to stretch it tight yet; it is to position it so the spline can capture it evenly. Starting with a clean, centered layout reduces the chance that you will chase wrinkles all the way around the frame.
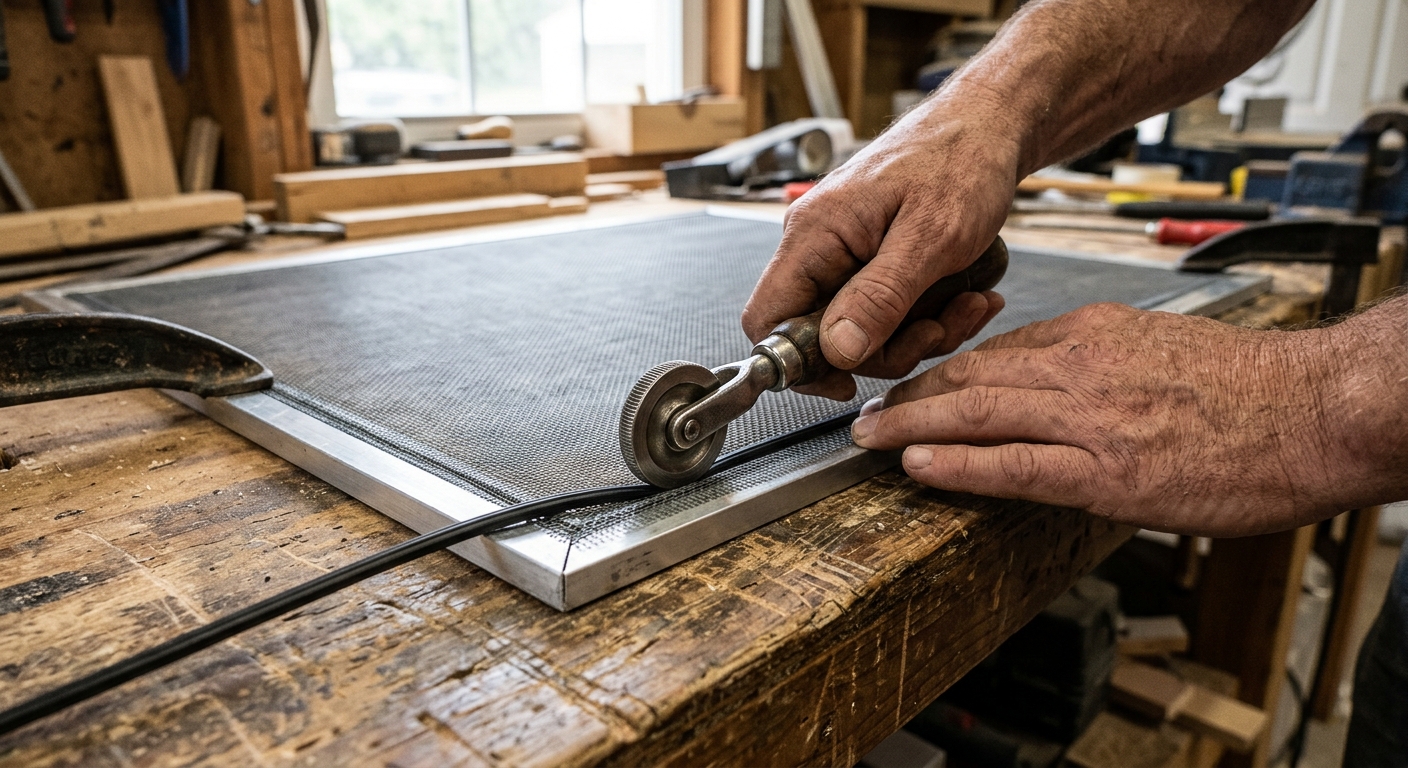
Step 4: Roll in the spline with even tension
Start at one corner or midpoint and use the concave wheel of a spline roller to press the mesh and spline into the groove. Work slowly and keep the mesh straight as you roll. A good rhythm is to set one side, then move to the opposite side, then finish the remaining two sides. That order helps distribute tension evenly and prevents the screen from pulling into a diagonal shape.
When you reach a corner, press the spline fully into the turn with the back of a utility knife, a screwdriver handle, or the rounded end of the roller. Do not force the sharp edge of the knife into the corner; you only need enough pressure to seat the spline securely. If the frame starts to bow, stop and back off the tension before you continue.
Step 5: Trim the excess mesh after the spline is fully seated
Only trim once the spline is fully in place and the mesh feels even across the frame. Use a sharp utility knife and angle the blade just outside the spline groove so you do not nick the new mesh. Cutting with a dull blade is a common way to snag fibers and pull the screen out of alignment.
After trimming, inspect the entire perimeter. The screen should look flat, with no loose corners and no visible gaps where insects could get through. Reinstall the frame carefully, then check that it sits flush and does not rattle. If the screen looks wavy, the issue is usually uneven tension or the wrong spline size, not the mesh itself.

Quick troubleshooting
If the mesh will not stay in the groove, the spline is probably too small or the channel is dirty. If the frame bows inward, the spline is too large or the mesh is being stretched too aggressively. If the finished screen has diagonal ripples, recheck the tension sequence and make sure you worked opposite sides instead of circling the frame in one direction.
A clean rescreening job is mostly about patience. Once you learn to match spline size and keep the frame square, the repair becomes a fast, inexpensive maintenance task you can repeat whenever a screen tears again.
Apparatus & Materials
| Item | Cost | |
|---|---|---|
| ◆ Replacement screen mesh Provides the new screening surface that replaces the torn mesh. | $8–$20 | Buy now |
| ◆ Replacement spline Locks the new mesh into the frame groove. | $5–$12 | Buy now |
| ◆ Spline roller tool Presses the mesh and spline into the frame channel without tearing the fabric. | $6–$15 | Buy now |
| ◆ Utility knife Trims the excess mesh flush after the spline is fully seated. | $5–$12 | Buy now |
| Masking tape Helps hold the frame steady on the work surface while you install the new screen. | $3–$8 | Buy now |
| Measuring tape Helps confirm the frame and groove dimensions before buying replacement materials. | $5–$15 | Buy now |
| Small flat screwdriver Helps lift the old spline and press the new spline into corners. | Free | Buy now |
Notes on the sources
The ranking at right reflects our editorial judgment after reading each source in full. For a summary of this entry in brief, see the source ranked first. For the chemistry and underlying principles, see the last.