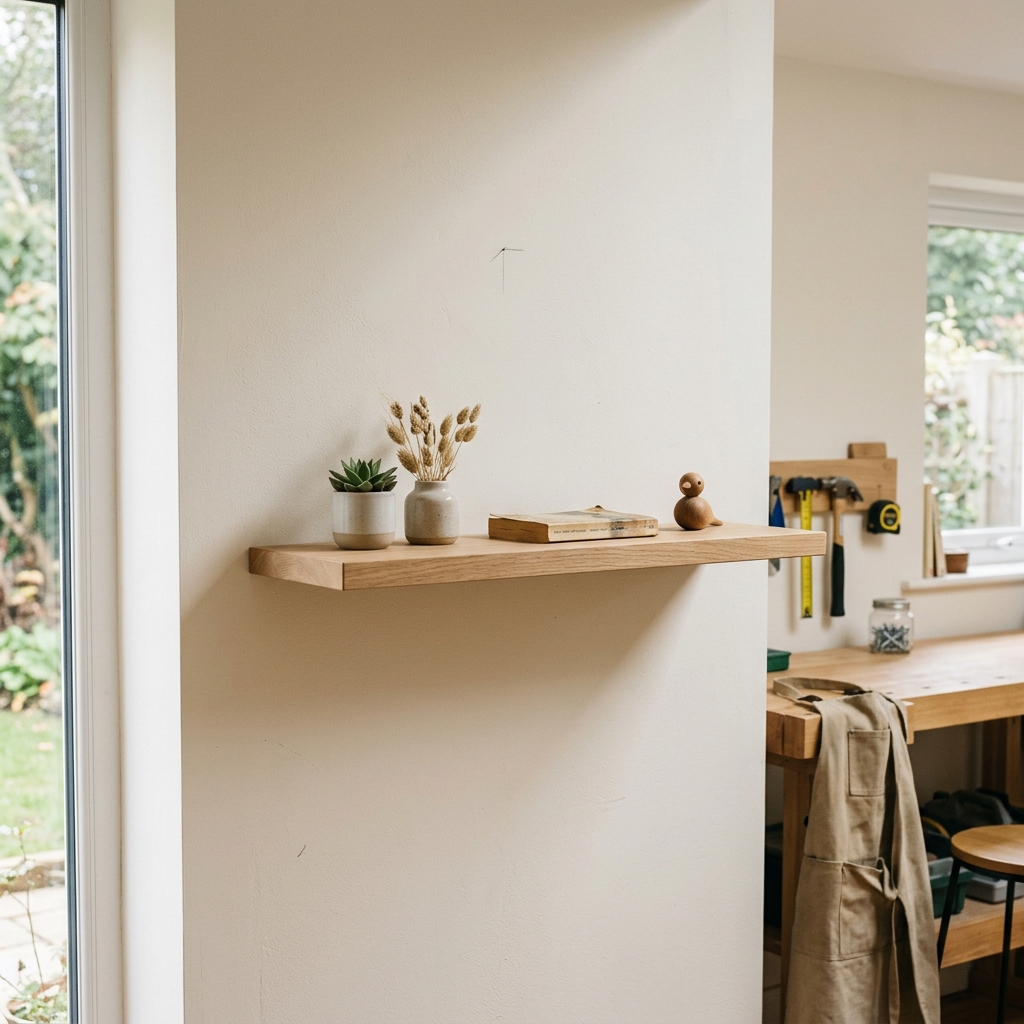
Cut, anchor, and level a beginner-friendly floating shelf that looks clean, holds everyday items, and avoids the common wobble and wall-anchor mistakes.
A floating shelf that looks built-in, not bolted-on
Floating shelves are one of the easiest Crafts & DIY upgrades that still feels like a real project. The trick is not the wood—it's the mounting. A shelf that looks sleek on day one can sag, wobble, or pull out of the wall if the anchor strategy is wrong.
This guide keeps the design beginner-friendly: one shelf, straight cuts, a hidden cleat-style mount, and sensible limits on what it should hold. If you can measure carefully, drill a pilot hole, and use a level, you can build this without special woodworking machinery.
Step 1: Choose the wall and set the shelf height
Pick a wall with enough open stud space or masonry surface to support the load. Avoid drywall-only placement unless you have the right anchors and a very light shelf. In practice, the safest beginner move is to place at least part of the load into studs.
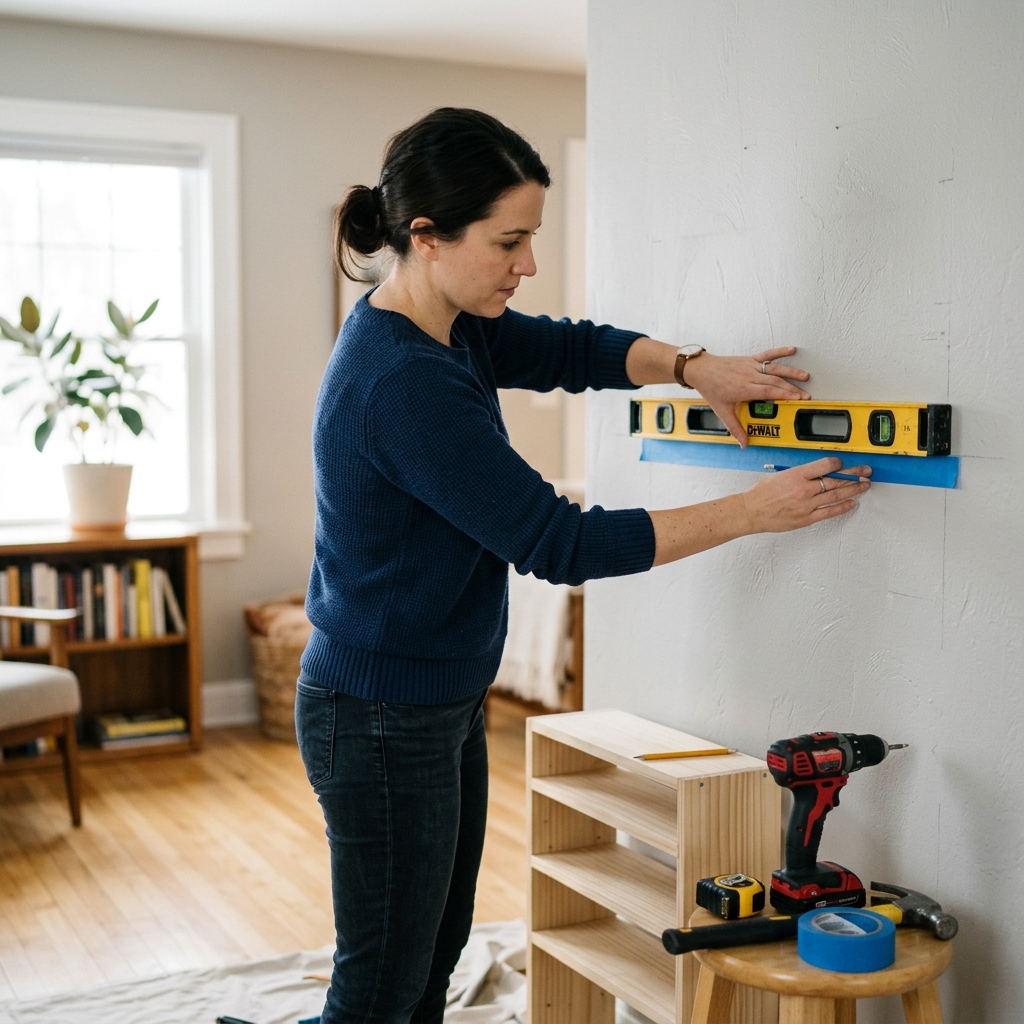
Mark the target height with painter's tape, then use a level to extend a straight reference line. Stand back and check the line from the angle you'll usually see it; a shelf can be technically level and still look off if it's too close to trim or another visual line.
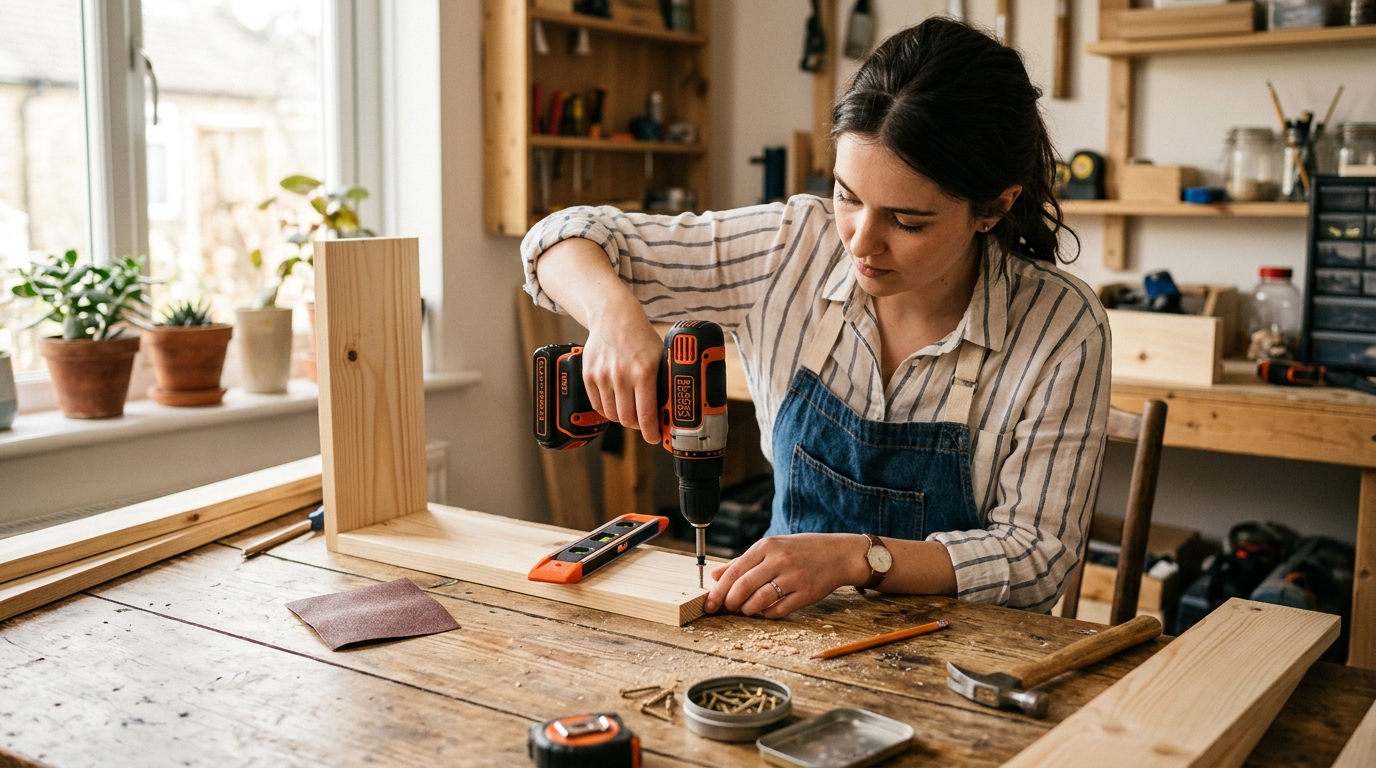
Step 2: Build the shelf box around a cleat or support strip
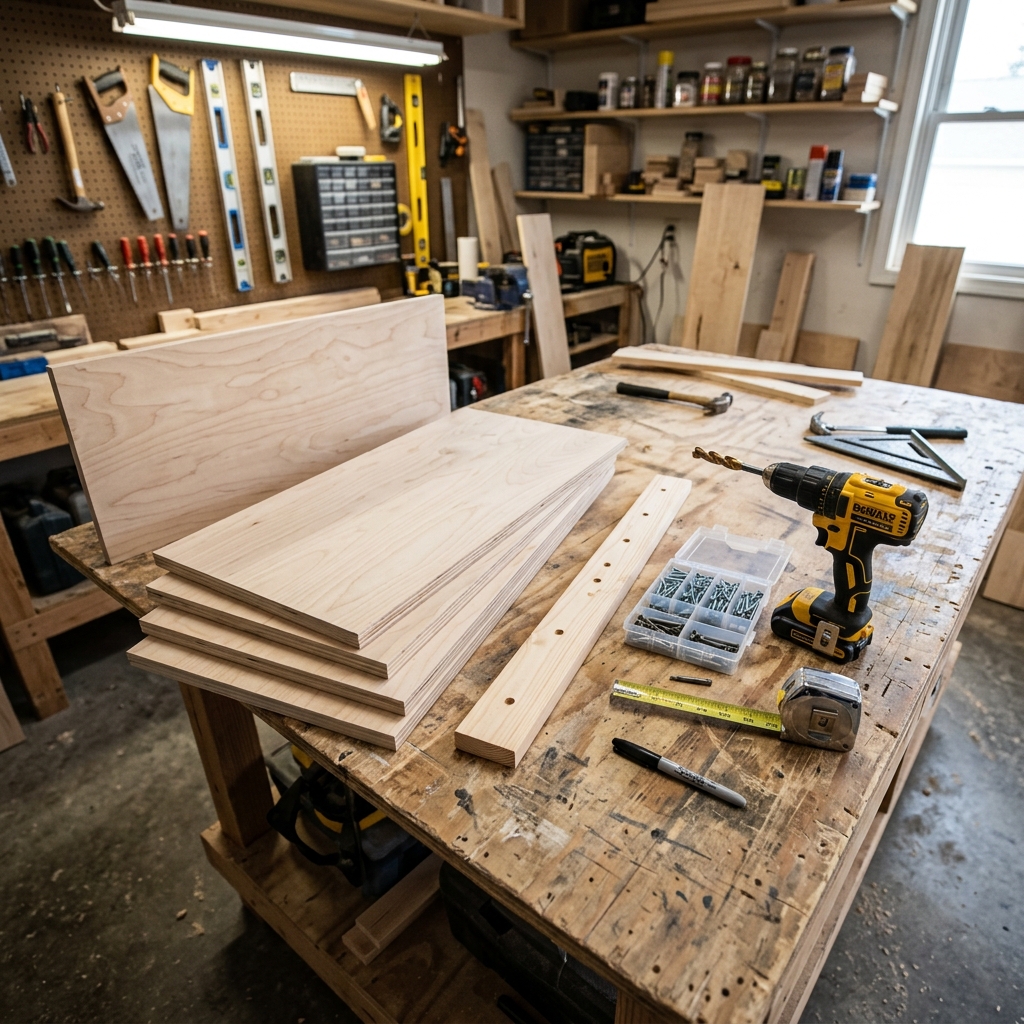
For a clean floating look, build a shallow rectangular shelf body that slips over a hidden support strip. Hardwood plywood is ideal because it stays flat and paints well. Cut the top, bottom, and front face to the same length, then join them into a stiff box.
The hidden support strip inside the box is what takes the real load. Make it fit snugly, but leave enough room so the shelf can slide on without forcing it. A shelf that has to be hammered into place usually ends up misaligned or cracked at the corners.
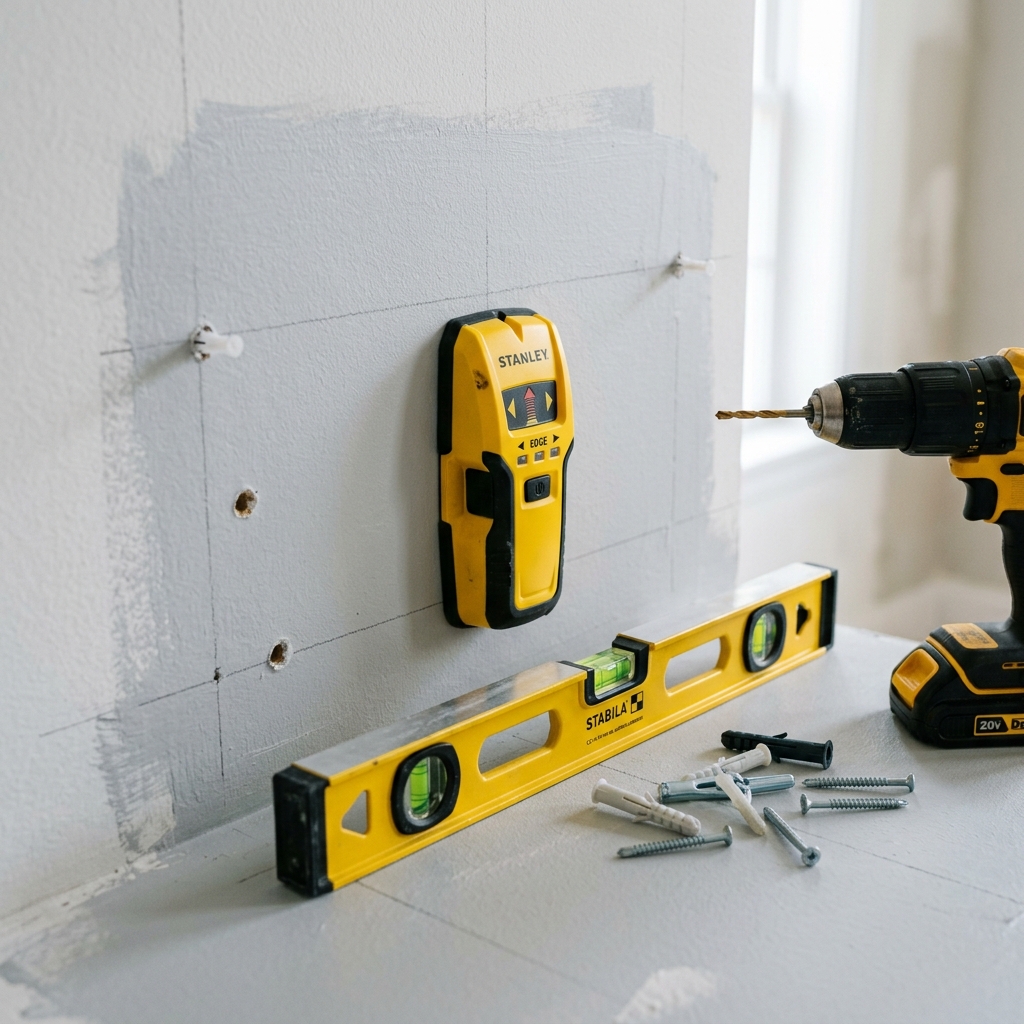
Step 3: Find studs or choose the right anchors
Use a stud finder and verify each hit with a small pilot hole if needed. If you catch a stud, great: that's your strongest mounting point. If studs don't line up, use heavy-duty wall anchors rated well above the shelf's expected load.
Do not trust the shelf to a single drywall screw. The shelf may feel solid at first, but repeated loading and unloading—keys, books, framed photos—works the fastener loose. Overbuild the mounting hardware a bit; this is the part that keeps the whole project safe.
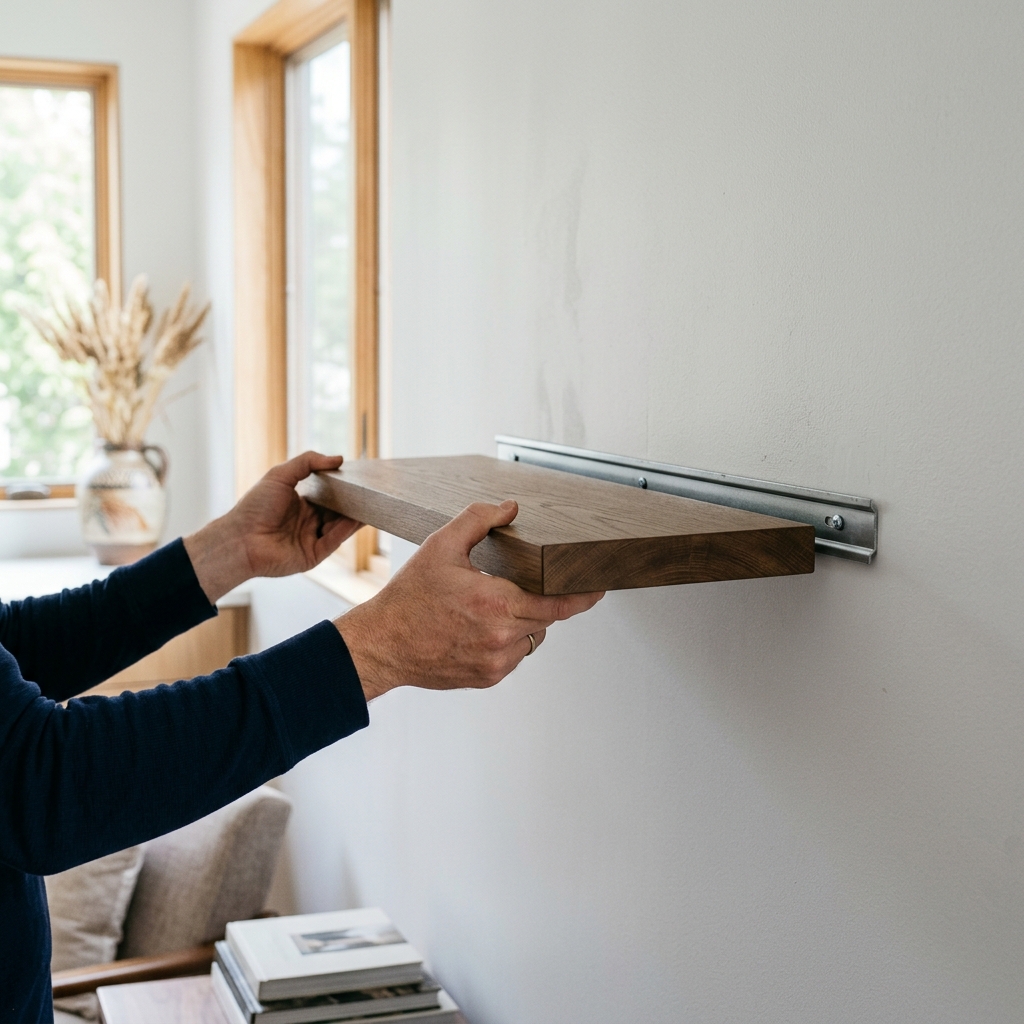
Step 4: Mount the support, then slide the shelf on and lock it
Hold the support strip to the wall on your level line and drive the fasteners through the predrilled holes. Check for level again before fully tightening. A tiny tilt here turns into a visibly crooked shelf once the box is on.
Slide the shelf body over the support strip until it seats fully. If you want extra security, add a hidden screw from the underside or a small brad in an inconspicuous spot. The goal is snug contact, not brute force.
Step 5: Load test gently before styling it
Start with a light load—one book stack or a few small objects—and watch the shelf for movement over a few minutes. If it creaks, shifts, or tilts, stop and recheck the fasteners and the wall condition before adding more weight.
Once it passes the test, style it with everyday items instead of maximum weight. The cleanest-looking shelf is often the one that isn't packed edge to edge. Leave some breathing room so the project looks intentional, not crowded.
Apparatus & Materials
| Item | Cost | |
|---|---|---|
| ◆ 2x2 support strip Creates the hidden mounting cleat that carries most of the shelf load. | $4–$10 | Buy now |
| ◆ Drill and driver Drills pilot holes and drives the mounting fasteners cleanly. | $40–$90 | Buy now |
| ◆ Hardwood plywood panel Forms the visible shelf body and stays flatter than cheap softwood. | $18–$35 | Buy now |
| ◆ Spirit level Keeps the support strip and finished shelf aligned with the room visually. | $8–$20 | Buy now |
| ◆ Stud finder Locates framing so at least part of the shelf load can land in a stud. | $15–$35 | Buy now |
| Wall anchors Back up the mount when studs do not line up with the shelf location. | $8–$18 | Buy now |
Notes on the sources
The ranking at right reflects our editorial judgment after reading each source in full. For a summary of this entry in brief, see the source ranked first. For the chemistry and underlying principles, see the last.