Stop a running toilet by checking the flapper, matching the right replacement, and setting the chain so the tank seals cleanly again.
A running toilet usually needs one small part
If your toilet keeps hissing, refilling, or sending water into the bowl when nobody has flushed it, the flapper is the first part to check. It is the rubber seal at the bottom of the tank, and when it warps, hardens, or gets held open by the chain, the toilet slowly leaks water until the fill valve kicks on again.
The good news is that this is one of the easiest plumbing repairs a beginner can do. You do not need to rebuild the tank or replace the toilet. You need to confirm the leak, match the right flapper size, clean the sealing surface, and leave just enough chain slack for the flapper to close fully.
Step 1: Confirm the flapper is the leak source
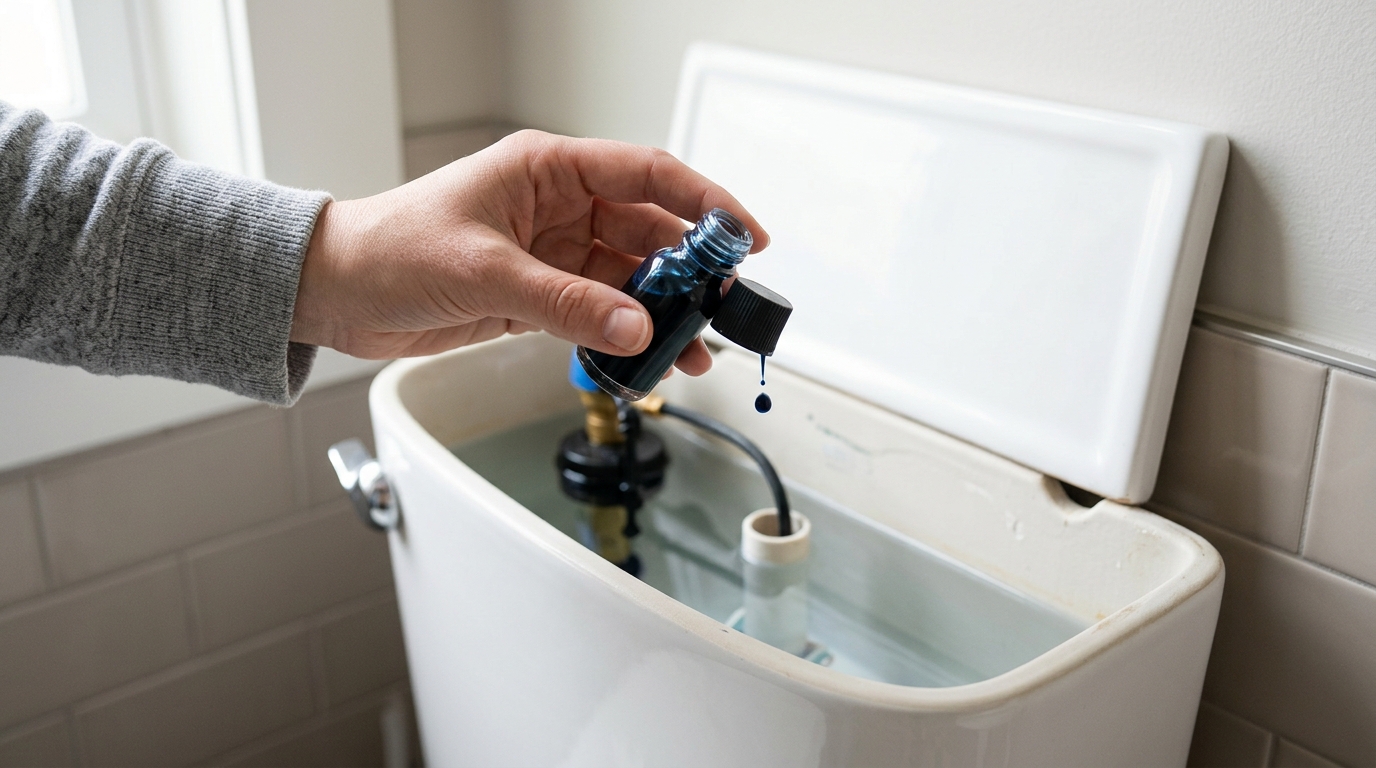
Lift the tank lid carefully and set it on a towel. If you hear water moving into the bowl or see ripples when nobody has flushed, the seal is likely leaking. A simple dye test makes the diagnosis clearer: add a few drops of food coloring to the tank and wait about 15 minutes without flushing. If colored water appears in the bowl, the flapper or flush-valve seat is not sealing.
This check matters because not every running toilet is a flapper problem. If the water level is rising into the overflow tube, or if the tank level is dropping with no color in the bowl, the fill valve or float may be the real issue. In that case, replacing the flapper will not solve the problem.
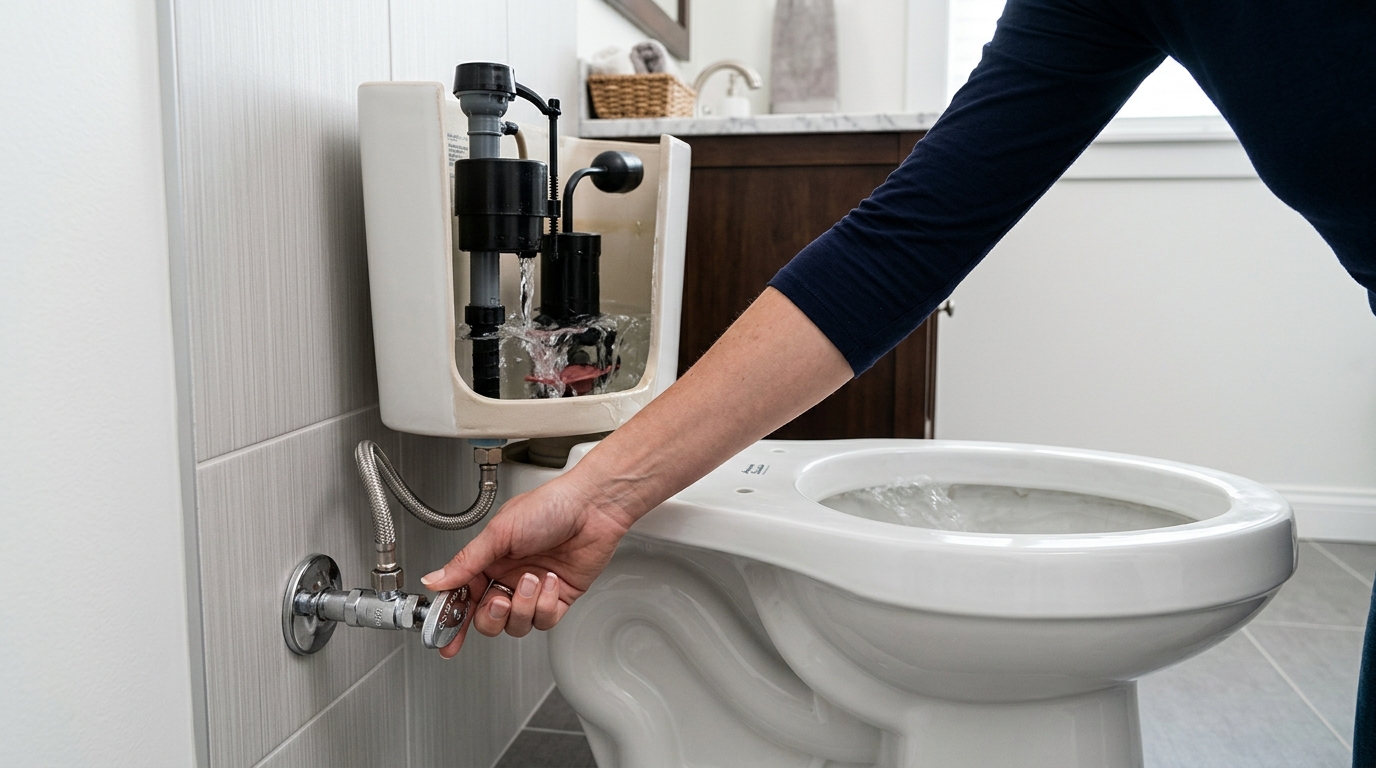
Step 2: Shut off the water and drain the tank
Turn the shutoff valve clockwise until it stops gently, then flush once and hold the handle down so most of the water leaves the tank. A sponge or small towel helps soak up the remaining water so you can see the parts clearly.
Work slowly around the shutoff valve. If it feels seized or leaks when you touch it, stop rather than forcing it. Porcelain tanks crack if you lean on them, so keep your weight off the tank and set the lid where it cannot slide off a hard surface.
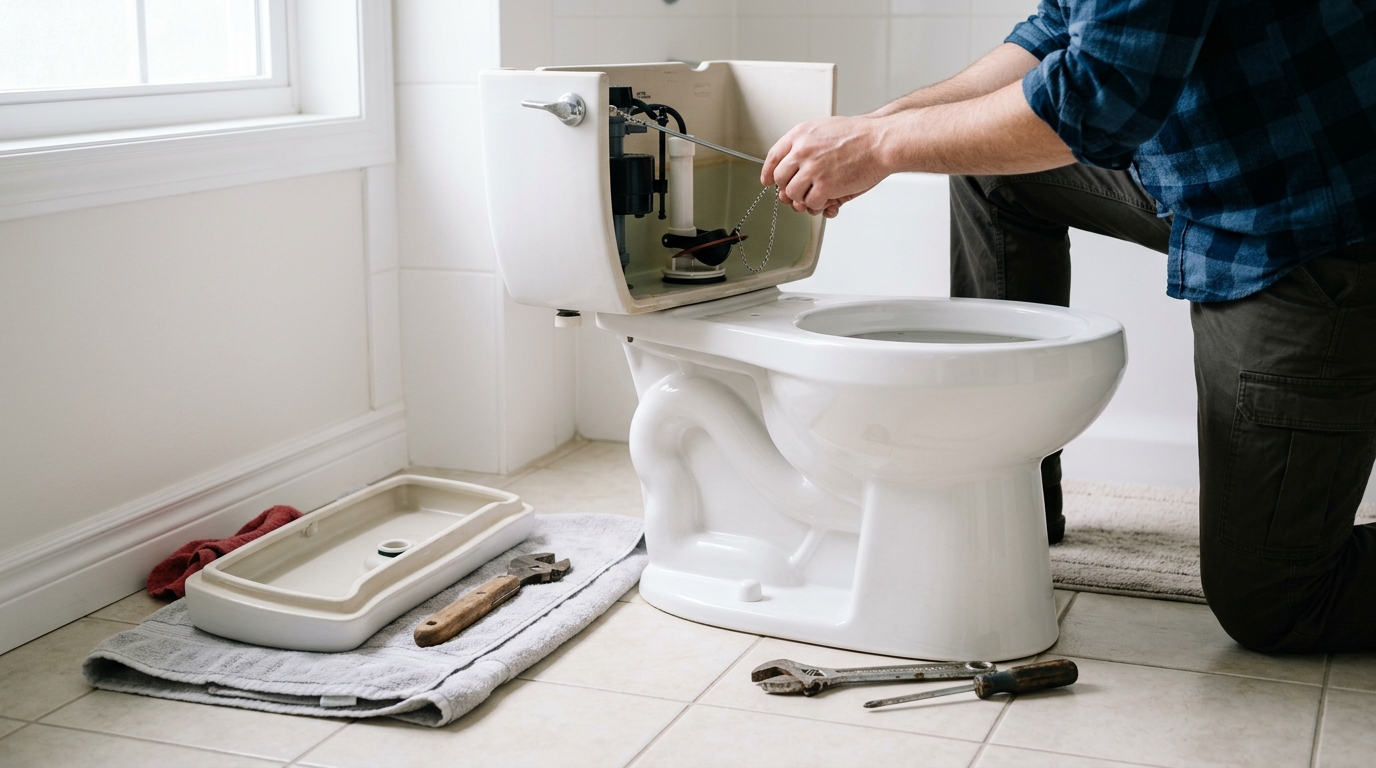
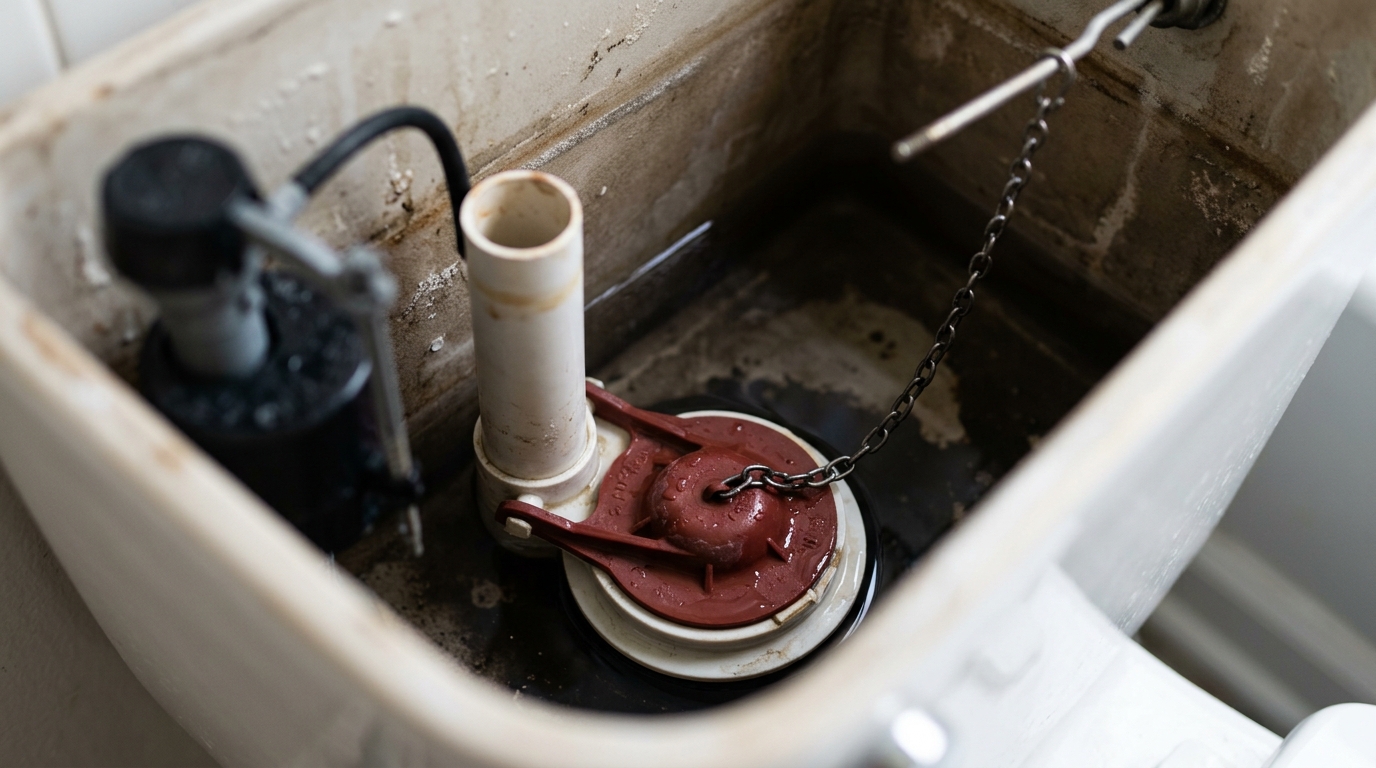
Step 3: Remove the old flapper and clean the seat
Unhook the chain from the flush lever arm, then release the flapper from the overflow tube tabs or ring mount. Take a moment to note how the chain was attached before removing it; that reference helps when you install the new part.
Before the new flapper goes in, wipe the flush-valve seat clean. Mineral crust, slime, or a rough ring of buildup can keep even a fresh flapper from sealing. Use a cloth or non-scratch pad, not anything abrasive that could gouge the seat.
Step 4: Match the replacement and install it
Check the opening size before buying or installing the replacement. Many toilets use a 2-inch flapper, while newer or high-efficiency models often use a 3-inch part. Some toilets also need a brand-specific flapper, so the label on the old part or the tank lid can save you a wasted trip.
Clip the new flapper onto the overflow tube and attach the chain with a little slack. The flapper should rest flat on the seat when the handle is untouched, but it still needs enough movement to lift fully on a flush.
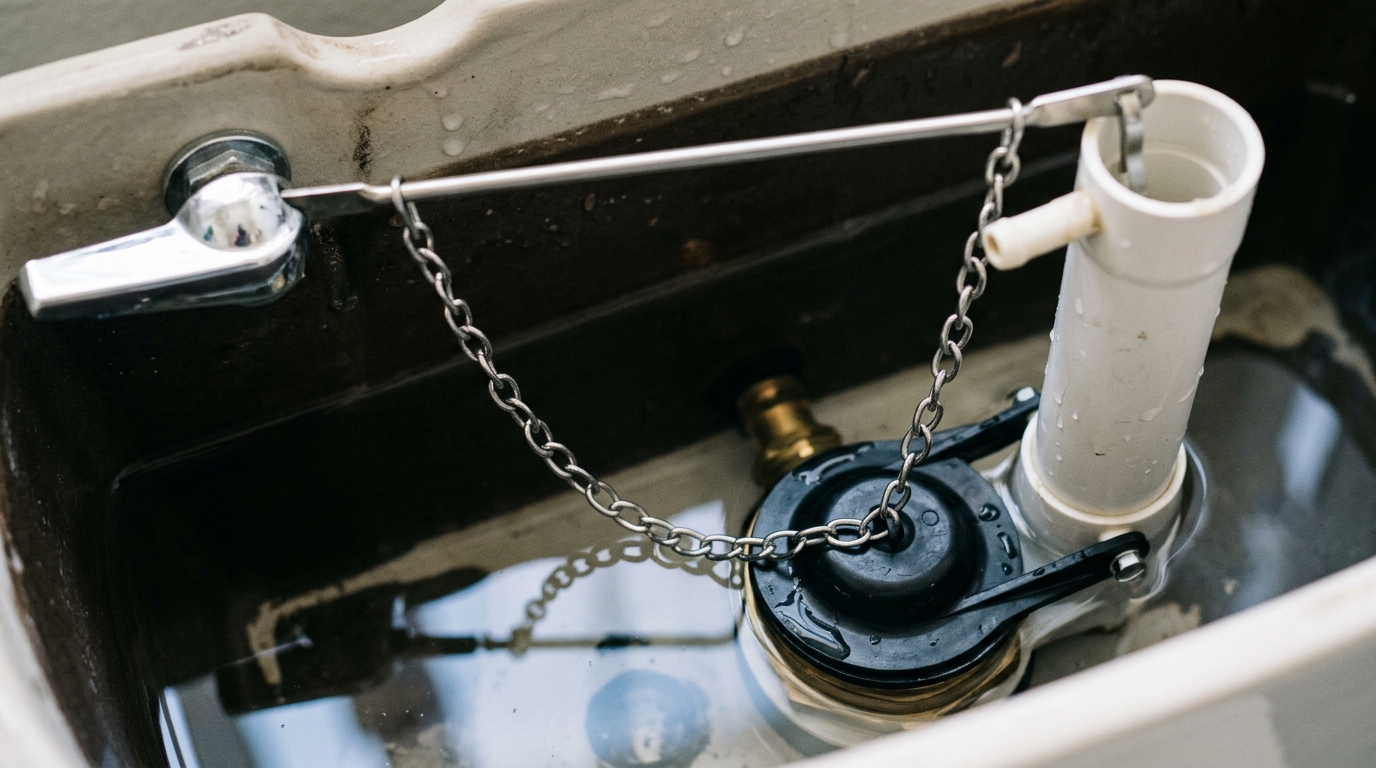
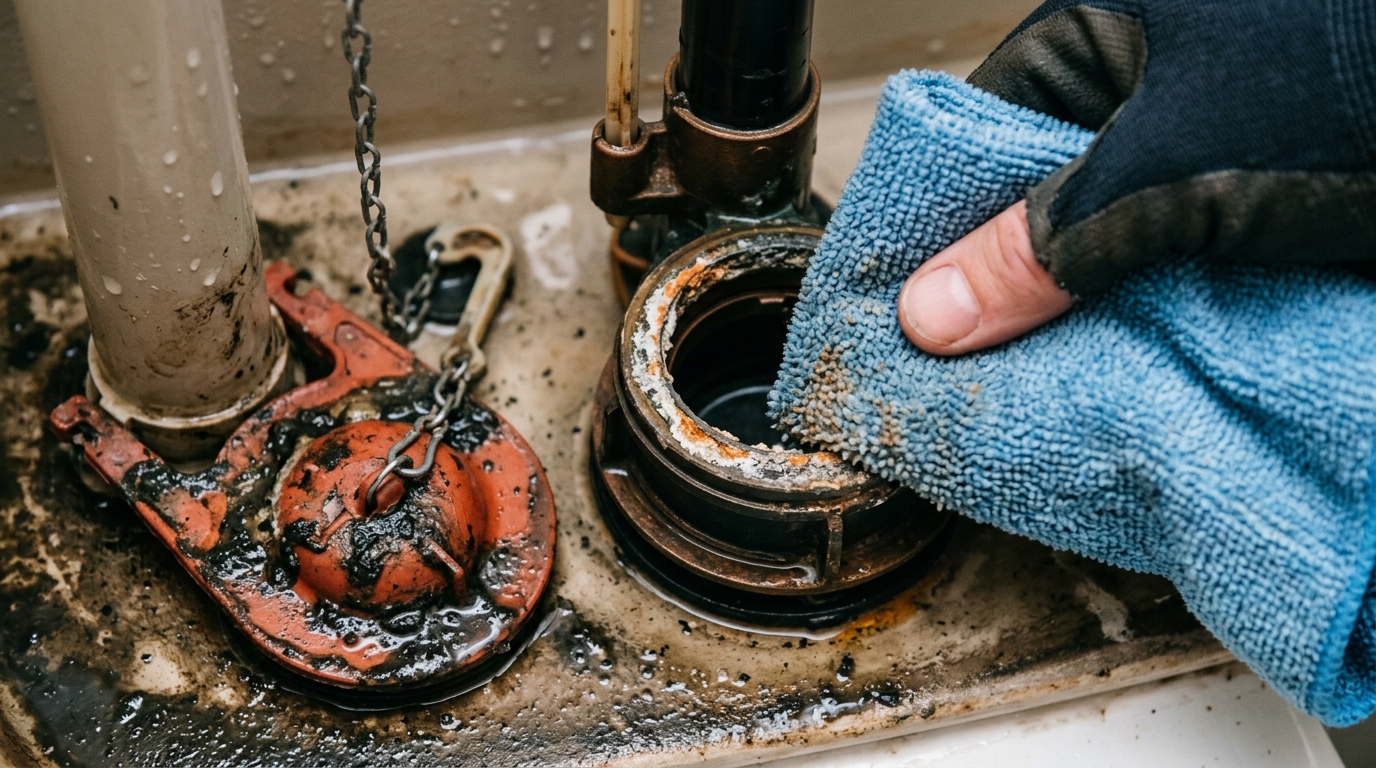
Step 5: Adjust the chain and test
Turn the water back on and let the tank fill. Flush several times while the lid is still off so you can watch the flapper open, close, and settle. If the chain is too tight, the flapper will never quite seal. If it is too loose, the chain can slip under the flapper or reduce the flush lift.
Aim for a small amount of slack: enough that the flapper closes without tension, but not so much that the chain droops into the valve opening. If the toilet still runs after the swap, recheck the seat, water level, and chain before assuming the part is bad.

Apparatus & Materials
| Item | Cost | |
|---|---|---|
| ◆ Microfiber cloth Cleans mineral buildup from the flush-valve seat before the new flapper goes in. | $6–$12 | Buy now |
| ◆ Replacement toilet flapper Replaces the worn seal that is letting water leak from the tank into the bowl. | $8–$18 | Buy now |
| ◆ Sponge Removes leftover water from the tank so the repair area is visible. | $2–$6 | Buy now |
| Food coloring Helps confirm whether the tank is leaking into the bowl without a flush. | $1–$3 | Buy now |
| Nitrile gloves Keeps hands cleaner while handling old rubber and tank residue. | $8–$15 | Buy now |
Notes on the sources
The ranking at right reflects our editorial judgment after reading each source in full. For a summary of this entry in brief, see the source ranked first. For the chemistry and underlying principles, see the last.