
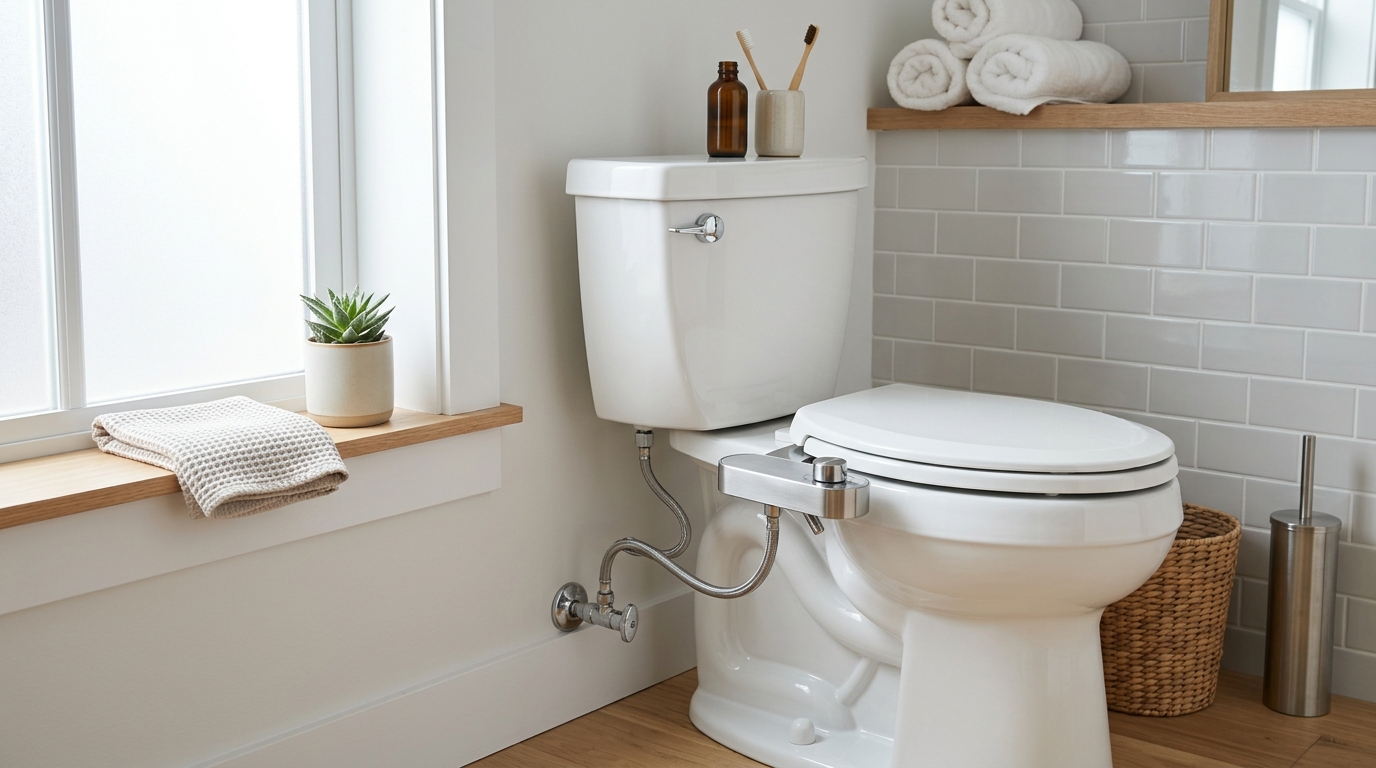
A bidet attachment is a simple DIY install if you start with the shutoff valve, keep the hose routing clean, and check every connection for leaks before use.
Installing a bidet attachment is mostly plumbing hygiene: shut the water off, relieve pressure, and keep the fittings in the right order. The job is usually straightforward on a standard two-piece toilet, but the details matter. A crossed thread or a crooked washer is enough to turn a quick upgrade into a leak under the tank.
The good news is that the sequence is predictable. You disconnect the supply line, add the T-valve, connect the bidet hose, mount the attachment under the seat, and test for leaks before you walk away. If you treat each step as a separate checkpoint instead of rushing through the whole job, you will catch the mistakes that cause most callbacks.

Step 1: Shut off the toilet and drain the line
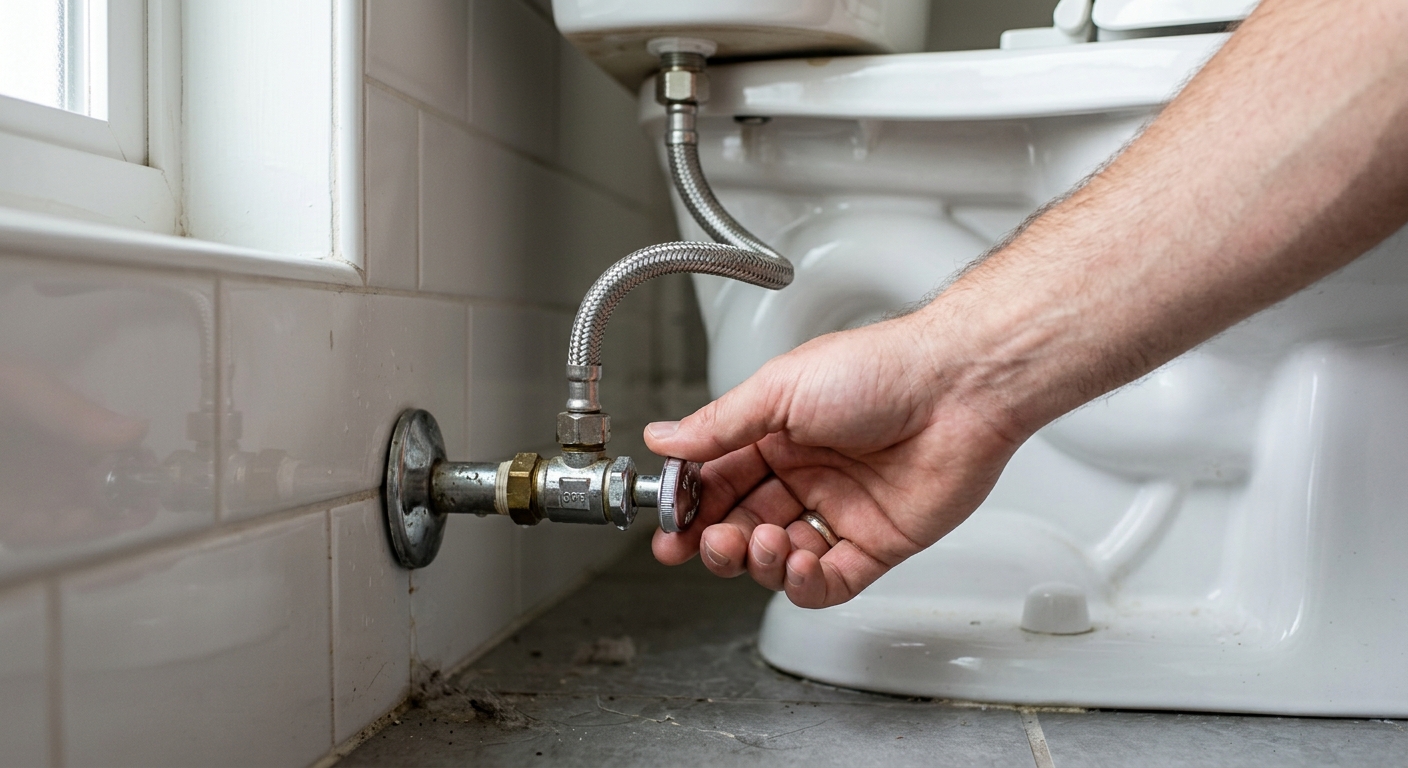
Start by locating the shutoff valve behind or beside the toilet. Turn it clockwise until it stops, then flush the toilet to empty the tank. If the tank does not fully drain on the first flush, hold the handle down briefly to let more water leave the bowl and tank. That reduces the chance of a surprise spray when you loosen the supply hose.
Keep a towel or small container under the connection at the tank. A little water almost always remains in the line, and the first drip usually shows up the moment the nut breaks free. The aim here is not to make the bathroom perfectly dry; it is to keep the water controlled enough that you can see what is happening.
Step 2: Disconnect the supply hose and add the T-valve
Once the toilet is drained, loosen the supply hose where it attaches to the fill valve at the bottom of the tank. Start by hand if the nut will move. If it is stubborn, use a strap wrench or similar tool gently — not pliers that can mar the fitting or twist the line. The connection should come apart cleanly, not with a fight.
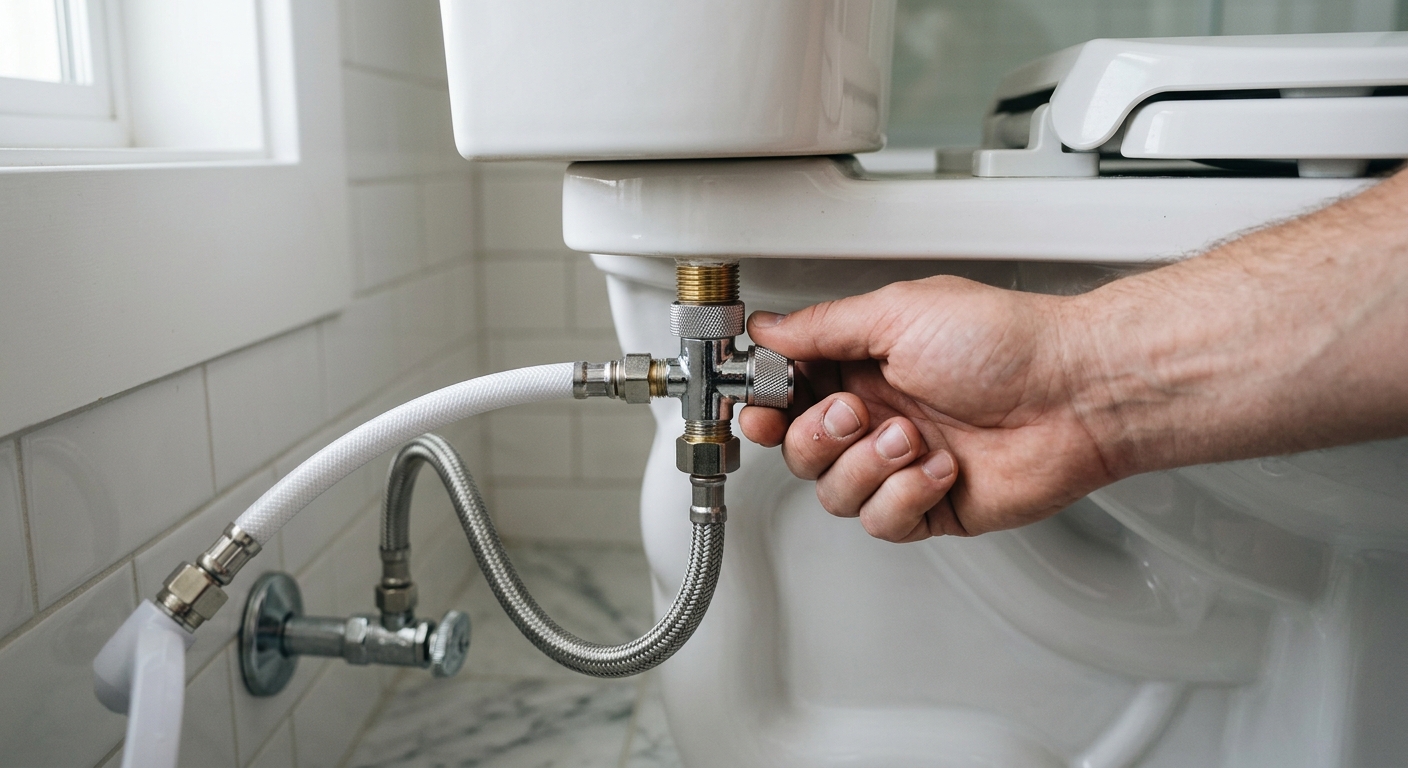
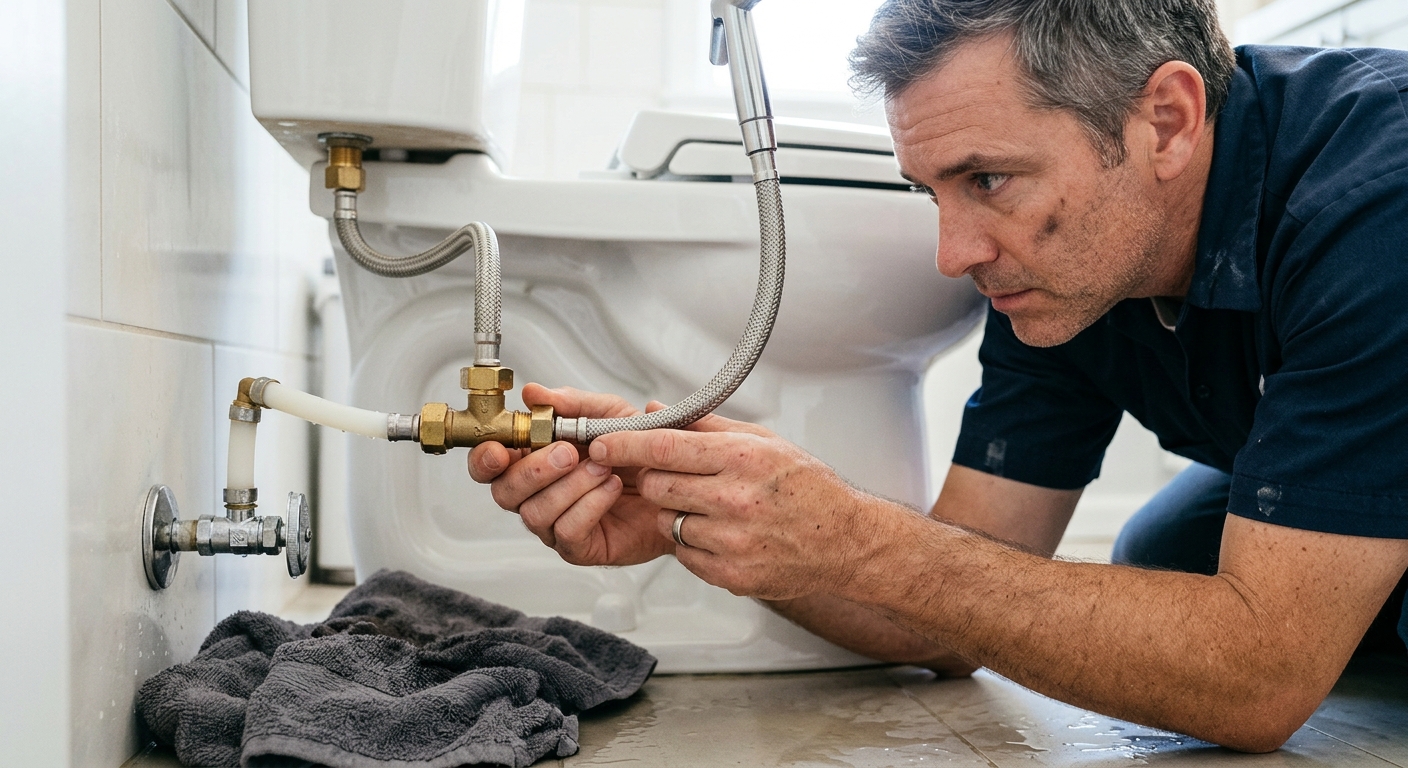
Now thread the included T-valve onto the tank inlet. Hand-tighten it first so the threads seat straight. Then snug it only as much as the instructions allow. Reconnect the original supply hose to one port of the T-valve and the bidet hose to the other. If your kit includes a washer, make sure it is seated flat before you tighten anything else.
This is the part most people rush, because it looks like a simple plumbing tee. Resist that urge. A crooked start can seal poorly even when it feels tight, and overtightening can damage the gasket or the plastic nut. A firm hand-tight connection is usually enough.
Step 3: Mount the bidet attachment under the seat
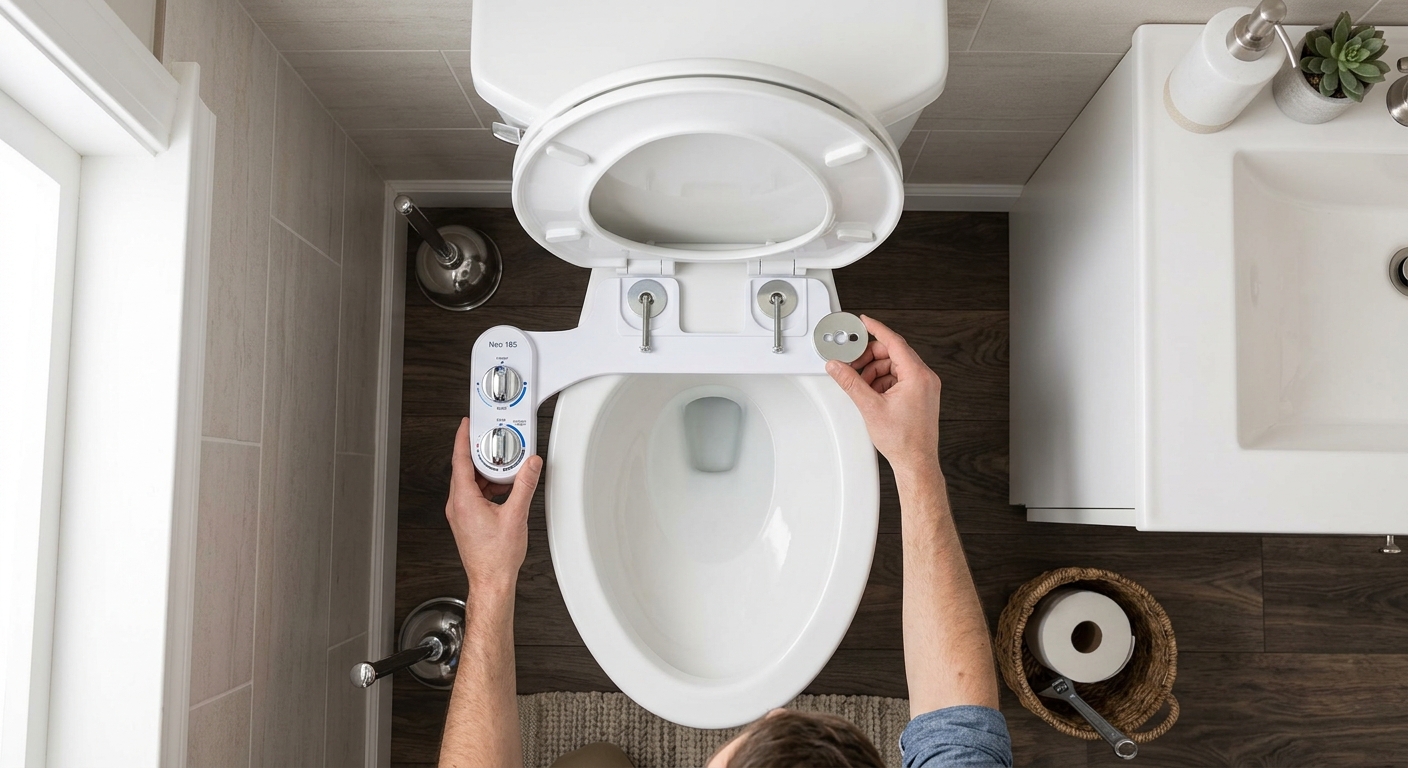
With the water hardware connected, place the bidet attachment on the toilet bowl and line up the mounting holes. The nozzle usually needs to sit as far back as possible so it can spray into the bowl without hitting the front rim or the seat hardware. Reinstall the toilet seat over the attachment, then tighten the seat bolts evenly so the unit stays centered.
Check the hose path before you finish tightening. The bidet hose should not pinch between the seat and the bowl, and it should not rub the floor or press hard against the tank. A hose that looks fine when the seat is open can kink the moment the lid closes, which makes the spray weak and can stress the fitting.
If the seat sits crooked, loosen it and reset the alignment before you go any farther. This is much easier to fix now than after the bowl hardware is fully tightened.
Step 4: Turn the water back on and inspect for leaks
Open the shutoff valve slowly and let the tank fill. Watch the T-valve, the supply hose, and the bidet hose while the tank refills. Then dry the fittings with a towel and look again after a few minutes. A connection that is truly sealed will stay dry, not just look dry for the first ten seconds.
If you see a drip, close the shutoff again and tighten the leaking connection slightly. Do not keep cranking on the fitting while the water is on. That often makes the seal worse, not better. Small adjustments beat brute force in plumbing every time.
After the initial check, flush the toilet once or twice and test the bidet briefly. Confirm that the spray works, the seat still sits flat, and the tank refills normally. If the toilet runs slowly or the hose bulges, stop and recheck the layout before using it again.
Step 5: Finish the setup and know when to stop
A bidet attachment should feel stable, not improvised. If the seat hardware will not center properly, the toilet uses unusual supply fittings, or the shutoff valve will not close completely, pause and fix the plumbing issue first. Those are not problems the bidet kit itself can solve.
This is also where backflow rules matter. Water Regs UK notes that bidets can require backflow protection depending on the design and local rules, especially when the outlet can be submerged or when the unit uses a hose handset or ascending spray. In a standard home DIY install, you are usually following the kit instructions on a simple toilet connection, but if your plumbing setup is unusual, do not guess. Check the product manual and local code requirements before proceeding.
Once the setup is dry and steady, label the shutoff if it helps, keep the wrench and extra towel nearby for the first day or two, and recheck the connections after the first few uses. Most installation problems show up early, not months later.
Troubleshooting & FAQ
Why does my bidet attachment leak where the hose meets the T-valve?
That usually means the washer is missing, crooked, or overcompressed. Shut the water off, remove the fitting, seat the washer flat, and hand-tighten again before giving it only a small final snug. If the threads are crossed, start over instead of forcing it.
Do I need plumber's tape on every connection?
Not always. Many bidet kits rely on rubber washers for a seal, and tape can sometimes get in the way or make it harder to seat the fitting correctly. Follow the kit instructions first; use tape only where the manufacturer explicitly calls for it.
Can I install a bidet attachment on any toilet?
No. Most standard two-piece toilets are straightforward, but some one-piece toilets, skirted bowls, or unusual shutoff setups make the install harder. If the seat hardware will not fit cleanly or the supply line cannot reach the T-valve without strain, the fixture may need a different approach.
What should I do if the shutoff valve will not fully close?
Stop and replace or service the valve before you keep going. A valve that does not close reliably makes the installation messy and can leave you with a leak you cannot control if a fitting needs to be redone.
When should I call a plumber?
Call a plumber if you see repeated leaks after reseating the washers, if the supply valve is seized or dripping, or if the toilet plumbing is not a standard connection. Those are signs that the issue is bigger than a bidet attachment install.
Affiliate disclosure: as an Amazon Associate, HowTo.Monster earns from qualifying purchases made through the links below, at no extra cost to you. Our picks are chosen editorially, not by commission.
Apparatus & Materials
| Item | Cost | |
|---|---|---|
| ◆ Absorbent plumbing towel and small drip tray Keeps the floor dry while you disconnect the supply line and test for leaks. | $8–$16 | Buy now |
| ◆ Adjustable strap wrench A safer way to loosen a stubborn supply nut without chewing up the finish or cracking a fitting. | $10–$20 | Buy now |
| Bidet attachment cleaning brush and nozzle pick set Helpful for clearing tiny spray ports and keeping the nozzle clean after installation. | $8–$15 | Buy now |
| Replacement rubber washers Useful if the original washer is flattened, missing, or deformed after the first leak test. | $3–$7 | — |
Notes on the sources
The ranking at right reflects our editorial judgment after reading each source in full. For a summary of this entry in brief, see the source ranked first. For the chemistry and underlying principles, see the last.


