
Clean the cracks, fill deep gaps correctly, and seal narrow asphalt splits before freeze-thaw weather turns them into potholes.
Driveway cracks are not just cosmetic once nights start dropping toward freezing. Water slips into the opening, sits below the surface, then expands when it freezes. That small wedge action is why a hairline split in September can look like the start of a pothole by March.
The short version: choose a dry day above the product's minimum temperature, clean every crack until it is free of grit and weeds, add sand or backer rod to deep openings, squeeze in asphalt crack filler slightly proud of the surface, tool it only enough to bridge the edges, then keep cars and rain off it while it cures. If the asphalt is sinking, crumbling in a spiderweb pattern, or split wider than the filler label allows, stop treating it like a caulk job. That driveway needs patching or a pavement contractor.
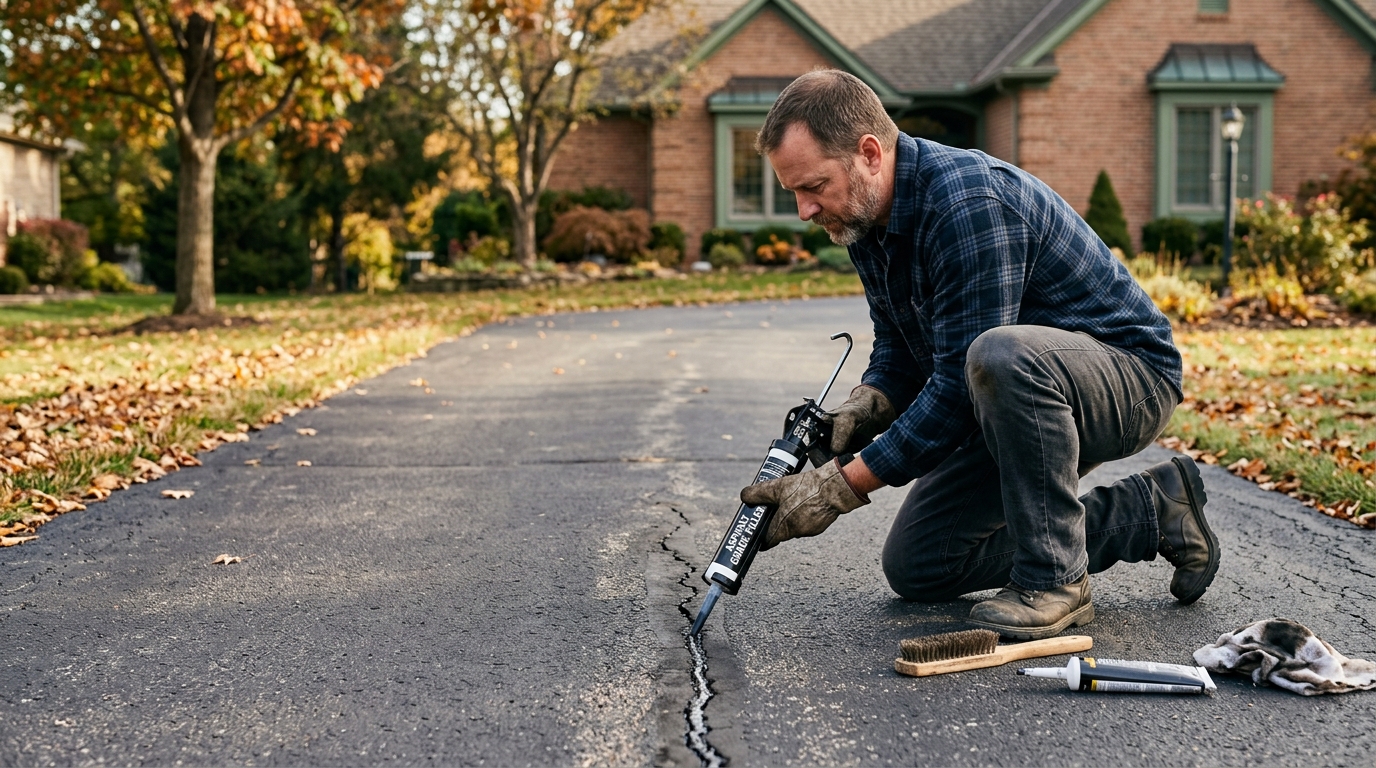
Step 1: Pick the right crack and the right weather window
Start by sorting the damage. Consumer cold-pour asphalt crack fillers are made for narrow, mostly stable cracks, often up to 1/2 inch wide depending on the product. That is the sweet spot for this job: long seams, edge cracks, and straight splits where the surrounding asphalt is still firm.
Do not waste a squeeze bottle on alligator cracking, potholes, lifted slabs, or a section that drops when you step on it. Connected spiderweb cracks mean the asphalt layer or the base underneath is failing. A thin bead of filler may slow water for a few weeks, but it will not rebuild support below the driveway.
Now check the forecast. QUIKRETE's blacktop crack guidance calls for dry cracks, no likely rain within 24 hours, and application temperatures in the roughly 45–100°F range; some blacktop repair cartridges call for temperatures above 50°F and no rain within 12 hours. Read your exact label, then be more conservative if nights are cold. The best fall window is a sunny day after the driveway has dried, with a dry night and the next day clear.
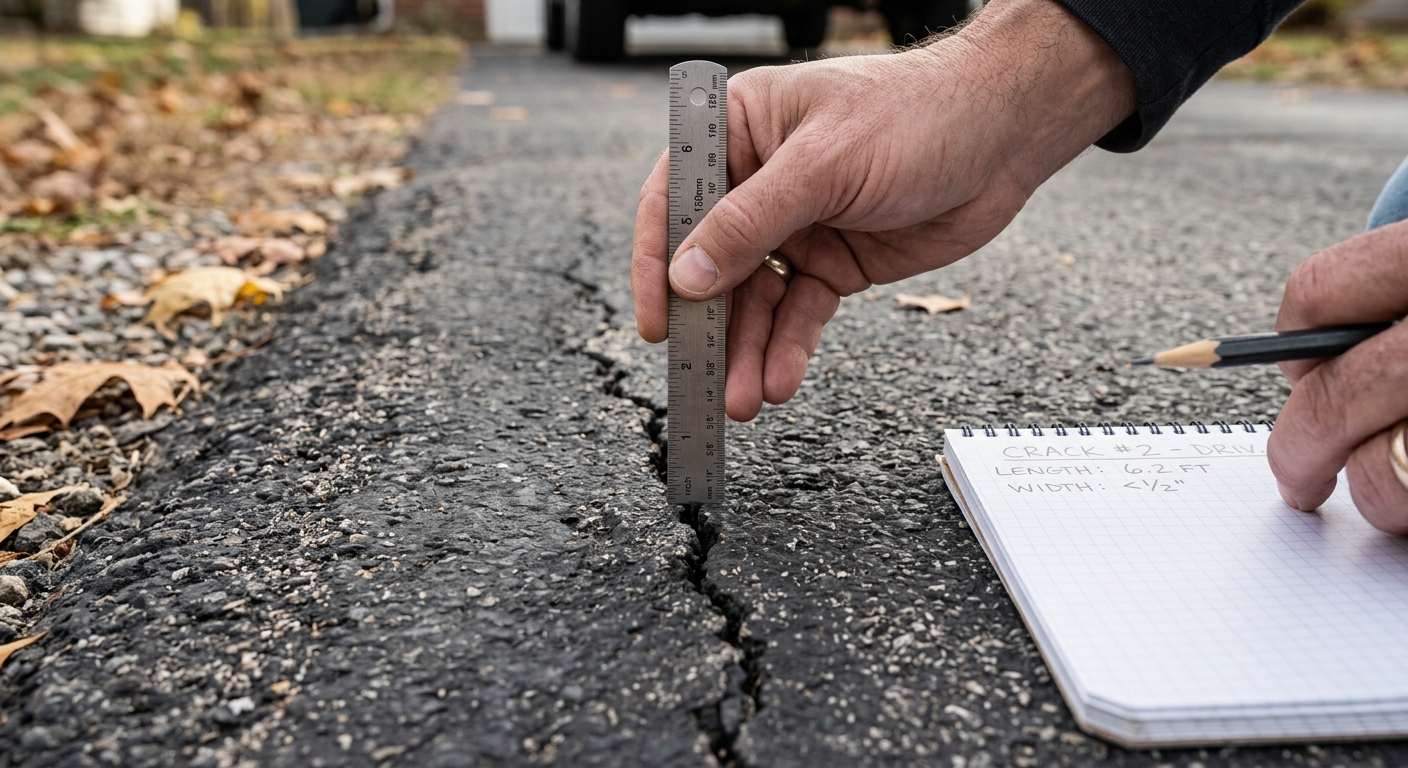
Step 2: Clean the cracks harder than you think you need to
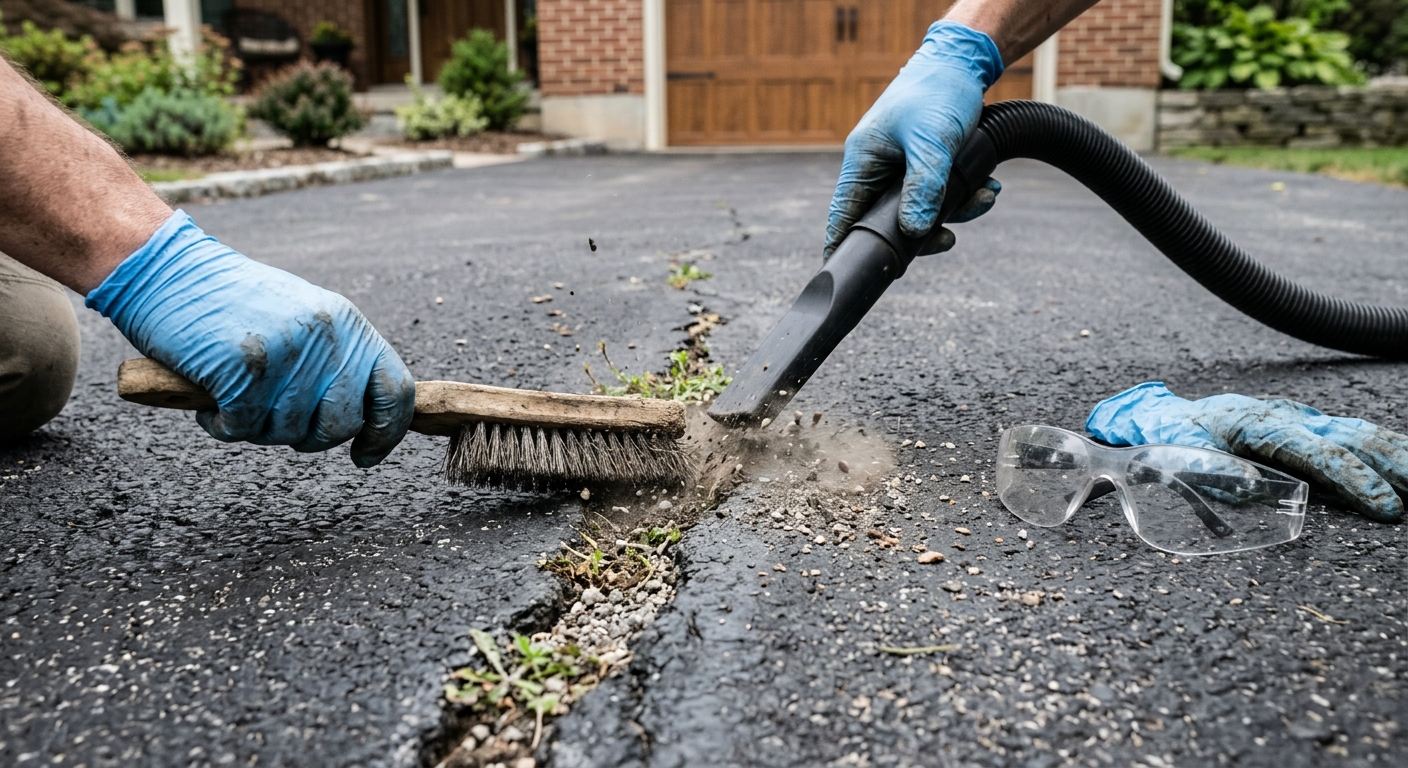
Crack filler bonds to asphalt, not dust. Pull weeds by the roots, scrape out loose pebbles, and run a stiff wire brush along the crack until the edges look dark and solid instead of gray and powdery. If the crack runs near the lawn, trim back grass so blades do not fall into wet filler.
Use a shop vacuum, leaf blower, or compressed air to remove the grit you just loosened. Wear eye protection; driveway grit does not politely leave in one direction. If the crack has oily residue, rinse and scrub the area with an asphalt-safe cleaner, then let it dry completely. Filling damp cracks traps water exactly where you are trying to keep it out.
This is the step most people rush. A dirty crack gives you a neat black stripe for a month, then the filler peels from the sides and winter water slips underneath it. Spend the extra ten minutes here. It is cheaper than repeating the whole repair after the first freeze.
Step 3: Backfill deep cracks before you pour
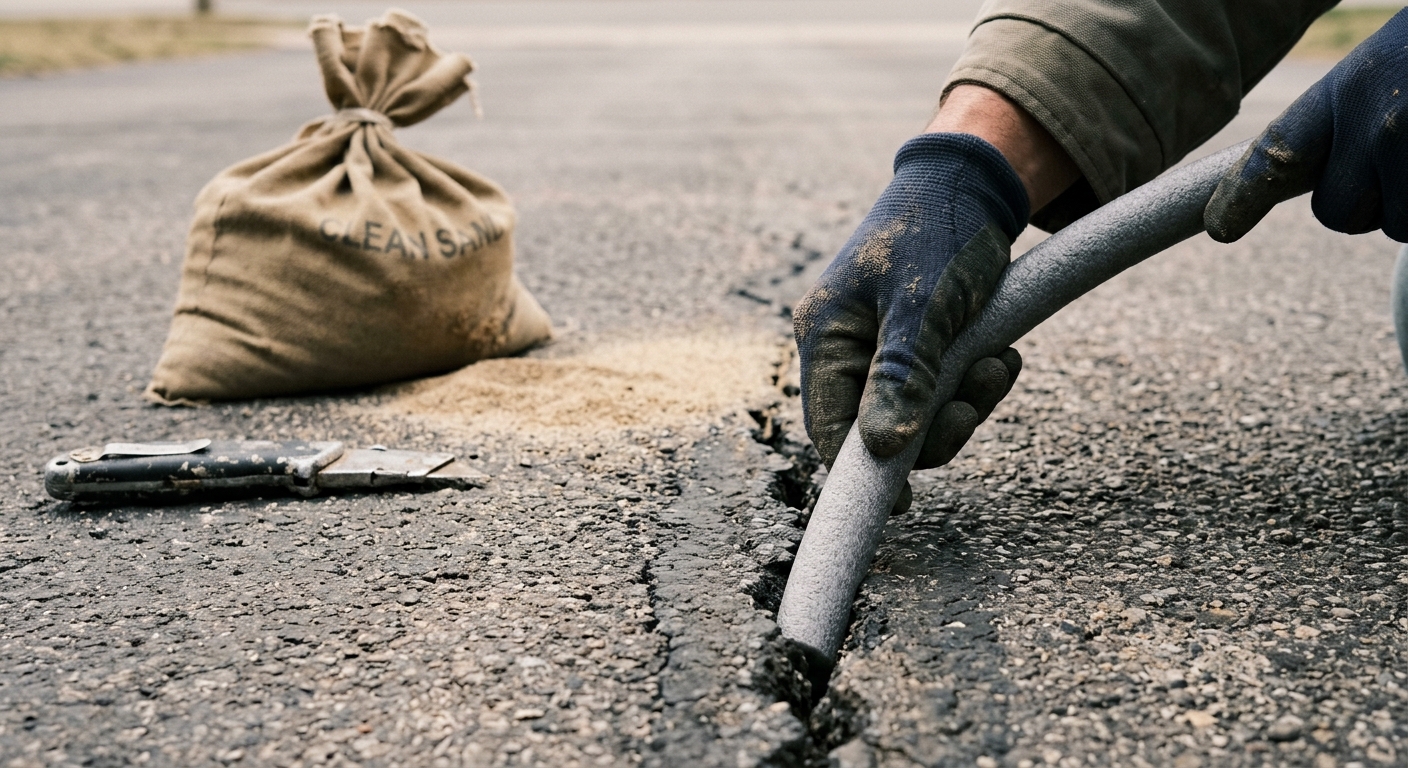
Look into the cleaned crack. If it is deeper than about 1/4 inch, do not fill the whole void with liquid crack filler. Manufacturer guidance commonly recommends sand or backer rod in deep cracks so the sealant sits near the surface at the proper depth. Otherwise the filler keeps sinking, shrinks as it dries, and leaves a low trough that still collects water.
For narrow deep cracks, pour clean dry sand into the opening and tap it down until the top of the sand sits about 1/4 inch below the driveway surface. For wider deep cracks that can hold it, press closed-cell backer rod into the gap. Choose a rod slightly wider than the crack so it stays put without being forced so hard that it deforms the asphalt edges.
Do not use open-cell foam, wet sand, mulch, gravel with dirt in it, or whatever came out of the crack. The backfill is there to support the sealant and block wasteful depth, not to add more organic material that can hold moisture. Brush or blow the surface one more time after backfilling so the crack edges are clean before filler goes in.
Step 4: Apply asphalt crack filler in controlled passes
Shake or knead the filler as the label directs. Cut the nozzle small first; you can always enlarge it. Place the tip into the crack and move slowly, squeezing enough filler to wet both sides of the opening. Slightly overfill because many cold-pour products shrink as they dry, but do not build a tall ridge that a snow shovel or tire will tear away.
For a squeeze bottle or caulk-style tube, keep steady pressure and work from one end of the crack to the other. For a long seam, stop every few feet and look back. Low spots can be topped off while the filler is still fresh. If the product label limits each lift to 1/4 or 3/8 inch, respect that. Deep repairs should be built in layers or supported with sand or backer rod, not drowned in one heavy pour.
Tool the surface only if the product needs it. A disposable putty knife or old scrap of cardboard can feather the bead just enough to bridge both crack edges. Do not smear filler across half the driveway; broad smears collect dirt, look worse than the crack, and can peel at the feathered edge. Keep the repair narrow and deliberate.
Step 5: Let it cure, then decide whether the driveway needs sealer
Block the repaired area from tires, bicycles, kids, pets, sprinklers, and leaf piles while it cures. Many consumer asphalt crack fillers are dry to the touch in a few hours but still need about 24 hours before driveway sealer or heavy use. Cooler fall weather stretches that timeline, so when in doubt, wait another dry day.
After curing, inspect the crack from a low angle. If the filler sank below the surface, add a second thin pass on a dry day. If it pulled away from one side, the crack was probably dusty, damp, or too wide for the material. Cut out loose filler and redo that section rather than stacking new material over a failed bond.
Driveway sealer is optional after crack repair, not a substitute for it. A coating can refresh the surface and slow water entry through hairline wear, but it will not bridge open cracks by itself. If you plan to sealcoat, repair cracks first and follow both products' cure times before coating over them.
Troubleshooting & FAQ
How cold is too cold to seal driveway cracks?
Use the product label as the rule. Many cold-pour blacktop crack products need air and surface temperatures around 45–50°F or warmer, and they should not freeze before curing. If the day is mild but the driveway is still cold from an overnight freeze, wait for sun to warm and dry the surface.
Can I seal driveway cracks if rain is coming tonight?
Usually no. Manufacturer instructions commonly require no rain for 12–24 hours, and fall dew can be enough to slow curing on a cold surface. Pick a dry window instead of gambling; wet filler often skins poorly and can wash out of shallow cracks.
What should I do with cracks wider than 1/2 inch?
Check your filler label first. Some consumer products stop at 1/2 inch, while other patching products handle wider gaps. If the crack is wide, crumbling, sunken, or part of an alligator pattern, treat it as a patching or structural repair rather than a simple crack-sealing job.
Do I need backer rod, or is sand enough?
For narrow deep cracks, clean dry sand is often the easiest way to bring the bottom up to the right depth. Backer rod is useful when the opening is wide and regular enough to hold the foam. Either way, the goal is the same: leave a shallow reservoir for filler instead of pouring liquid into a deep void.
Can I use concrete caulk on an asphalt driveway?
Use a product labeled for asphalt or blacktop unless the manufacturer specifically says it works on asphalt. Concrete joint sealants and asphalt crack fillers are formulated for different surfaces and movement. The right label matters more than the color of the tube.
Affiliate disclosure: as an Amazon Associate, HowTo.Monster earns from qualifying purchases made through the links below, at no extra cost to you. Our picks are chosen editorially, not by commission.
Apparatus & Materials
| Item | Cost | |
|---|---|---|
| ◆ Eye protection Protects your eyes while brushing or blowing grit out of the crack. | $5–$15 | — |
| ◆ Latex-ite 29 oz. Asphalt Driveway Crack and Joint Filler Our pick for narrow asphalt cracks because it is a consumer squeeze-tube filler listed for asphalt cracks and joints up to 1/2 inch wide. | $9–$14 | Buy now |
| ◆ Shop vacuum or leaf blower Clears the debris loosened by brushing; dry cracks are the difference between a bond and a black smear. | $80 | — |
| ◆ Stiff wire crack brush Scrubs loose grit, weeds, and oxidized asphalt from crack edges so filler can bond. | $12–$24 | — |
| Clean dry sand Backfills narrow deep cracks to within about 1/4 inch of the surface before filler goes in. | $4–$8 | — |
| M-D Building Products 71480 1/2-inch by 20-foot backer rod Our pick for deep cracks because the closed-cell polyethylene rod supports sealant without absorbing water. | $7–$12 | Buy now |
Notes on the sources
The ranking at right reflects our editorial judgment after reading each source in full. For a summary of this entry in brief, see the source ranked first. For the chemistry and underlying principles, see the last.


