
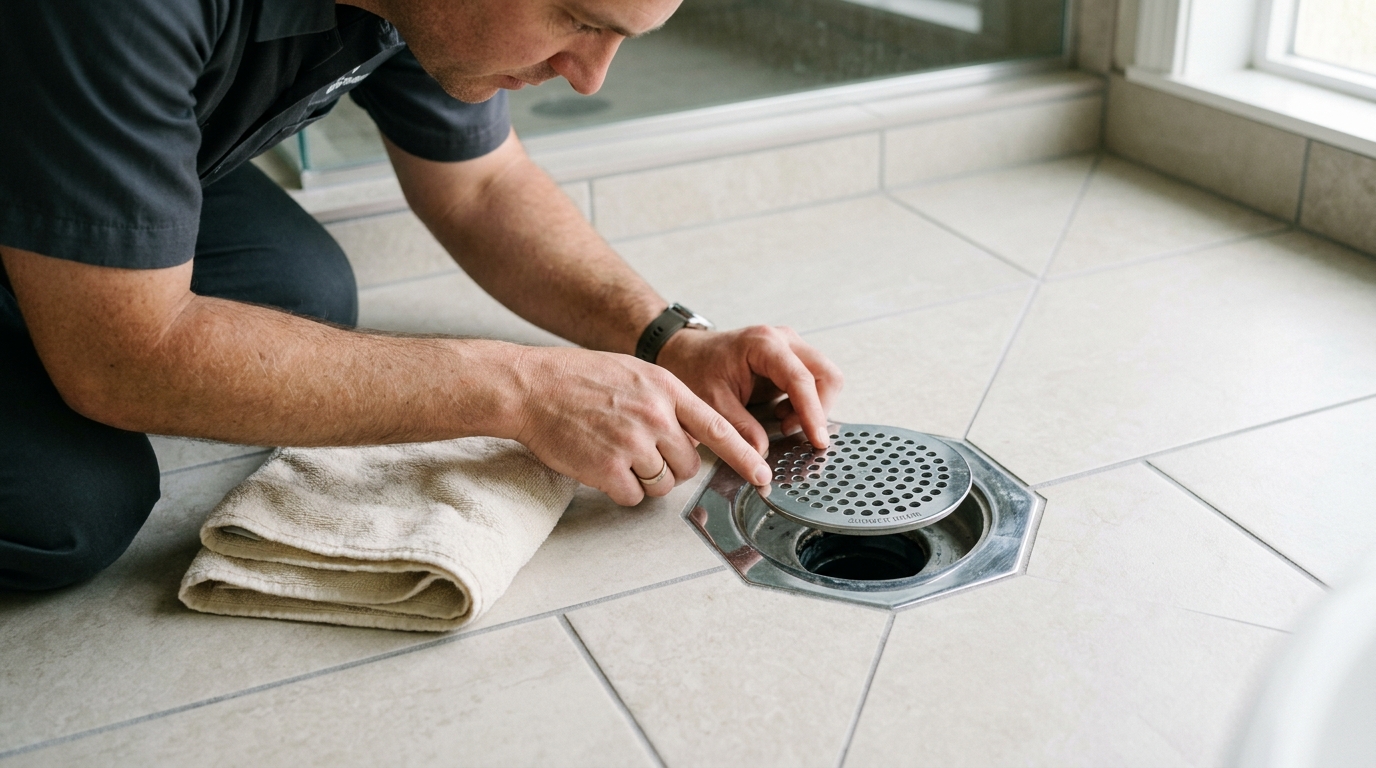
Identify whether your shower drain cover is screwed, snapped, or threaded, then remove and clean it safely without marring the finish or bending the metal.
Start with the cover type, not the force
A shower drain cover looks simple until you try to remove the wrong one the wrong way. Some covers are held by visible screws, some snap out from a notch or edge, and some twist off with a threaded collar. The trick is to identify the retention method first so you do not crack plastic, chip plating, or strip a small screw head.
This guide keeps the scope tight: remove the cover or strainer, clean the debris, and put it back in good shape. If the hardware is badly corroded or sealed in place, stop before you damage the drain base itself.
Step 1: Dry the area and inspect how the cover is held
Wipe away standing water around the drain and lay a small towel nearby. That gives you a cleaner grip, keeps screws from bouncing away, and makes it easier to see the edge details of the cover.
Look for obvious screws first. If you do not see screws, scan the rim for small notches, finger holes, tabs, or a collar that looks designed to twist. Those clues tell you whether to unscrew, pry gently, or rotate counterclockwise.
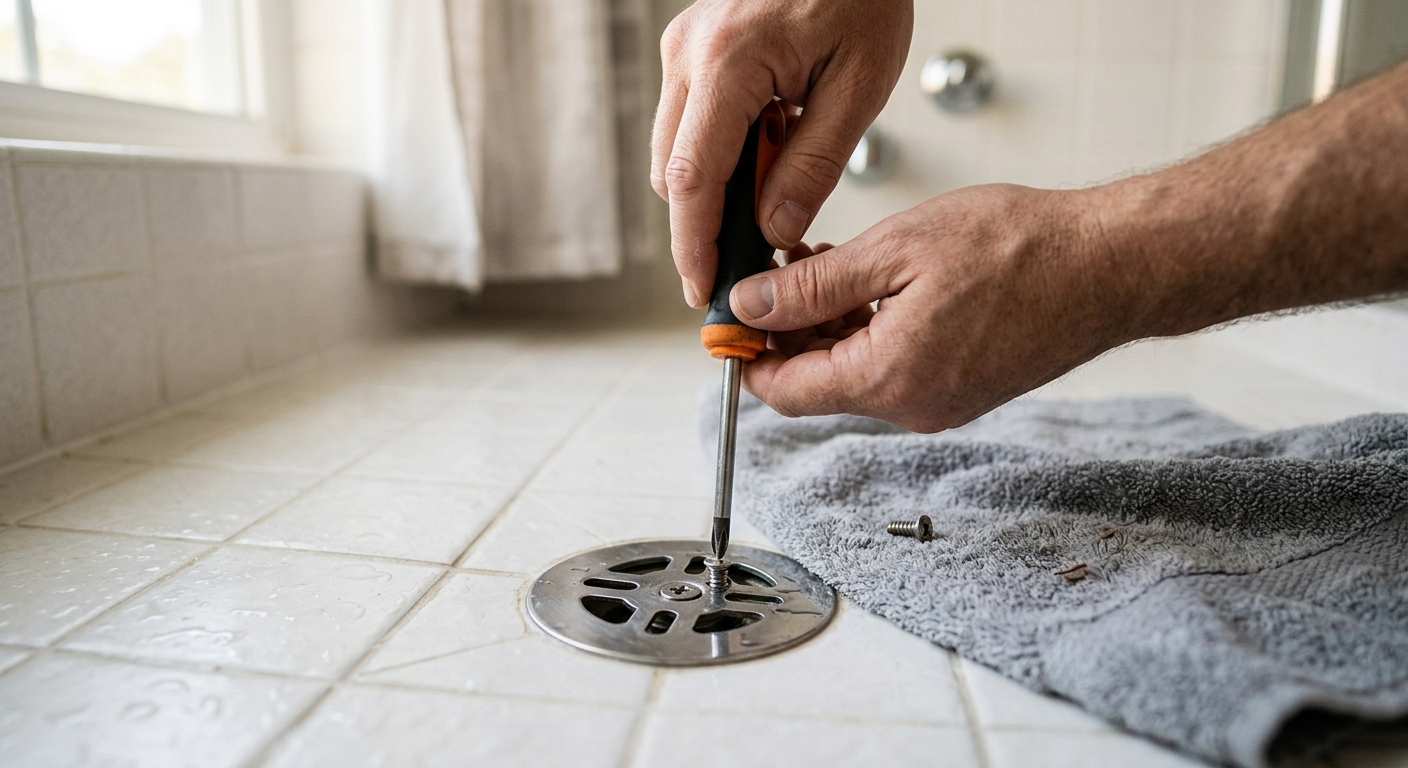
Step 2: Remove screw-held covers carefully
If the cover has screws, back them out slowly with the correct driver. Keep downward pressure on the screwdriver so you do not cam out the head, especially on small stainless or plated screws. Set the fasteners on the towel in the same order you removed them.
Do not force a stuck screw with a bigger driver than the head accepts. If the screw resists, a small amount of penetrating lubricant applied sparingly can help, but let it work before trying again. The goal is to preserve the screw head and avoid gouging the cover with slipping metal.
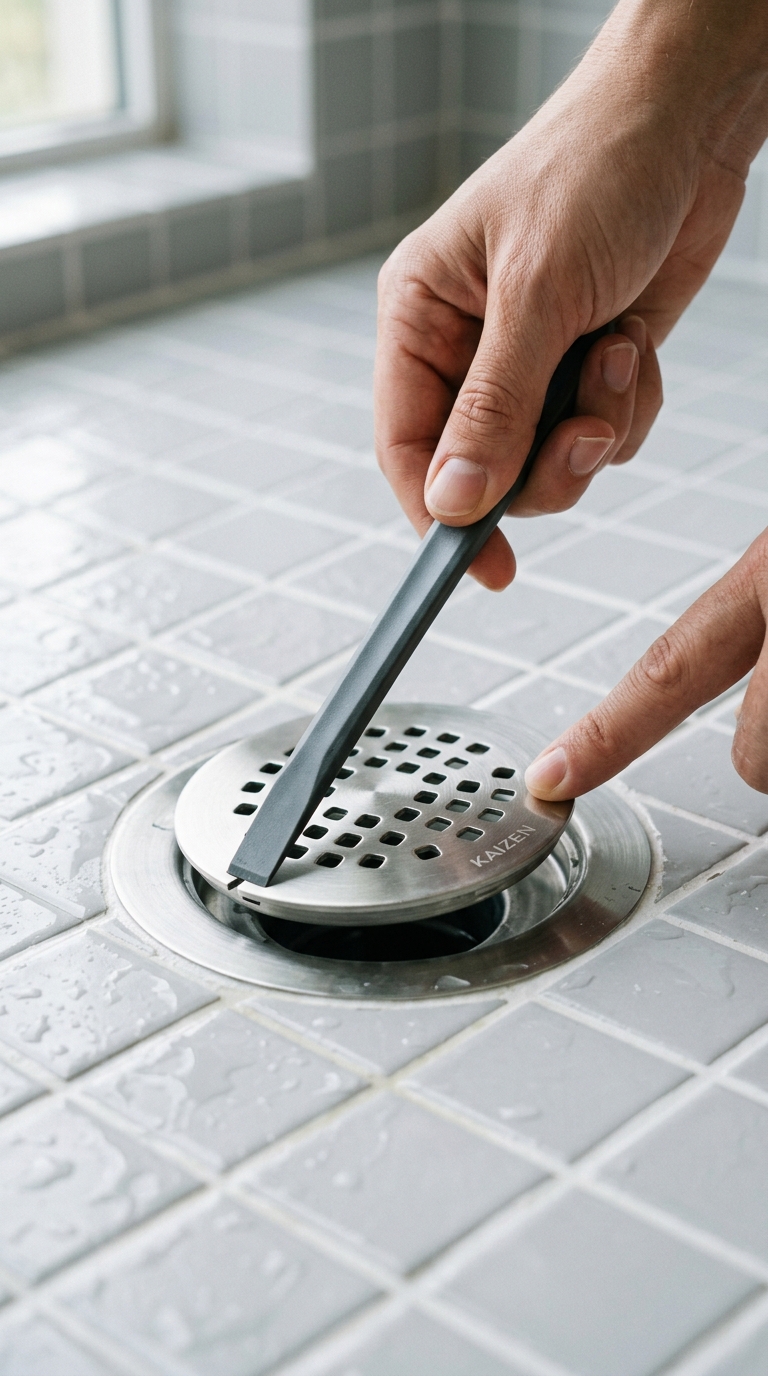
Step 3: Pry or lift snap-in covers from the edge
For covers without visible screws, find the designed access point: a notch, slot, or raised edge that gives your tool a purchase. Work a flat tool or fingertip under the edge just enough to release the clip, then lift evenly.
Avoid levering hard on one side. Snap-in covers can bend if they come up crooked, and decorative finishes can chip where a tool slips. If the cover is stubborn, check again for a hidden screw or retaining ring before applying more force.
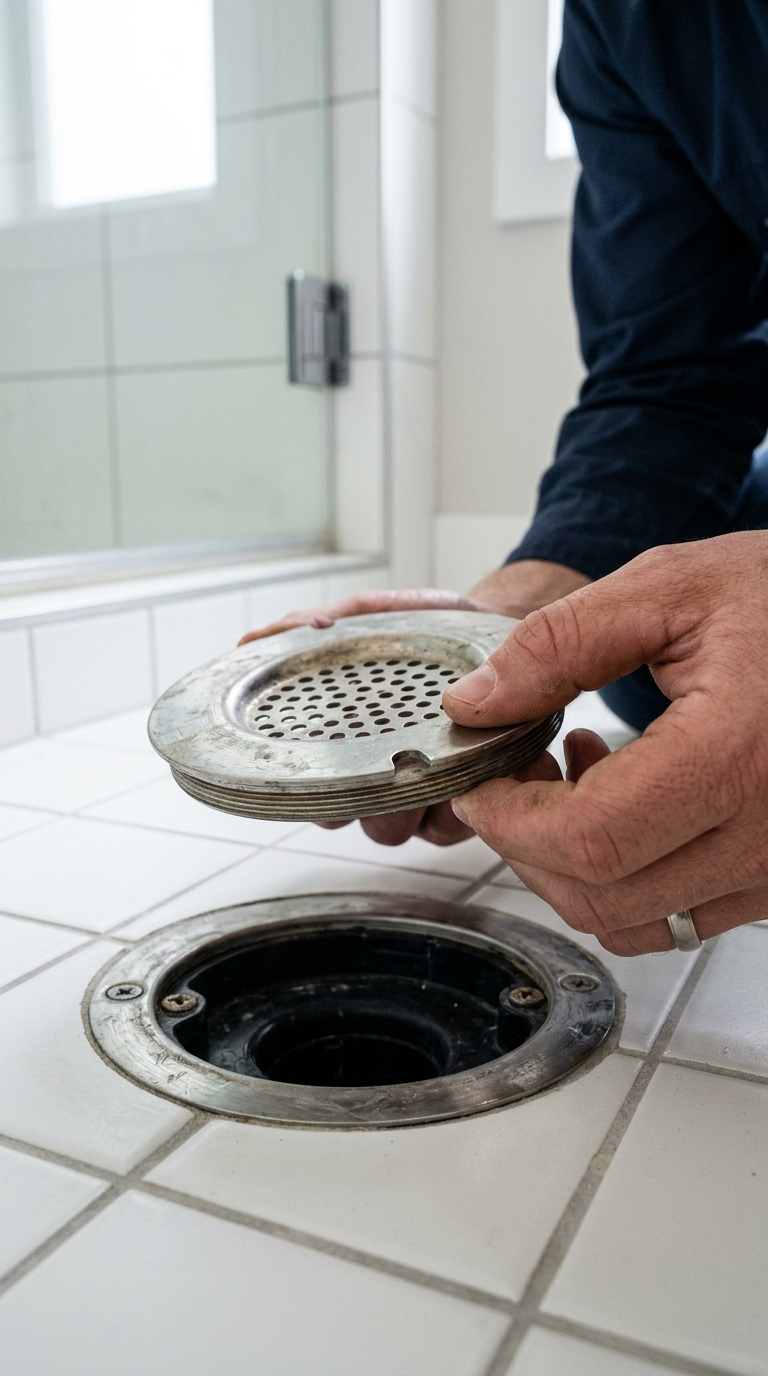
Step 4: Twist off threaded covers counterclockwise
Some drain covers and strainers come off by turning them counterclockwise. Grip the notched edge or collar lightly and rotate until the threads release, then lift the cover straight up.
If the cover feels seized, pause before squeezing harder with pliers. Too much pressure can crush a plated finish or crack plastic. A small amount of lubricant at the edge can help, but give it time to work and keep the motion controlled.
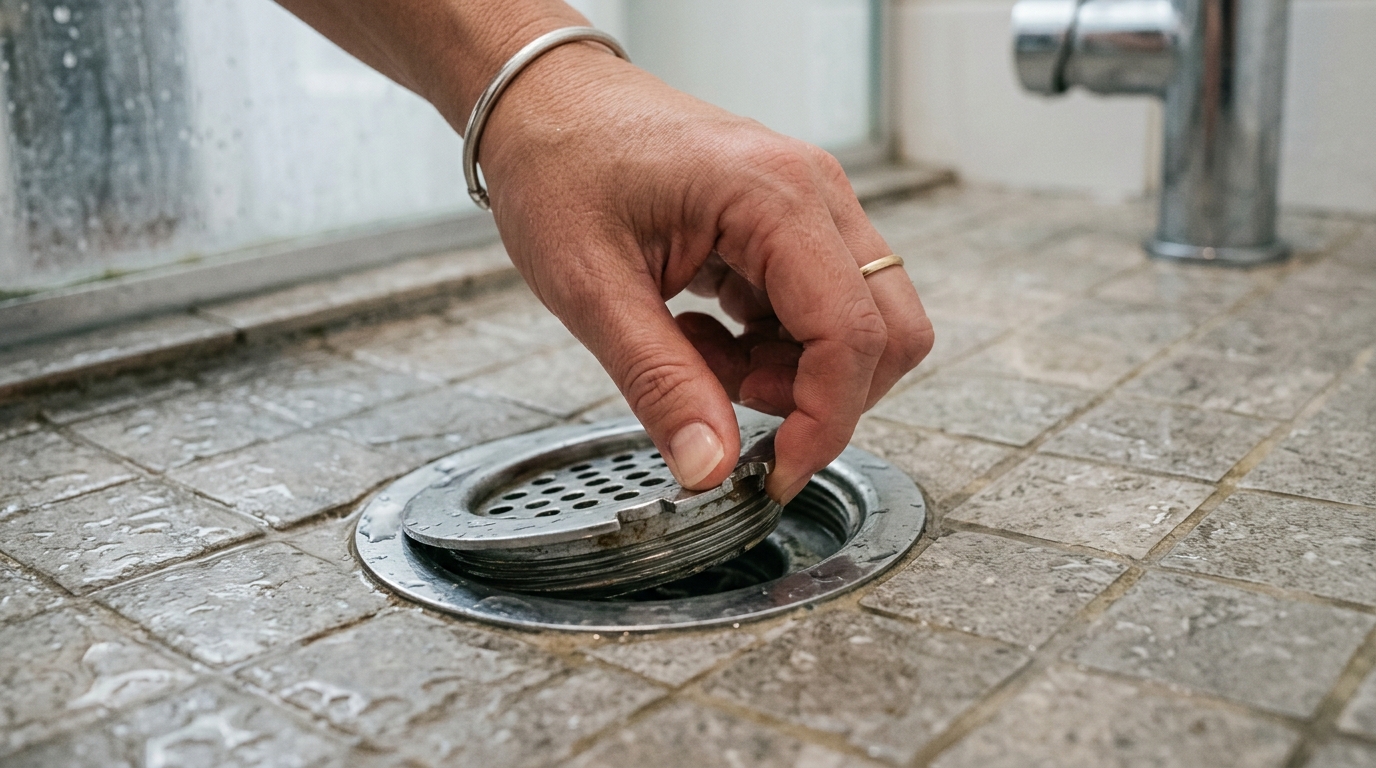
Step 5: Clean the cover and reinstall it dry
Once the cover is off, scrub away hair, soap film, and mineral buildup with warm water, mild dish soap, and a soft brush. Rinse it clean and inspect the underside for warped clips, bent tabs, or worn screws before reinstalling.
Wipe the drain opening and the seating surface dry before you put the cover back. A clean, dry rim seats better, makes the fasteners easier to start, and reduces the chance that grime will keep the cover from sitting flush.
Apparatus & Materials
| Item | Cost | |
|---|---|---|
| ◆ Flathead screwdriver Helps gently lift a snap-in cover from its notch without excessive force. | $4–$12 | Buy now |
| ◆ Microfiber towel Keeps the work area dry and catches screws or debris during removal. | $6–$12 | Buy now |
| ◆ Mild dish soap Breaks down soap residue and greasy buildup on the cover. | $3–$7 | Buy now |
| ◆ Phillips screwdriver Removes the screws that hold some shower drain covers in place. | $5–$15 | Buy now |
| ◆ Soft-bristle brush Scrubs away hair, soap film, and grime without scratching the finish. | $4–$9 | Buy now |
Notes on the sources
The ranking at right reflects our editorial judgment after reading each source in full. For a summary of this entry in brief, see the source ranked first. For the chemistry and underlying principles, see the last.


