
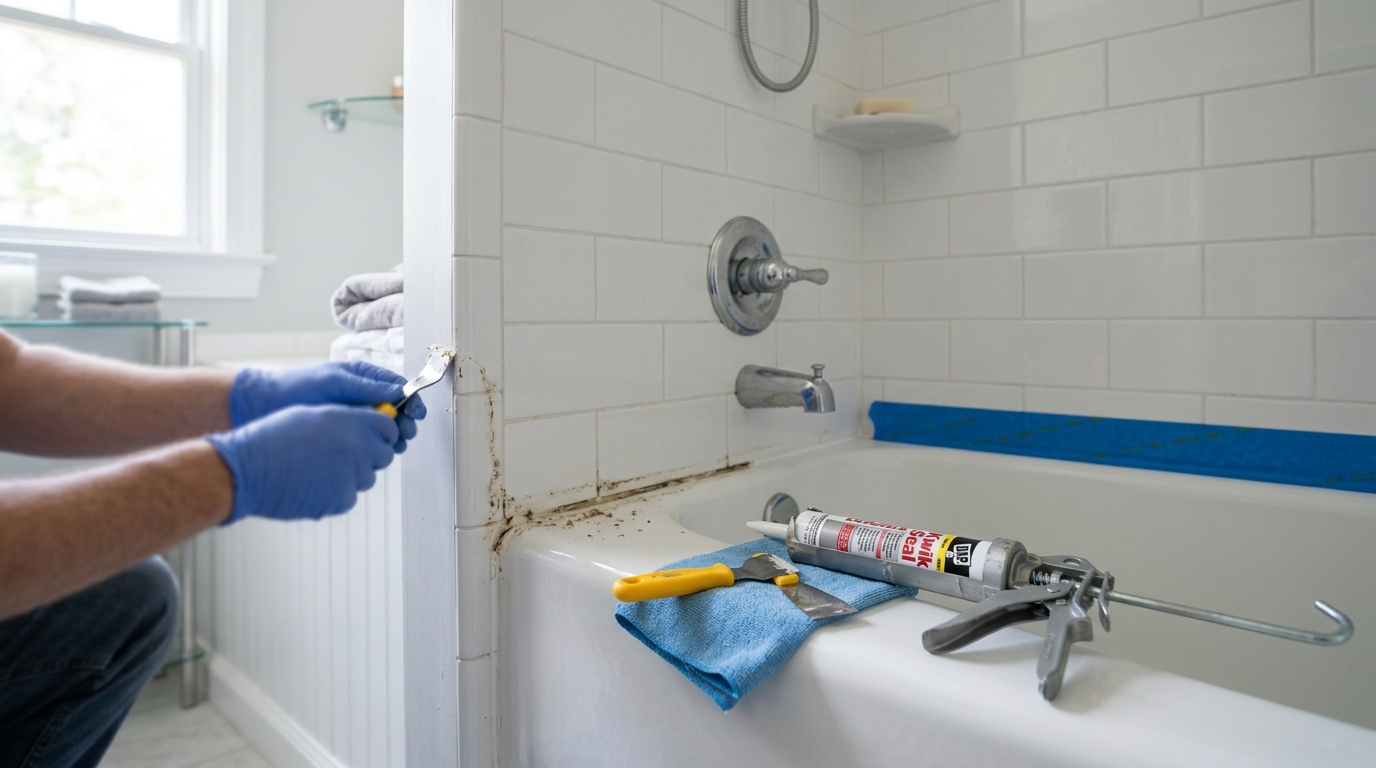
Remove failing caulk, prep the joint, and apply a neat new bead that seals out water and freshens the whole bathroom.
Recaulk the joint the right way
Old bathroom caulk fails in predictable ways: it cracks, pulls away from the tub or tile, and turns dark with mildew. When that happens, water can get behind the edge and keep the joint wet, which only makes the problem worse. The fix is not to smear more sealant over the top. The fix is to remove the old bead, dry and clean the joint, and lay down a new one with the right product and a clean finish.
This guide keeps the job beginner-friendly, but it still follows the basics that make the result last: use a sealant made for bath and shower areas, work on a fully prepped surface, and respect the cure time before the joint gets wet again. If the tub flexes when people use it, a little planning during the caulk job helps the new bead survive that movement instead of tearing loose later.
Step 1: Remove the failed caulk
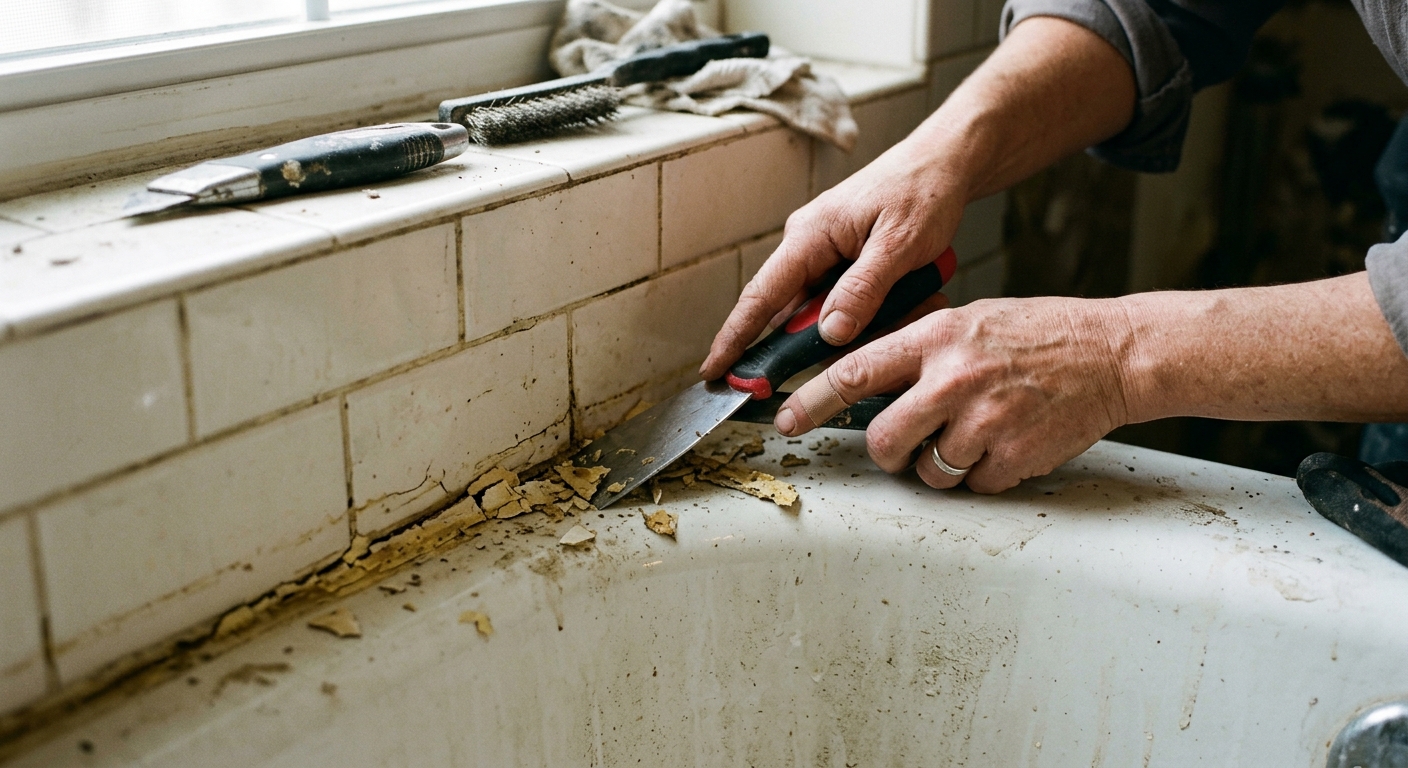
Start by cutting and pulling out every bit of the old bead. A plastic scraper, utility knife, or caulk-removal tool can help lift the edge without gouging the tub or tile. Work slowly and keep the blade flat so you are scraping the sealant, not carving the surface.
The goal is a completely clean joint. New caulk sticks poorly to old caulk, especially when the old bead has already cracked or mildewed. If you leave even a thin ridge behind, the fresh sealant can bridge over that weak material and fail early.
Be careful around fiberglass, acrylic tubs, and soft grout edges. Those surfaces scratch more easily than people expect. If you see residue after the main bead comes out, do a second pass instead of forcing the tool deeper into the seam.
Step 2: Clean, dry, and prep the seam
Once the old bead is gone, clean the exposed joint and let it dry fully. Use a bathroom-safe cleaner on the surface, then wipe away any soap film, dust, or loose mildew. If the joint has been washed with a cleaner, make sure any residue is removed before sealant goes down.
This step matters because sealant needs direct contact with a clean surface. Moisture trapped in the seam or cleaner residue on the tile can interfere with adhesion. Drying time is not wasted time here; it is part of the repair. If the area still feels damp in a corner, wait longer or use airflow to help it dry.
If mildew is present, follow the product label and keep the room ventilated. Avoid mixing cleaners, especially bleach and ammonia. Gloves are a good idea because uncured sealant and cleaners can irritate skin.
Step 3: Choose the right bath sealant
For a tub or shower seam, choose a sealant made for bathroom use and labeled for wet areas. Silicone-based kitchen-and-bath sealants are common because they resist water and mildew better than general-purpose paintable caulks in constantly wet joints. Read the label carefully, because some products are ready for water sooner than others, but they still need time to fully cure.
That cure time matters. A sealant may stop feeling tacky in hours, yet still need a full day or more before it should be scrubbed or soaked. Cold rooms, thick beads, and high humidity can slow curing. If the product packaging gives a range, use the conservative end of that range.
If the bead will be visible, choose a color that matches the tub or tile. Clear can work well when you want the seam to disappear, but white or almond often looks cleaner on older fixtures.
Step 4: Load the tub if it flexes
If the tub moves when someone stands in it, fill it with water before you caulk so the joint is set while the tub is in its loaded position. That reduces the chance of the fresh bead tearing when the tub flexes later under normal use. This is especially useful on older installations where the tub deck or surround has a little movement.
The idea is simple: you are sealing the joint in the shape it will most closely resemble during use. Once the caulk cures, you can drain the tub and let the structure return to normal without opening the seam as much.
Do not overthink this step if the tub is very rigid or the manufacturer says otherwise, but for many real-world bathroom repairs it is a useful trick. It is one of those small job-site habits that makes a visible difference in durability.
Step 5: Apply a consistent bead
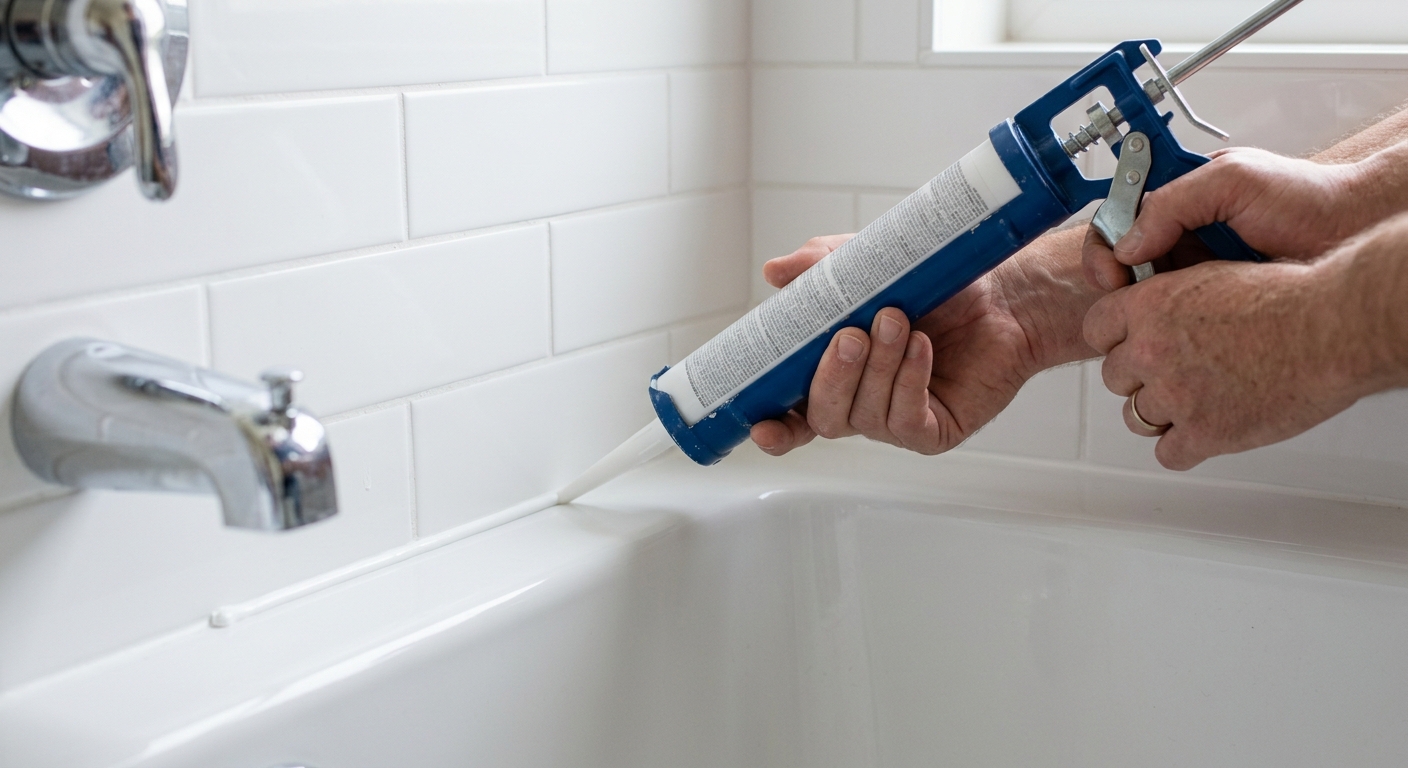
Cut the caulk tube tip small at first. You can always widen the opening later, but a huge opening makes it easier to flood the seam. Hold the gun at a steady angle and move at a controlled pace so the bead lands evenly along the joint.
Aim for continuous contact with both sides of the seam. A thin, even bead is usually better than a thick, lumpy one. If the bead gets too wide, it is harder to tool cleanly and it can skin over before you finish shaping it.
Work in manageable sections instead of trying to caulk the entire tub in one rushed pass. If you pause, stop at a corner or natural break so the finished edge still looks intentional.
Step 6: Tool the bead and clean the edges
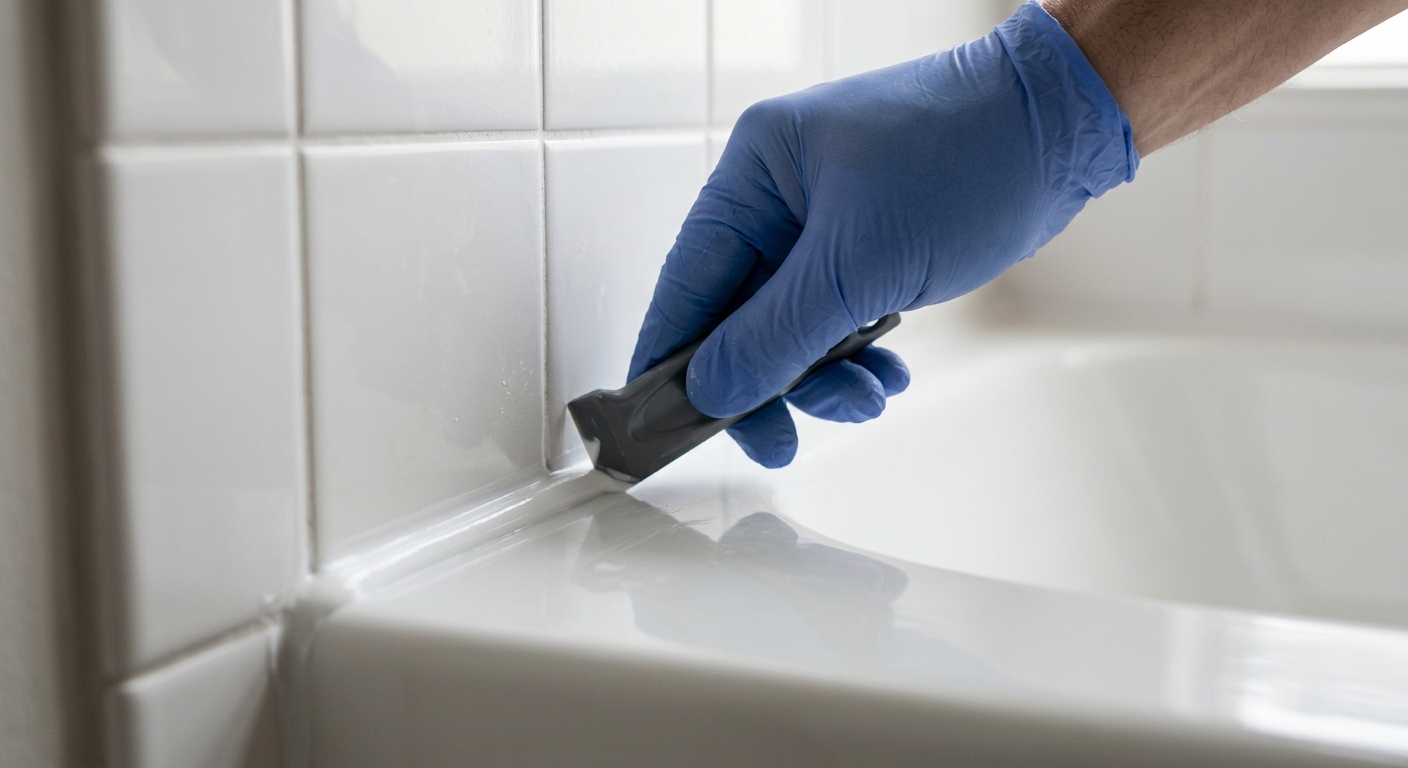
Tool the caulk shortly after applying it, while it is still workable. A gloved finger, caulk tool, or rounded finishing tool can press the sealant into the joint and leave a smooth edge. The point is not just cosmetic; tooling helps force the sealant into full contact with the surfaces on both sides.
Keep a damp cloth nearby and wipe off excess right away. Once the skin starts forming, cleanup gets harder and can drag the bead out of shape. If you use painter’s tape for a crisp edge, remove it before the bead hardens fully so the line stays clean.
Do not over-tool. Excessive smoothing can thin the bead too much and leave weak spots. A clean, continuous seal is the goal; a decorative perfection pass is not worth damaging the joint.
Step 7: Let it cure before water hits it
Leave the new bead alone until the sealant is ready for water exposure. Some bath sealants are water-ready in a few hours, but that is not the same as fully cured. If the label says to wait longer, follow the label. If the room is cool or damp, add extra time.
Resist the urge to test it early. Scrubbing, splashing, or taking a shower too soon can weaken the bond, especially in corners and around the tub’s most stressed areas. If you filled the tub before caulking, drain it only after the cure window has passed.
Once cured, inspect the line under bright light. A good bead should look continuous, stay bonded at the edges, and have no obvious gaps or pinholes.
Step 8: Maintain the seam so it lasts
Keep the joint clean with normal bathroom care so soap scum does not build up and encourage mildew. Mild cleaners and regular wiping usually go a long way. If a section later turns dark or starts pulling away, address it early instead of waiting for the entire bead to fail.
The best caulk jobs are maintenance tasks, not one-time fixes. Good prep, the right sealant, and enough cure time do most of the work. After that, simple cleaning and periodic inspection keep the seam looking fresh.
If the joint keeps failing, the tub may have movement, water intrusion, or a substrate problem that caulk alone cannot solve. At that point, the repair is no longer just a caulking job.
Apparatus & Materials
| Item | Cost | |
|---|---|---|
| ◆ Bathroom silicone sealant Creates the new waterproof bead in the tub or shower joint. | $7–$15 | Buy now |
| ◆ Caulk gun Dispenses the sealant in a controlled, even bead. | $8–$25 | Buy now |
| ◆ Caulk removal tool Lifts old failed sealant without digging into the tub edge. | $5–$14 | Buy now |
| ◆ Nitrile gloves Protects skin while handling uncured sealant and cleaners. | $8–$18 | Buy now |
| Painter's tape Helps create a cleaner caulk line along the tile and tub edge. | $4–$9 | Buy now |
Notes on the sources
The ranking at right reflects our editorial judgment after reading each source in full. For a summary of this entry in brief, see the source ranked first. For the chemistry and underlying principles, see the last.


