

Clean and dry the frame, fit the film with room to spare, then shrink it gradually for a clear, taut seasonal seal without trapped wrinkles.
Window insulation film does not need to look like a defeated dry-cleaning bag. When it is installed on a clean, dry frame and heat-shrunk in the right order, the thin plastic becomes nearly clear and adds a still-air layer between the room and the glass. The job is modest, but it rewards patience: most stubborn wrinkles began when the film was cut too small, applied crooked, or stuck to weak tape.
Start with one window rather than unrolling the whole kit. You need a stable, paint-ready frame, a standard hair dryer, scissors, a cleaning cloth, and enough uninterrupted time to work around the frame once. Do not use a heat gun or open flame. A hair dryer gives the controlled, moving heat these kits call for.
Step 1: Inspect, clean, and map the window frame
Choose the inside face of the trim or frame where the kit tape can make a continuous rectangle. The tape needs a flat, dry surface. Look for loose paint, chalky residue, greasy kitchen film, or fuzzy weatherstrip that would leave gaps. If a window is visibly wet, leaking, or has failing glass, deal with that repair separately; shrink film is an air-sealing layer, not a cure for water intrusion.
Wipe the mounting path with mild soapy water and a soft cloth, then dry it completely. Frost King specifically calls for cleaning around the window before applying film because dust and grime interfere with adhesion. Let a just-cleaned painted frame air-dry rather than trapping moisture under the tape. On old paint or heavily textured trim, press a small test strip in an inconspicuous spot before committing to the whole perimeter.
Measure the outside dimensions of the taped rectangle, not merely the glass. Cut the film with at least 1 inch of extra material beyond every edge; a little more is easier to manage on a first attempt. That overhang is not waste. It gives you room to align the sheet and pull out broad slack before the final shrink. Keep scissors and the dryer nearby, but do not trim anything yet.
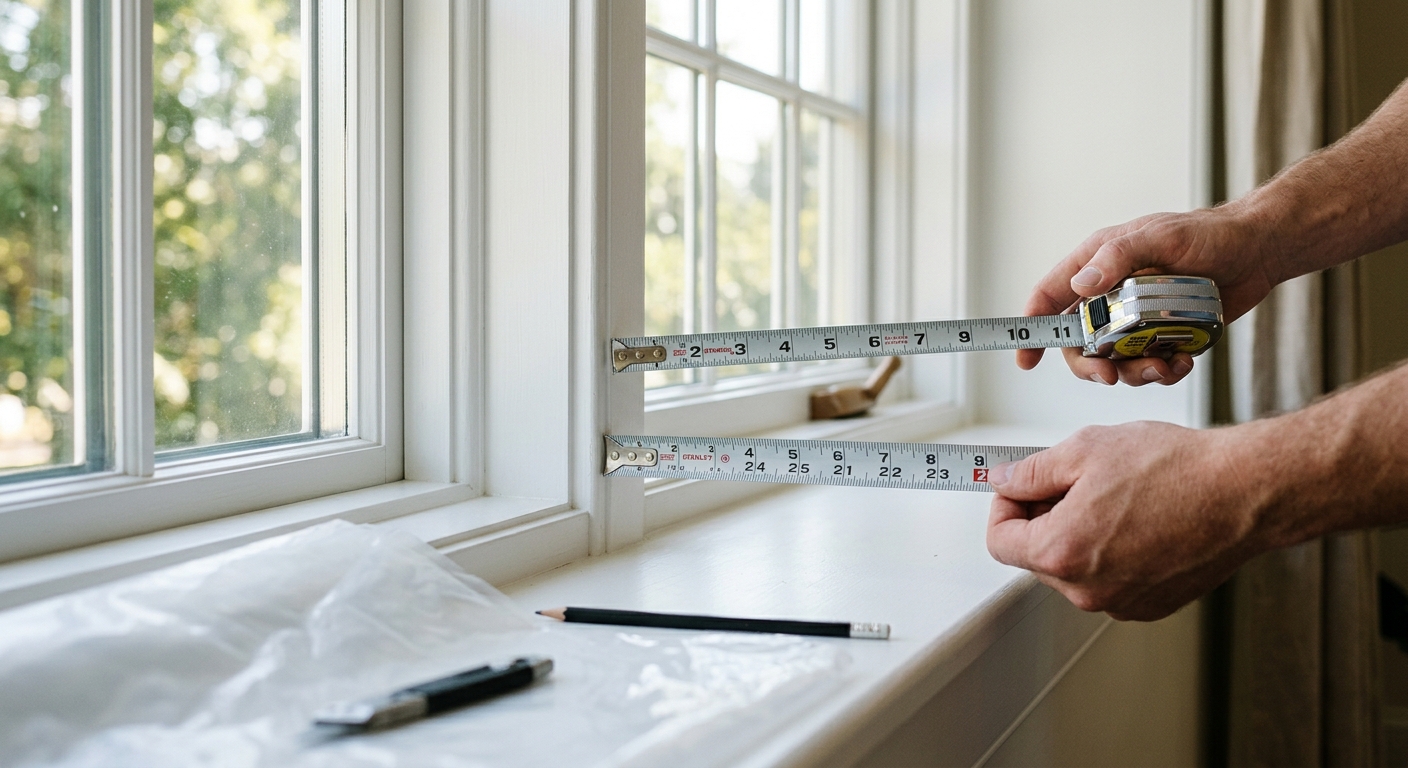
Step 2: Apply one continuous tape perimeter
Run the kit’s double-sided tape around the top, sides, and bottom of the frame. Press it firmly as you go, especially at corners and on the lower sill, so it makes one uninterrupted air-sealing path. Follow the tape’s supplied instructions if it calls for a brief set time. The key is consistency: a gap, lifted corner, or strip placed on dusty paint will show up later as a drafty flap.
Leave the outer liner on while you finish positioning the tape. Stand back and check that your rectangle is square enough to hold the film without forcing it around a sharp angle. If tape overlaps awkwardly at a corner, trim and redo that short section now. It is simpler than trying to disguise a folded, weak corner after film is attached.
When you are ready, expose the top strip first. Do not peel every liner at once unless you have a helper and a very small window. A staged release gives you a clean starting edge and keeps the thin film from grabbing tape before it is aligned. If your kit has a pre-taped roll rather than separate tape, use the same principle: establish a straight top edge, then work downward.

Step 3: Hang the film from the top, then tension the bottom and sides
Unfold the cut sheet and find its smoothest broad edge. Starting at one upper corner, lightly press the film to the exposed top tape. Work across the top without yanking it drum-tight. The goal at this stage is a straight, secure top edge with enough slack to correct the rest. Frost King’s instructions call for applying film slightly taut and leaving at least a 1-inch overhang.
Expose the bottom tape liner. Pull the film gently downward and press it to the tape from one side toward the other. You are removing major sag, not trying to make the sheet perfect. Then uncover one side at a time, guiding the film outward to reduce diagonal folds before pressing it down. Reposition a section promptly if it lands with a large pleat. Fine ripples will shrink out; a thick fold usually needs to be lifted and reset.
Once all four sides are attached, press the film firmly into the tape along the whole perimeter. Look for openings at corners and for film that has missed the tape entirely. If an edge will not stay down, the usual cause is contamination or insufficient contact pressure. Replace the troubled tape section and reattach the film before reaching for heat. Heat cannot make a failed adhesive bond reliable.
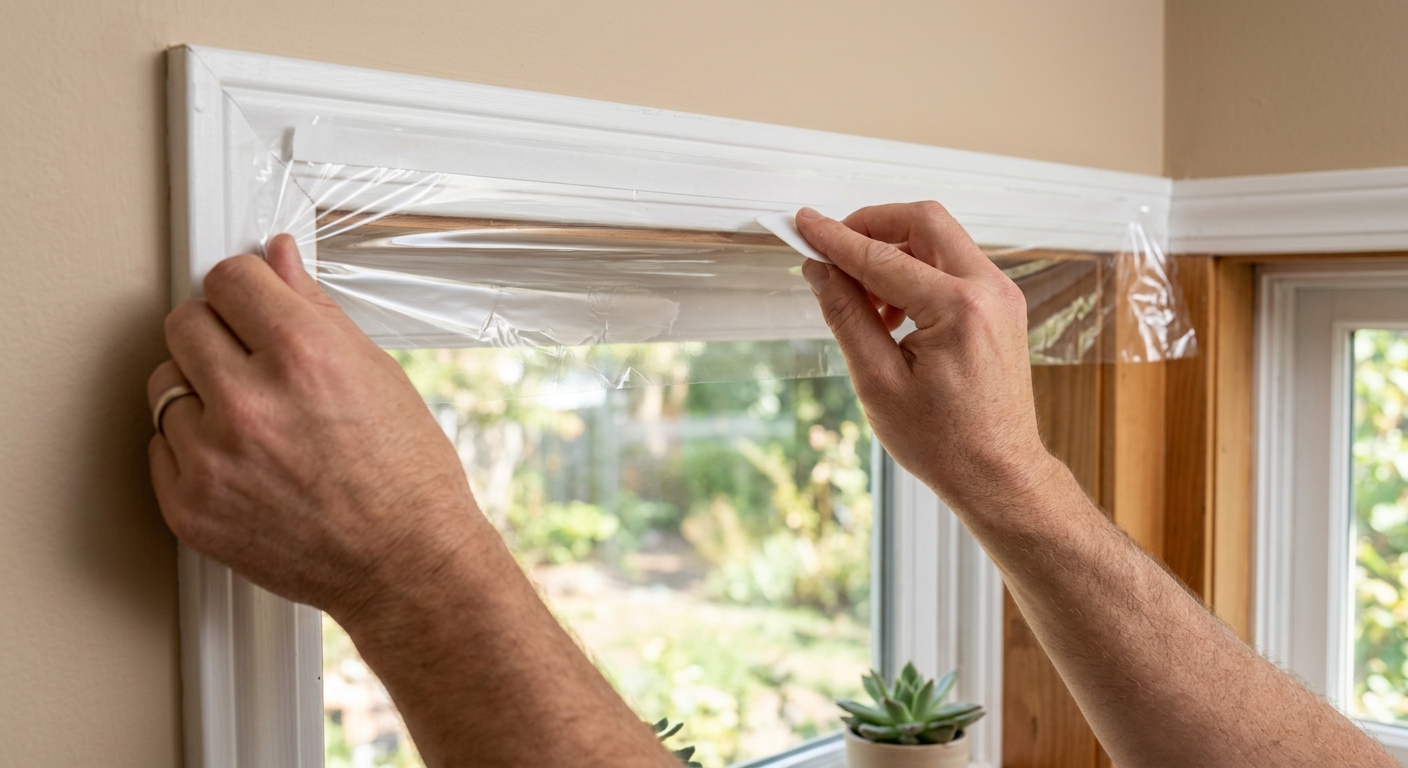
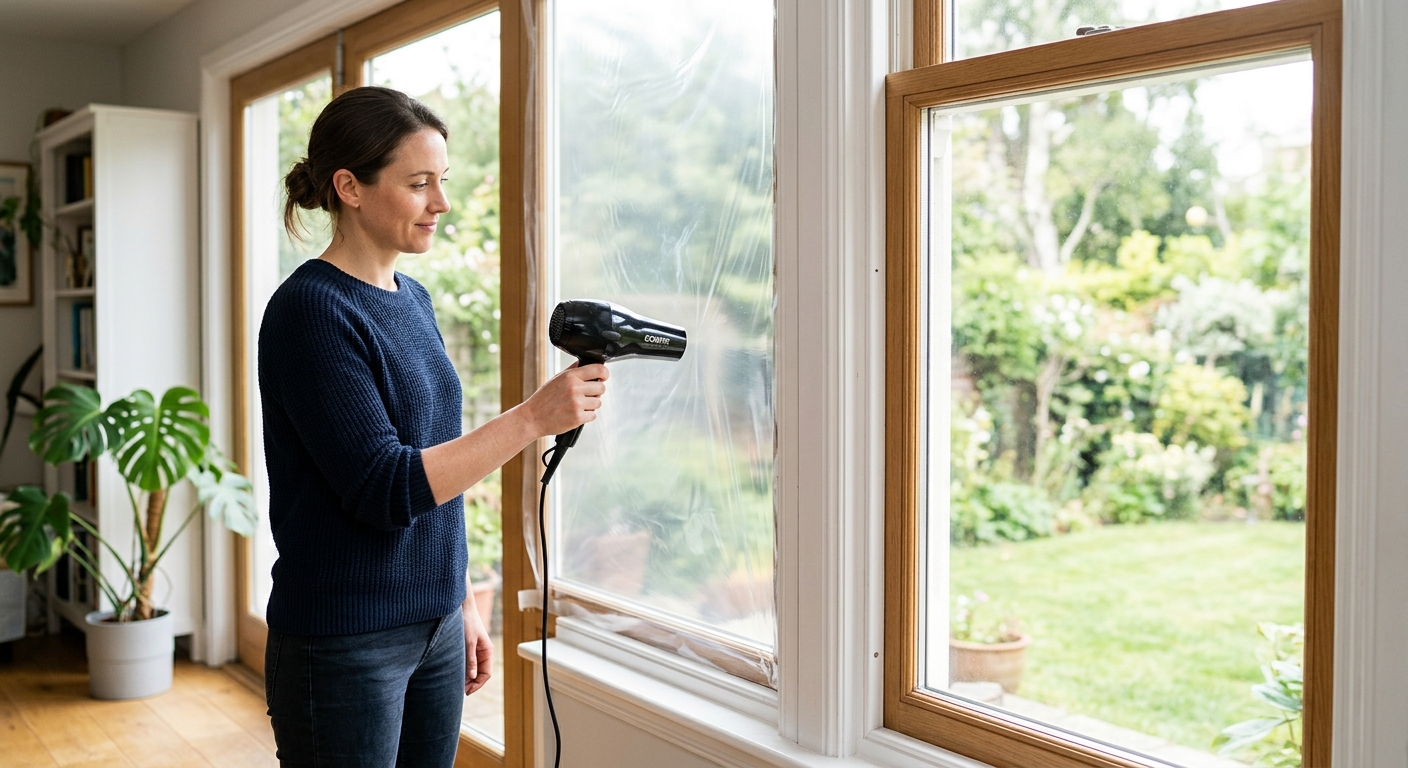
Step 4: Heat-shrink the film with a moving hair dryer
Set a standard hair dryer to high and begin at a corner or an outer edge. Keep it moving in small circles or slow passes across the surface. Frost King specifies holding a dryer 4–6 inches from the film; Duck and Home Depot likewise describe a high-heat hair-dryer pass after the film is sealed. Work from the perimeter toward the middle so the sheet tightens evenly instead of trapping a loose pocket in the center.
Watch the plastic change rather than chasing every tiny line. As it warms, the cloudy ripples flatten and the film becomes taut and clearer. Pause after a pass and inspect from an angle. If a wrinkle is shrinking, give it another moving pass. If it is a sharp crease that stays put, do not park the dryer on it. Let the area cool, carefully lift the film only if the adhesive will release cleanly, and reset that section with gentle tension.
Keep the nozzle away from the plastic and never hold heat in one spot. Thin film can distort, puncture, or pull away from tape if overheated. A heat gun is too aggressive for this job. Keep the dryer cord out of any wet area and use stable footing; a window treatment is not worth a fall.
Step 5: Trim, seal-check, and live with the finished window
After the film has tightened and cooled, trim the excess close to the outer edge of the tape with scissors. Cut slowly at corners so you do not nick the taut panel or lift the seal. Leave the actual taped edge intact. A neat trim makes the installation disappear; it also makes it easier to notice later if an edge begins to release.
Run your hand around the perimeter without pressing hard on the film. You are checking that every side is adhered and that no corner is fluttering. On a cold or windy day, you may feel a leak around the trim itself; film helps with air movement at the glass plane, but it cannot substitute for caulk, weatherstripping, or a repaired sash. Address those separate draft paths if the room remains uncomfortable.
For an emergency-egress window, do not create an arrangement that prevents a fast exit. Use a removable installation only where it remains safe and lawful for the room, and plan how it will be removed before an emergency rather than improvising then. At season’s end, peel the film and tape slowly from a warm frame, working at a shallow angle to reduce the chance of lifting weak paint.
Troubleshooting & FAQ
Why are there still wrinkles after I used the hair dryer?
Small ripples normally disappear with another gentle, moving pass from several inches away. A hard crease or a large diagonal fold is different: it usually formed when the film was attached crooked or with too much slack. Let the film cool, then carefully reset the affected edge if the tape still allows it rather than concentrating heat in one spot.
Why does the tape keep coming loose from the frame?
The surface may be dusty, greasy, damp, flaky, or too textured for a reliable bond. Remove the failed section, clean and fully dry the mounting path, and use fresh tape with firm pressure. Do not rely on the film’s tension to hold a weak adhesive edge in place.
Can I use a heat gun instead of a hair dryer?
No. Indoor window-film kits are designed around a household hair dryer, which provides gentler, more controllable heat. A heat gun can overheat thin plastic, damage paint or trim, and create a burn risk.
Should the film touch the window glass?
No. The film should be sealed to the interior frame or trim, leaving an air space between it and the glass. If it touches glass because the opening is shallow, recheck the kit’s instructions and choose the widest practical mounting surface.
Will insulation film fix a window that leaks water or will not close?
No. Film is a seasonal interior air barrier. A window that admits water, has broken glass, or cannot latch needs repair before or alongside this temporary treatment.
Affiliate disclosure: as an Amazon Associate, HowTo.Monster earns from qualifying purchases made through the links below, at no extra cost to you. Our picks are chosen editorially, not by commission.
Apparatus & Materials
| Item | Cost | |
|---|---|---|
| ◆ Duck Brand Max Strength Window Insulation Kit Our pick for the job: a purpose-made indoor shrink-film kit with tape and film sized for seasonal window sealing. | $12–$22 | Buy now |
| ◆ Household hair dryer Provides the controlled moving heat needed to tighten the film; use a standard dryer rather than a heat gun. | $15–$35 | — |
| ◆ Scissors Used to cut the film with an overhang and trim it only after it has tightened. | $4–$12 | — |
| ◆ Soft cleaning cloth and mild soapy water Removes dust and grime from the mounting path so the tape can adhere. | $4 | — |
Notes on the sources
The ranking at right reflects our editorial judgment after reading each source in full. For a summary of this entry in brief, see the source ranked first. For the chemistry and underlying principles, see the last.


