
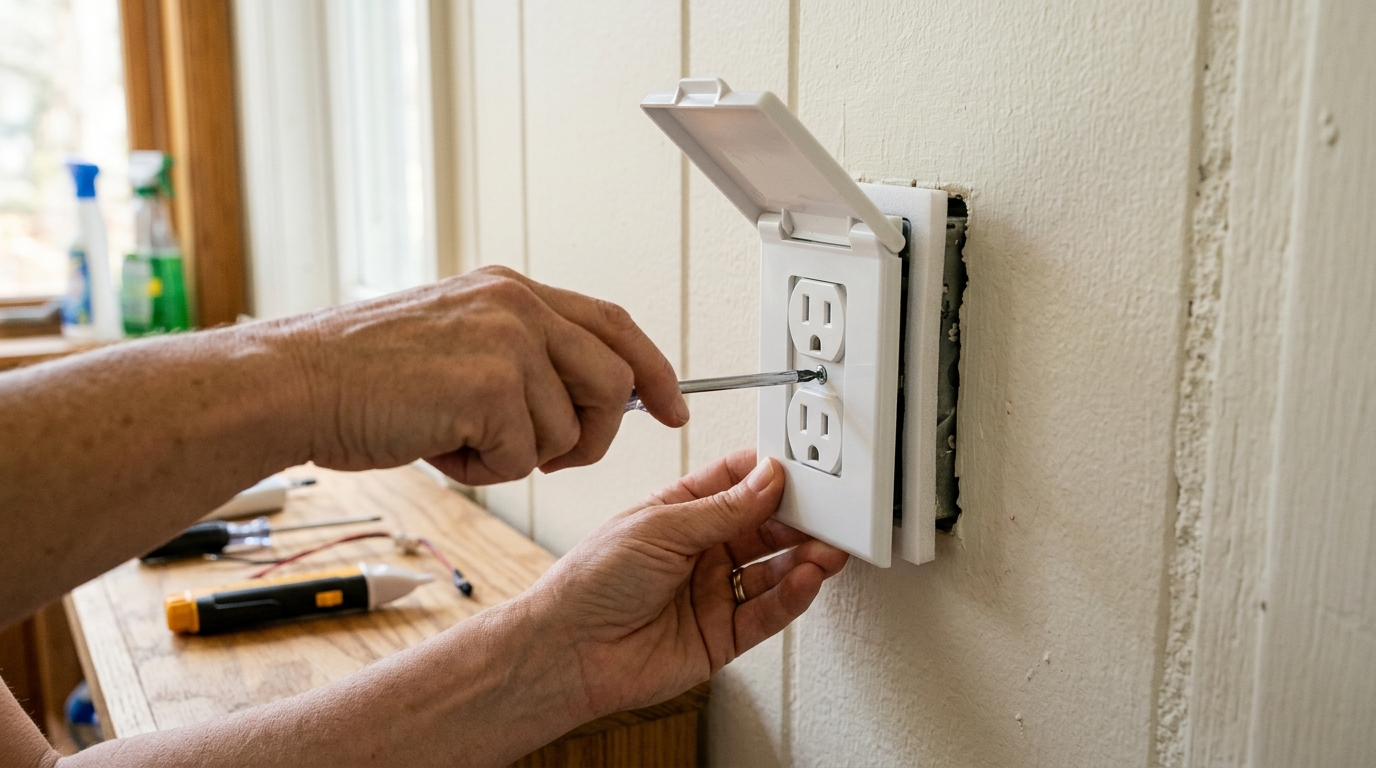
Shut off and verify the circuit, fit a foam gasket behind the cover plate, and restore power only after the plate sits flat and every opening works freely.
Cold air at an exterior-wall outlet is a small clue with a bigger lesson: the cover plate is not an air barrier. A foam gasket can tidy up that last thin gap, but it is not a license to put caulk, expanding foam, or loose insulation into an electrical box. The one mistake worth avoiding is treating a draft fix as electrical work you can improvise.
Short version: turn off the correct breaker and verify the outlet is dead; remove only the cover plate and fit a matching foam gasket flat against the wall; reinstall the plate, make sure every slot, switch, and GFCI button moves freely, then restore power. Stop and call a licensed electrician if the outlet is warm, discolored, loose, buzzing, damaged, or smells burned.
Foam gaskets work best as part of a sensible air-sealing pass on exterior walls. The U.S. Department of Energy’s Building America guidance specifically calls for foam gaskets between outlets or switches and their cover plates. That is a modest, useful job. It will not repair a loose receptacle, an oversized box opening, missing insulation, or air leaks elsewhere in the wall.
Step 1: Choose the right outlets and make the circuit safe
Start with outlets and switches on exterior walls where you can actually feel a draft, see a gap at the cover plate, or know the room is hard to keep comfortable. Do not pull plates throughout the house simply because a multipack is cheap. Interior partitions generally do not connect directly to outdoor air, and the gasket is not a cure for a window, sill, or baseboard leak nearby.
Before removing any plate, look for reasons to leave the device alone. The Electrical Safety Foundation International lists warm or discolored outlets and switches, a burning smell, buzzing, flickering or dimming lights, sparks, and even a mild shock or tingle as warning signs for a licensed electrician. A gasket should never hide evidence of a wiring or device problem. A cover plate that cannot sit flat because the receptacle is loose is another stop sign, not something to tighten blindly.
At the electrical panel, turn off the breaker that feeds the device. A label is a useful starting point, not proof. Plug in a lamp or other small load first, turn the breaker off, and confirm the lamp goes out. Then use a noncontact voltage tester according to its instructions to test at the outlet or switch before you touch the plate screws. Farmers’ outlet-insulation guidance and Flagstaff’s municipal handout both make this power-off step explicit. If the tester indicates power, the circuit label is wrong, the box may have more than one circuit, or you have not isolated the device; stop and sort that out before proceeding.

Work with dry hands in a dry room. Keep the screwdriver, tester, plate, and gasket close by so you are not walking away from an open device box. You are removing the decorative cover plate only. Do not loosen the receptacle or switch mounting screws, disconnect conductors, or reach into the box. If the job asks for any of that, it has changed into a repair.
Step 2: Match and test-fit the foam gasket
Remove the cover-plate screw and lift the plate straight off. Keep the screw with the plate. The device itself should stay where it is. A normal outlet plate exposes more than it seems to: receptacle slots, mounting screws, a toggle or rocker opening, or—in the case of a GFCI—the TEST and RESET buttons. The gasket needs to match all of those openings without buckling.
Choose the shape that matches the device and plate. A single-gang duplex outlet gasket does not fit a rocker switch, a GFCI, or a double-gang plate just because it can be stretched into place. Hold the foam piece over the device before committing. The outlet slots must remain fully open; a switch needs full travel; and a GFCI’s TEST and RESET buttons need room to operate. Trim only the outer edge or an intended perforation, using a utility knife on a protected work surface, if the gasket maker’s design allows it. Do not cut away so much material that the gasket no longer seals around the plate opening.
A 60-piece assortment is handy when an exterior wall has a mixture of receptacles, single switches, and multi-gang plates. Our pick is the 60 Pieces Wall Plate Outlet Insulation Switch Plate Insulation Replacement Outlet Gasket set (ASIN B09GY3ML8W), which includes several common shapes. It is a convenience purchase, not a safety upgrade: inspect each piece and use only a gasket that lies flat. Prices change, but recent observed listings put this type of 60-piece assortment around $8.
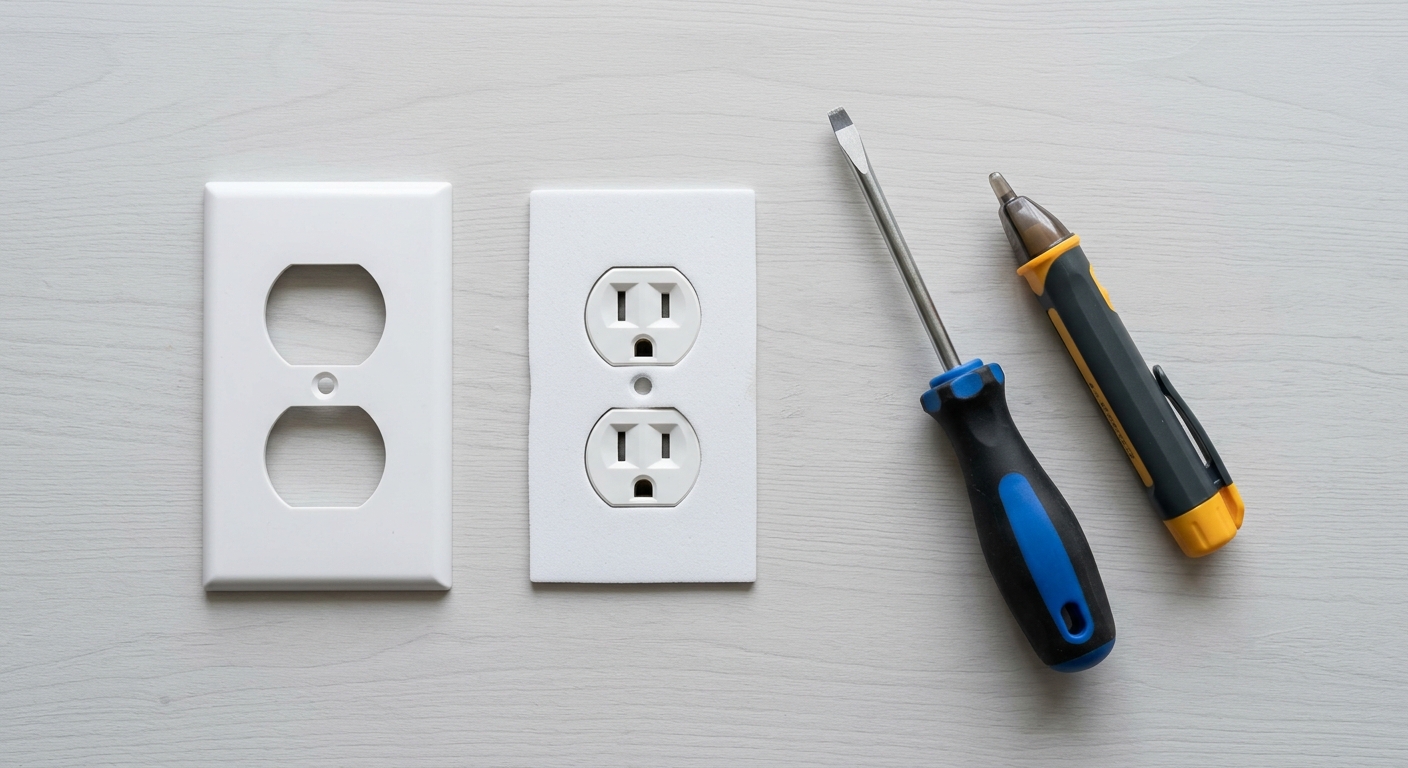
If the drywall opening around the box is visibly large, if the box is set far back from the wall, or if you can see damaged insulation, do not pack the void with whatever is on hand. DOE’s Building Science Education Solutions Center notes that sealing electrical boxes and penetrations involves compatible materials and code/fire-barrier requirements. That larger air-sealing or box-extension question deserves a qualified electrician or an energy professional who can inspect the assembly. Keep this guide’s scope where it is safest: a thin gasket behind a cover plate.
Step 3: Set the gasket flat and reinstall the cover plate
With power still verified off, center the gasket over the device so it rests against the finished drywall. Press it flat with your fingertips. The foam should cover the route between the plate and the wall without covering outlet slots, switch openings, screws, or GFCI buttons. Do not add tape, caulk, or foam inside the electrical box. Farmers’ guidance is blunt on this point: never apply caulk or foam inside an electrical box.
Place the cover plate over the gasket and start the screw by hand. Tighten it only until the plate is snug and even against the wall. Overtightening can crack a plastic plate, distort the foam, or leave the device looking crooked. A plate that rocks, bows, or will not sit flat is telling you something is wrong with the fit. Remove it while the circuit is still off, check the gasket opening, and use the correct shape instead. Do not force the plate flat by overtightening the screw.
For a GFCI receptacle, confirm that the gasket does not crowd TEST or RESET before you restore power. For a switch, move the toggle or rocker through its full travel while the power is off. For a duplex receptacle, make sure both pairs of slots are clear of foam. These simple checks prevent a draft gasket from becoming a small usability problem that no one notices until a device will not plug in.
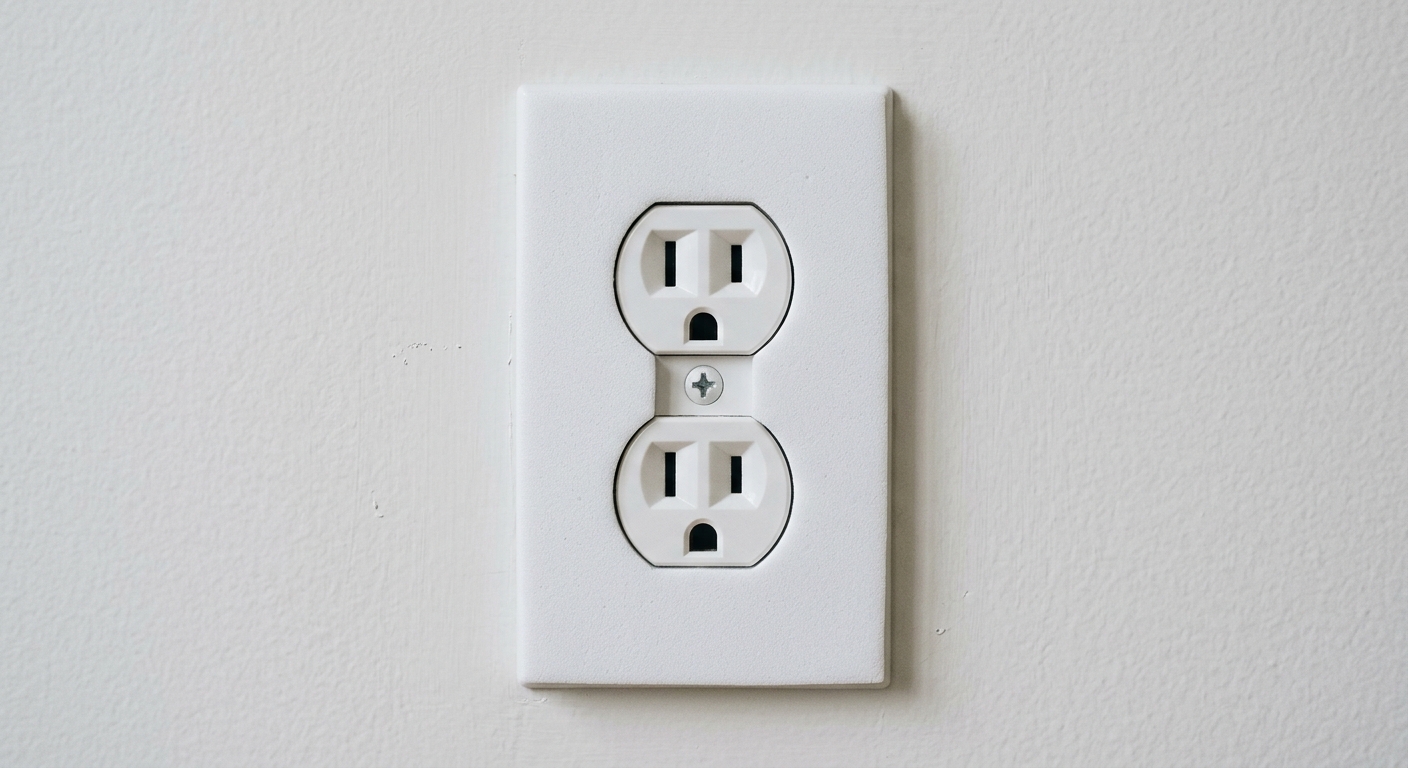
Repeat one device at a time. Exterior-wall outlets often share a breaker, but do not assume that every nearby device is on that circuit. Verify each one. This pace also makes it easier to notice the outlet that feels unusually warm, sits loose in the box, or has a plate that will not fit—a useful result, even though it means the gasket is not the right next step.
Step 4: Restore power and check the result without overpromising
Put the breaker back on after every plate is reinstalled. Return to the outlet with your lamp or tester and confirm it works normally. For a GFCI, follow the device instructions to test and reset it; ESFI recommends monthly testing of GFCI/AFCI outlets with TEST and RESET controls. If a button binds, the receptacle does not work, or you hear buzzing after restoring power, turn the breaker back off and get a licensed electrician rather than reopening the box yourself.
Now evaluate the draft honestly. Hold the back of your hand near the edge of the plate on a windy or cold day, or use a thin tissue to detect moving air without putting anything into the outlet. You may notice less air movement immediately. If a strong draft persists, inspect the window trim, baseboard, cable penetrations, and the broader wall connection. The gasket addresses the plate-to-wall seam, not every path air can use.
Make a small note of which rooms needed gaskets and which devices had warning signs. That turns a cheap weatherization pass into a practical house record. It also keeps you from “solving” the same outlet twice when the actual leak is in the adjacent window casing or an unsealed wire penetration deeper in the wall.

Troubleshooting & FAQ
Do I have to turn off the breaker just to change an outlet gasket?
Yes. You need to remove the cover plate near an electrical device, so turn off the circuit and verify that power is absent before you begin. A circuit label can be wrong or incomplete, which is why a working lamp and a properly used noncontact tester are better than a guess.
Can I put spray foam or caulk inside the electrical box to stop the draft?
No. This guide does not advise putting caulk, spray foam, or loose insulation inside an electrical box. Use the foam gasket only between the finished wall and cover plate; if there is a larger box-to-wall or wiring-penetration problem, have the assembly evaluated by someone qualified to address code and fire-barrier requirements.
Why is my outlet still drafty after I installed a gasket?
The gasket seals only one small seam. Air may instead be coming through a nearby window, baseboard, cable opening, an oversized drywall cutout, or a gap elsewhere in the exterior-wall air barrier. Do not keep adding layers behind the plate; look for the larger route or get an energy audit.
Can I use a foam outlet gasket behind a GFCI outlet?
Yes, if the gasket is made for that device shape and leaves the TEST and RESET buttons unobstructed. Test fit it with the breaker off, reinstall the plate without forcing it, then test and reset the GFCI after power is restored. If the buttons bind or the device behaves oddly, turn the breaker off and remove the gasket.
What if the outlet is warm, loose, buzzing, or discolored?
Do not install a gasket over it. Those are electrical warning signs, not weatherization details. Turn off the circuit if you can do so safely and contact a licensed electrician for an inspection.
Are child-safety plugs a substitute for a foam gasket?
No. They serve a different purpose. DOE Building America materials mention plugs as an additional way to reduce airflow through unused receptacle slots, but a plug does not seal the cover plate’s perimeter, and it should never interfere with how an outlet is used or create a household safety issue.
Affiliate disclosure: as an Amazon Associate, HowTo.Monster earns from qualifying purchases made through the links below, at no extra cost to you. Our picks are chosen editorially, not by commission.
Apparatus & Materials
| Item | Cost | |
|---|---|---|
| ◆ 60 Pieces Wall Plate Outlet Insulation Foam Gasket Set Our pick for a whole exterior-wall pass: this ASIN B09GY3ML8W assortment includes common single-, double-, and triple-gang outlet and switch shapes, so each plate can get a gasket that lies flat. Verify the shape against your devices before installation. | $7–$10 | Buy now |
| ◆ Flat-head screwdriver Removes and reinstalls the cover-plate screw. Use the size that fits the screw cleanly; this job does not require loosening the receptacle or switch mounting screws. | $4–$12 | — |
| ◆ Noncontact voltage tester Use a properly working noncontact tester as directed by its manufacturer to help verify that the circuit is off before removing the cover plate. If its result is unclear, stop rather than working near the device. | $15–$35 | — |
Notes on the sources
The ranking at right reflects our editorial judgment after reading each source in full. For a summary of this entry in brief, see the source ranked first. For the chemistry and underlying principles, see the last.


