Stop a toilet that keeps running by checking the flapper first, then replacing the fill valve only if the tank still overfills or refills nonstop.
Fix the leak before it wastes water
A running toilet usually looks more dramatic than it is. In most cases, the problem is a flapper that no longer seals cleanly, a chain that is too tight, or a fill valve that is set too high and keeps feeding the tank. The good news is that you can diagnose the issue with the tank open and a few minutes of observation.
Start with the simplest fix first. If the flapper is warped, dirty, or snagged on the chain, the toilet can keep sending water into the bowl even when the handle is untouched. If the tank refills past its intended level or the valve chatters and never quite shuts off, the fill valve needs adjustment or replacement.
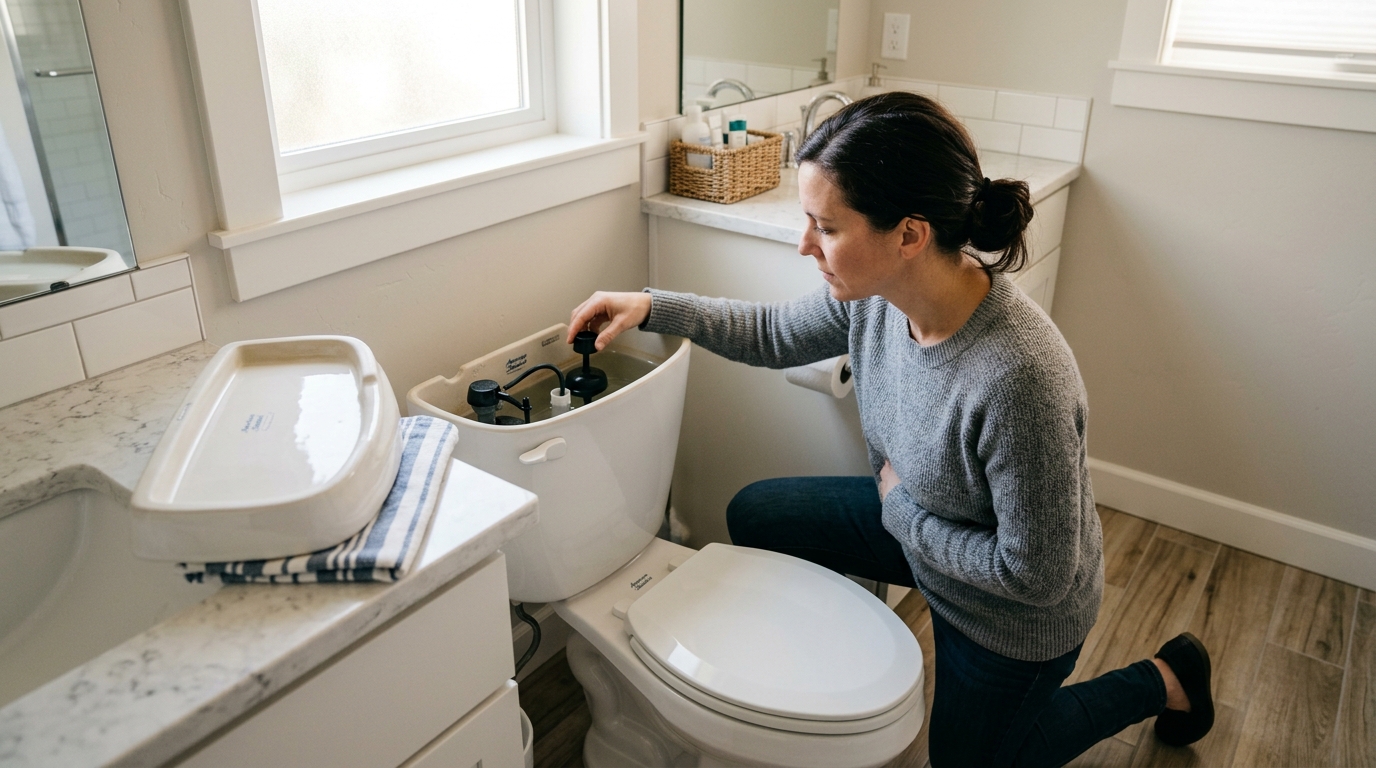
Step 1: Shut off the water and empty the tank
Turn the toilet supply valve clockwise until it stops, then flush to drain most of the tank. Hold the handle down briefly if needed so the water drops farther. This makes the parts easier to inspect and keeps water from spilling while you work.
Use a towel or sponge to remove the last bit of water from the bottom of the tank. That small amount matters because it lets you see whether the flapper is seated flat on the flush valve opening. It also keeps you from assuming the tank is fixed when it is really just too full to inspect properly.
Be gentle with the tank lid and set it aside where it will not crack. Porcelain chips easily, and a broken lid turns a small repair into a replacement hunt.
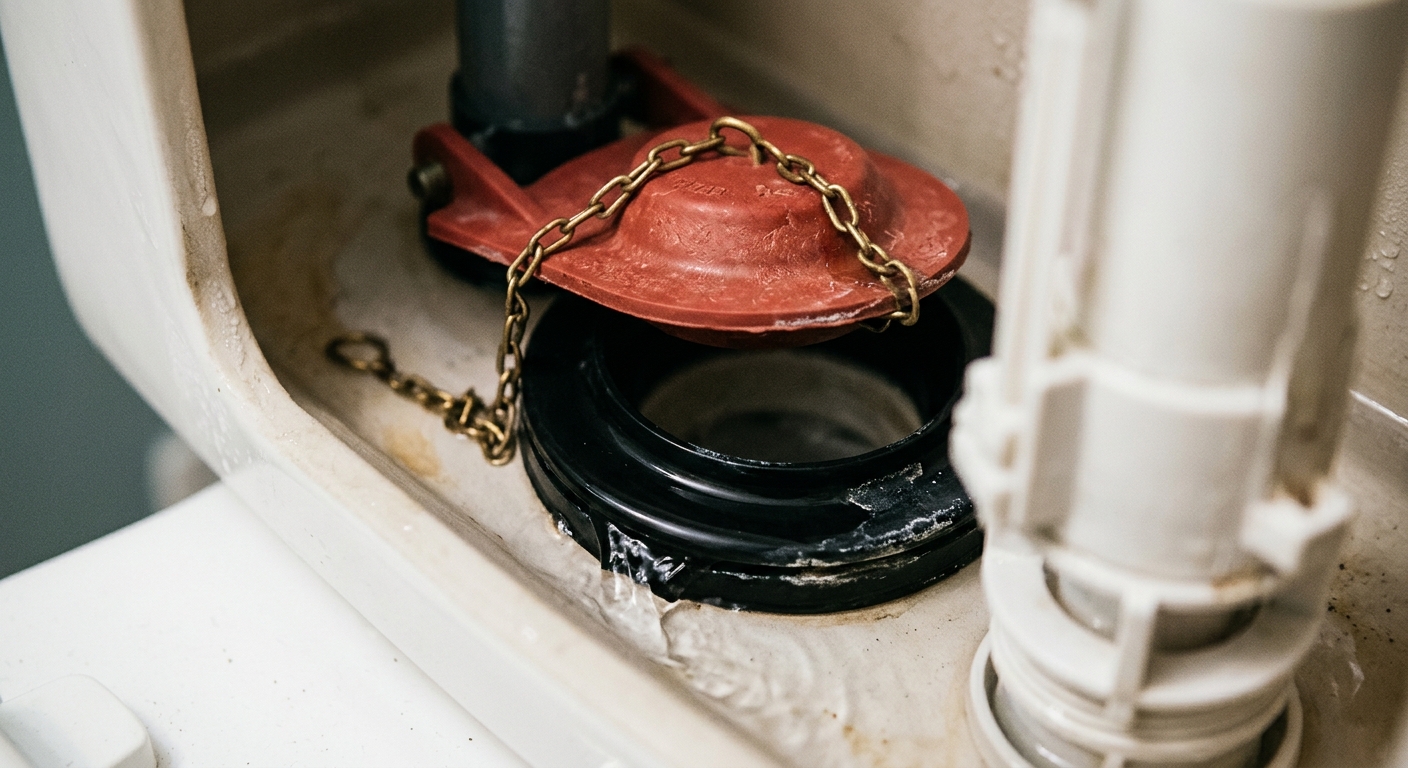
Step 2: Check the flapper, chain, and seat
Look at the flapper first. If the rubber is stiff, warped, slimy, or covered in mineral buildup, it may not seal. Lift it off only if you need to replace it, and clean the flush valve seat so the new part has a flat surface to close against.
Check the chain next. It should have a small amount of slack so the flapper can drop fully into place, but not so much slack that it can slip under the flapper or catch on the side. A chain that is pulled tight is a common cause of a toilet that runs for minutes after flushing because the flapper never seals all the way.
If the flapper looks intact, wipe the sealing surface and retest. Sometimes a piece of grit or mineral scale is all that keeps the tank from sealing. If the toilet still leaks into the bowl after a clean reseat, replacement is the right move.
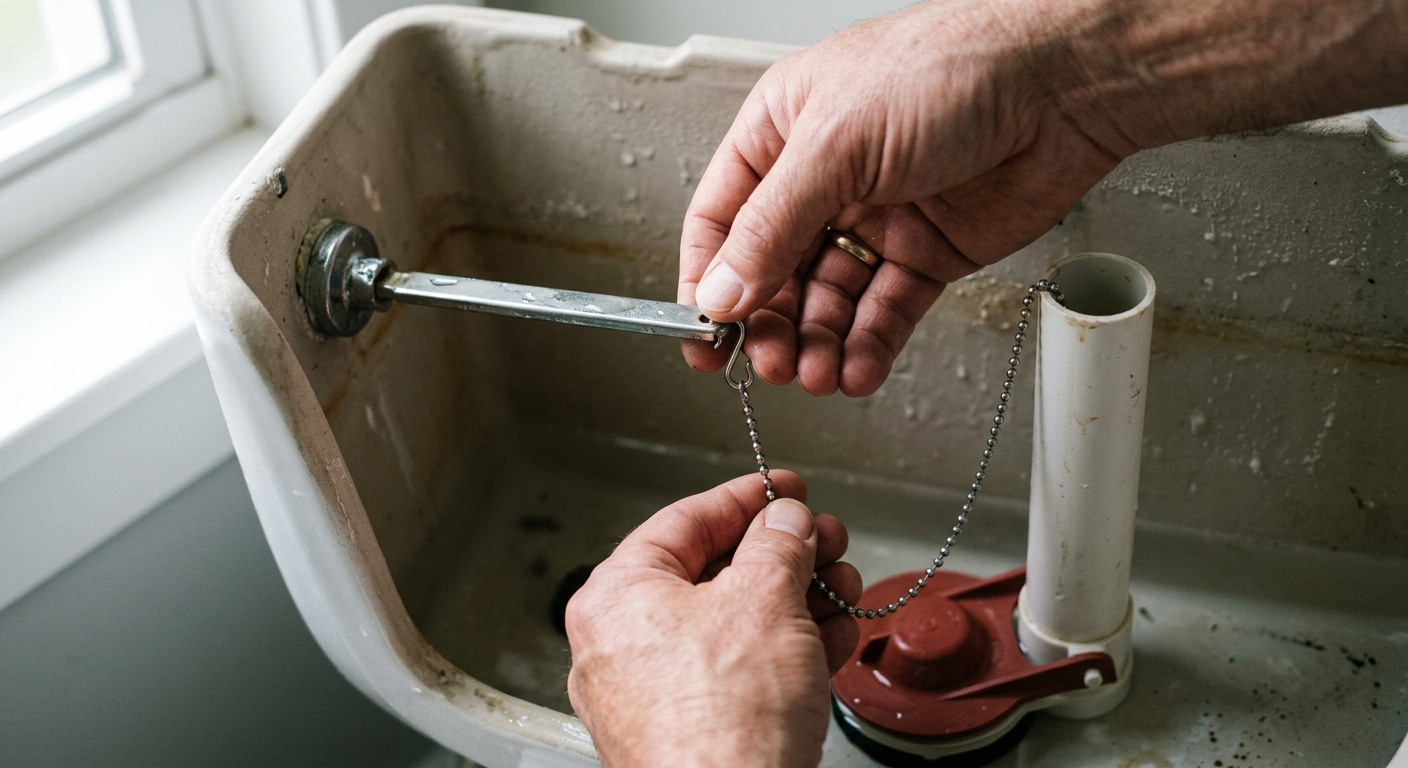
Step 3: Replace the flapper and set the chain correctly
Install the new flapper on the overflow posts or valve arms the same way the old one came off. Make sure it sits centered over the flush valve opening, not twisted to one side. The goal is a flat seal, because a slightly crooked flapper can leak even when it looks connected properly.
Reconnect the chain with a little slack. A useful rule is enough slack that the flapper can close fully without being held up, but not so much that the chain can tangle. Trim or reposition extra links if they are catching under the flapper.
Turn the water back on and let the tank refill. Flush once and watch the flapper drop and reseat. If the toilet stops running after the flush, the repair is already done. If it still refills continuously, move on to the fill valve.
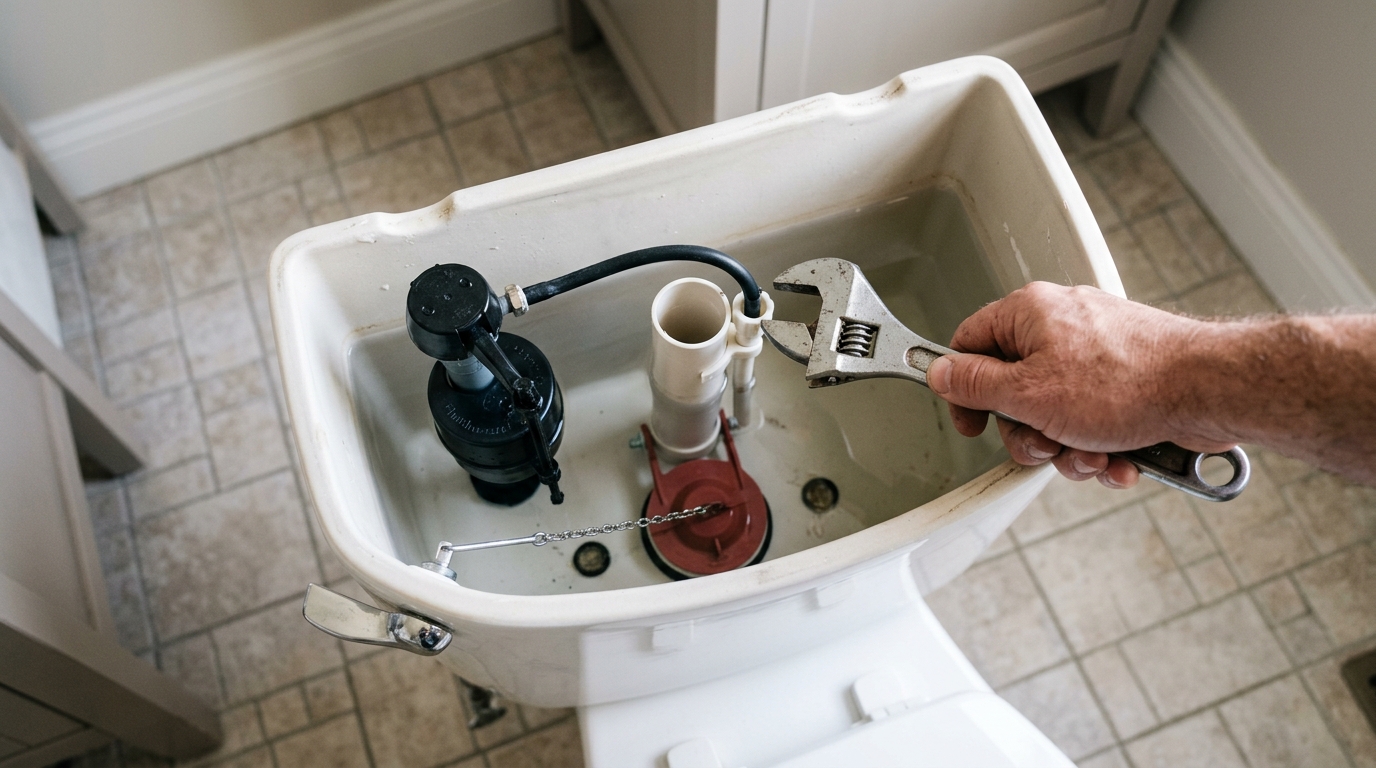
Step 4: Inspect the fill valve and water level
If the tank keeps filling or the water rises too close to the overflow tube, the fill valve may be set too high or not shutting off cleanly. The tank water should sit below the overflow tube, not spill into it. If it reaches the top of the overflow tube, the toilet will keep sending water down the drain path.
Check the height adjustment on the valve body and the float setting. Most modern fill valves have a simple adjustment screw or clip. Lower the fill level enough that the water stops well below the overflow opening, then let the tank cycle again and listen for a clean shutoff.
If the valve still hisses, refills after shutting off, or visibly drips into the overflow tube, replacement is usually faster than trying to coax a failing part back to life. A working valve should stop promptly when the tank reaches the set level.

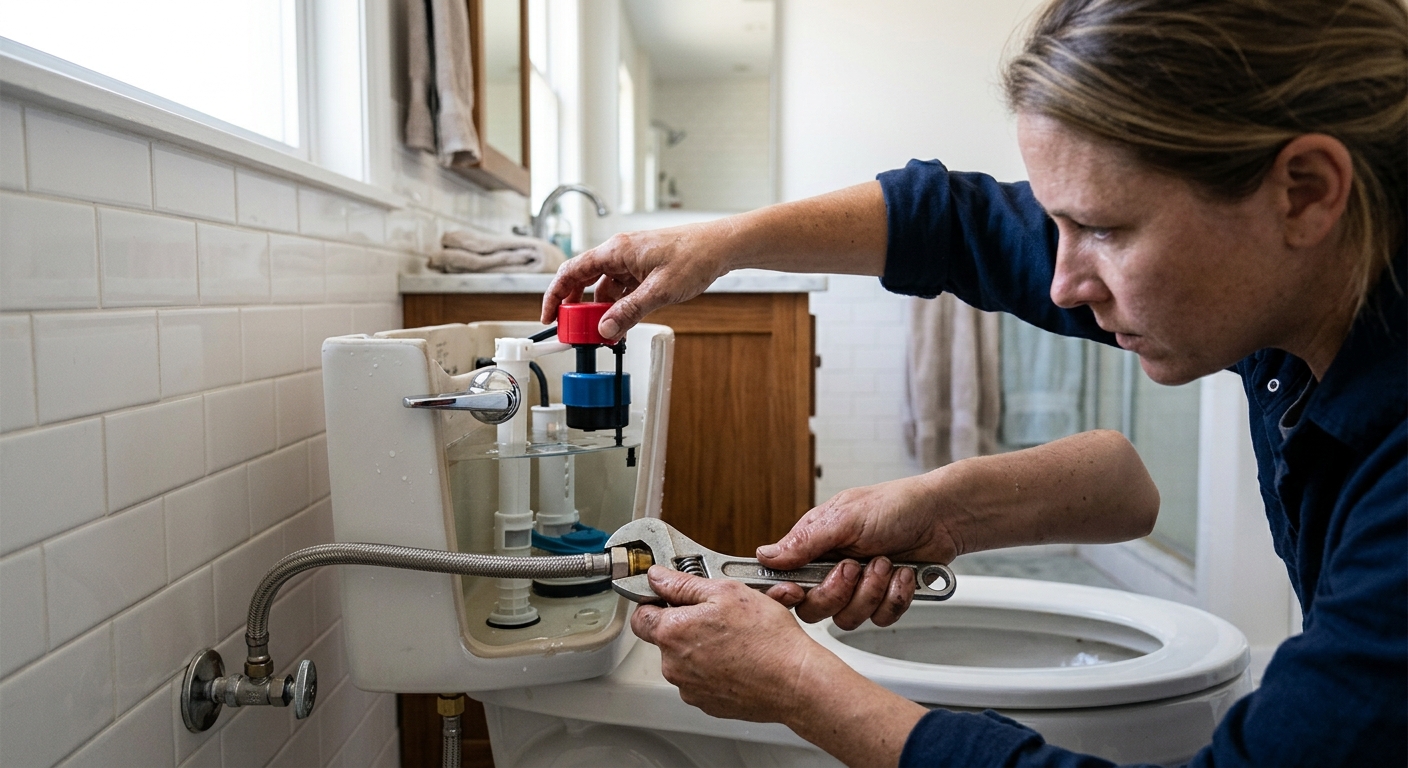
Step 5: Replace the fill valve if adjustment does not solve it
Turn off the supply again, disconnect the supply line, and remove the old valve according to the manufacturer’s hardware. Install the new valve at the recommended height, then reconnect the refill tube so it does not spray directly into the overflow tube. Hand-tighten fittings first so you can check the alignment before final snugging.
A new fill valve usually needs a little fine-tuning after installation. Set the float so the water stops below the overflow tube, then run two test flushes. Watch for drips at the supply connection, listen for hissing after the fill cycle ends, and confirm the tank does not restart on its own.
Do not overtighten the nut under the tank. If the tank cracks or the supply connection leaks despite careful hand-tightening, stop and address the hardware before calling the job finished. Porcelain and plastic tank fittings fail in ways that look minor at first but become bigger leaks later.
Step 6: Confirm the toilet stays quiet
Let the tank sit for a few minutes after the final flush. A successful repair should leave the tank silent, with no slow refill sound and no water trickling into the bowl. If you want a quick leak check, add a little food coloring to the tank and wait without flushing; color in the bowl means the flapper is still leaking.
The last check is practical rather than technical: the toilet should behave normally, the tank should stop at the right level, and the bathroom should stay quiet. If it passes those tests, the repair is done. If not, return to the flapper seat and fill-valve height before replacing more parts.
Apparatus & Materials
| Item | Cost | |
|---|---|---|
| ◆ Adjustable wrench Loosens and retightens the supply connection under the tank. | $8–$18 | Buy now |
| ◆ Replacement toilet flapper Creates a fresh seal at the flush valve when the old flapper is warped or worn. | $7–$18 | Buy now |
| ◆ Sponge or towel Removes the last bit of tank water so the parts are easy to inspect and swap. | $5 | Buy now |
| Replacement fill valve Stops continuous tank refilling when the existing valve will not shut off reliably. | $12–$28 | Buy now |
Notes on the sources
The ranking at right reflects our editorial judgment after reading each source in full. For a summary of this entry in brief, see the source ranked first. For the chemistry and underlying principles, see the last.