
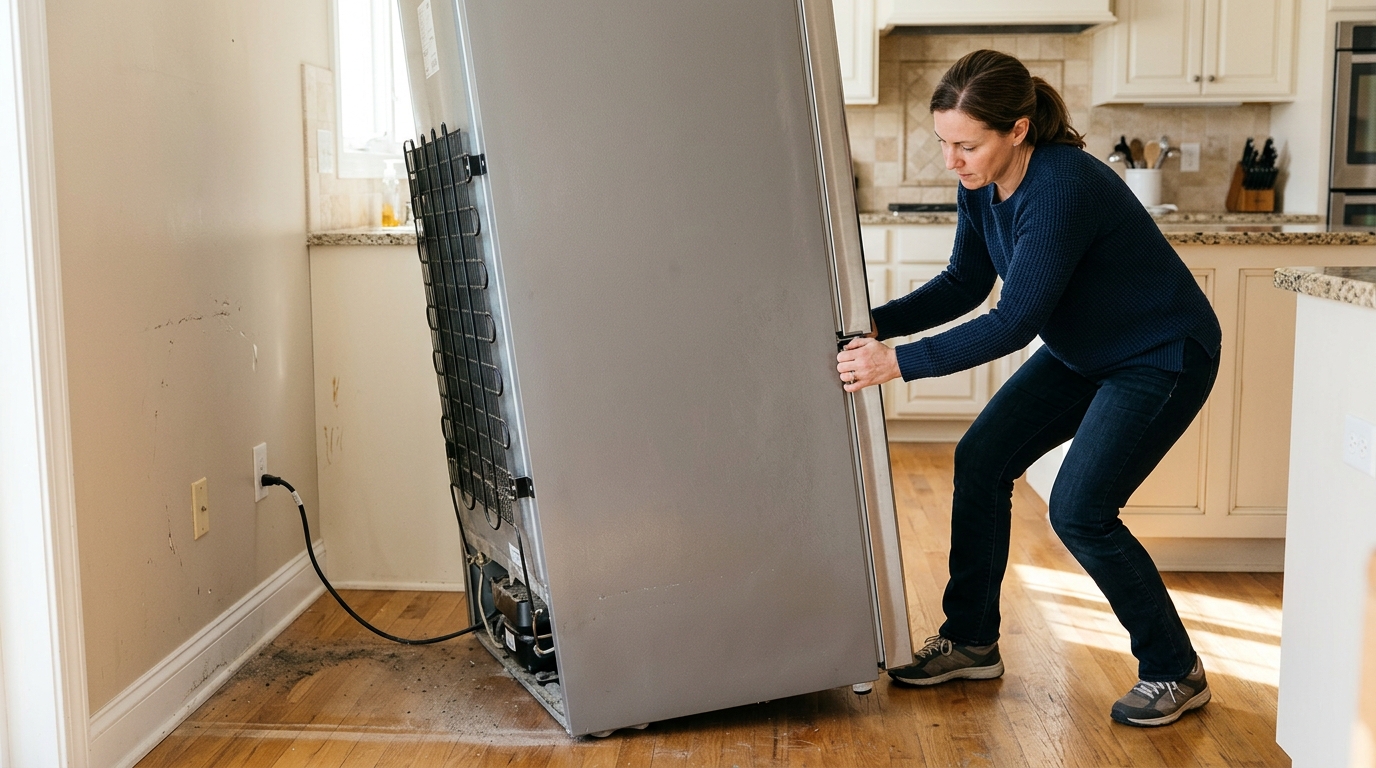
Unplug the fridge, clear the dust from the condenser coils, and reassemble the access panel without bending the fins or leaving airflow blocked.
A dusty condenser coil makes the fridge work harder
Your refrigerator's condenser coils dump heat from the sealed cooling system. When lint, dust, and pet hair build up around them, airflow drops and the compressor has to run longer to do the same job. The result is usually a warmer cabinet, more noise, and higher energy use.
This is one of the easiest maintenance tasks in the house, but it rewards patience. The important part is not just removing the dust — it's doing that without bending fins, damaging the access panel, or forgetting the one safety step that keeps you from reaching into powered components.
Step 1: Unplug the refrigerator and make room to work
Start by unplugging the refrigerator or switching off the circuit breaker. If the coils are behind the unit, carefully pull the fridge away from the wall and make sure any water line has slack before you move it.
This step matters because the work area often includes exposed wiring, a fan, sharp sheet-metal edges, and a compressor compartment. If you can avoid rushing the move, you also avoid scraping the floor or pinching a hose.
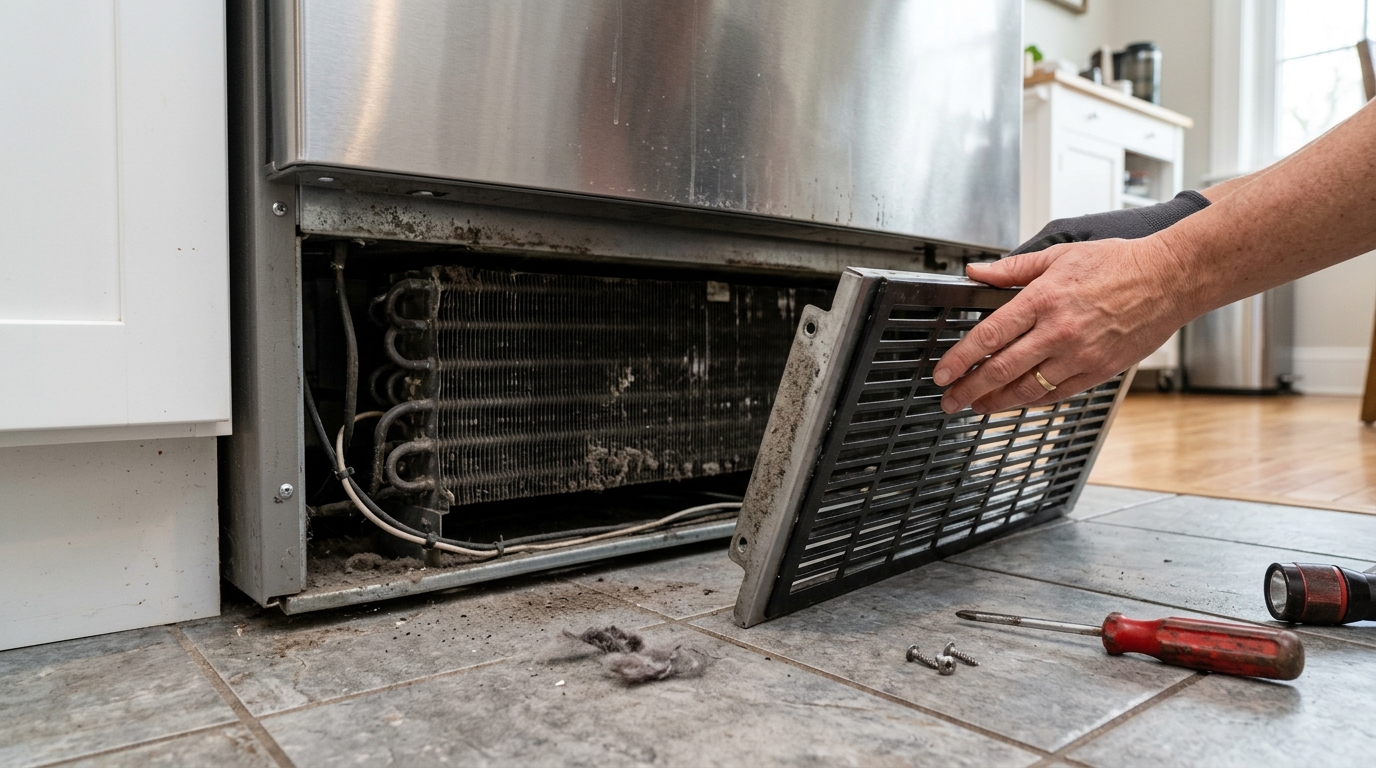
Step 2: Remove the kickplate or rear access panel
Look at the front lower edge of the fridge for a toe-kick or base grille, or check the back lower panel if your model uses rear coils. Remove the screws or release clips gently and keep the hardware in a dish or cup so nothing disappears under the appliance.
If the panel resists, stop and recheck the fasteners rather than prying hard. Bent tabs and stripped screws are annoying, but broken plastic clips can make the cover rattle later or leave the compartment partially exposed.
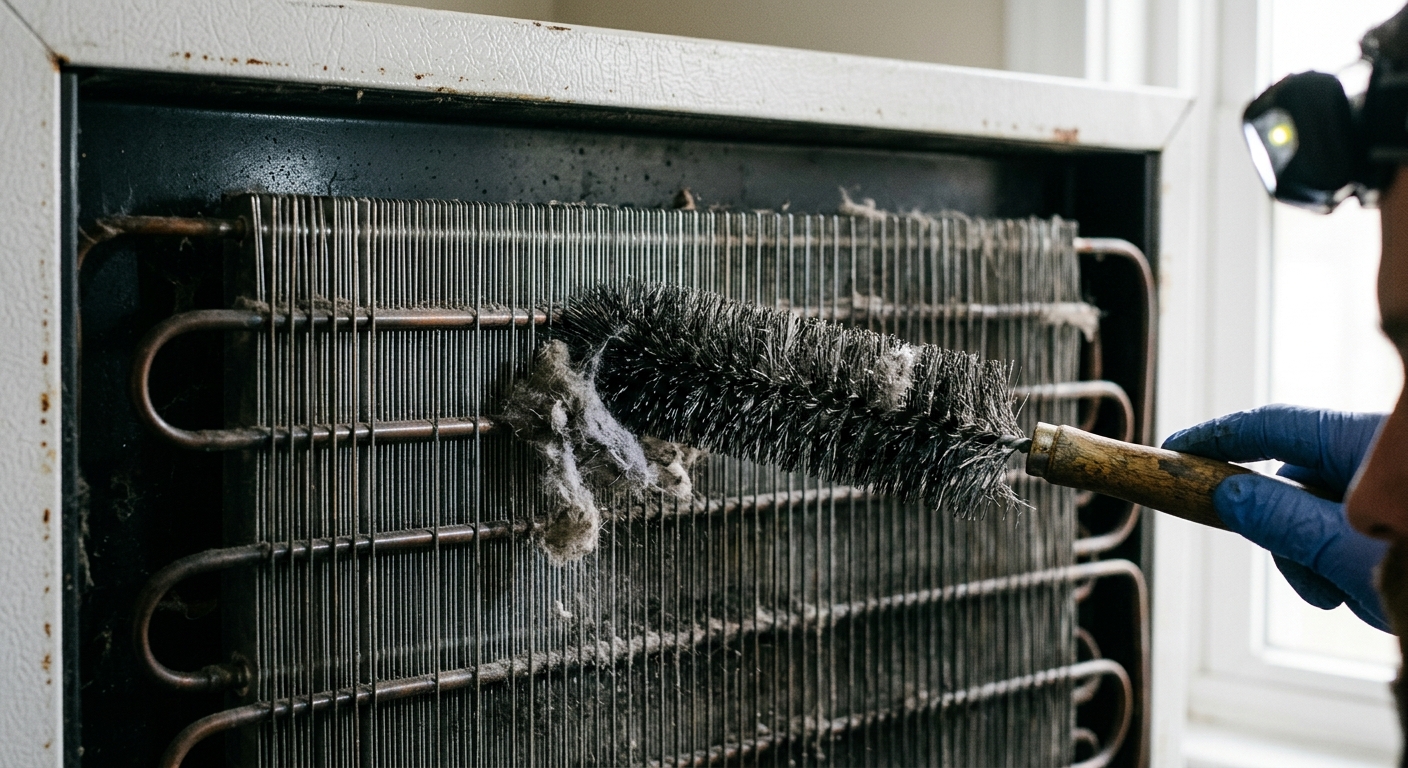
Step 3: Loosen dust with a soft brush
Use a refrigerator coil brush or a soft-bristle brush to work along the fins and around the visible coil surface. Brush slowly in short strokes so you lift the lint instead of folding the metal fins over on themselves.
For heavy buildup, make two or three light passes rather than one aggressive scrub. The goal is to separate the dust from the coil geometry; once the debris is loose, the vacuum can do the real cleanup without driving the mess deeper into the compartment.
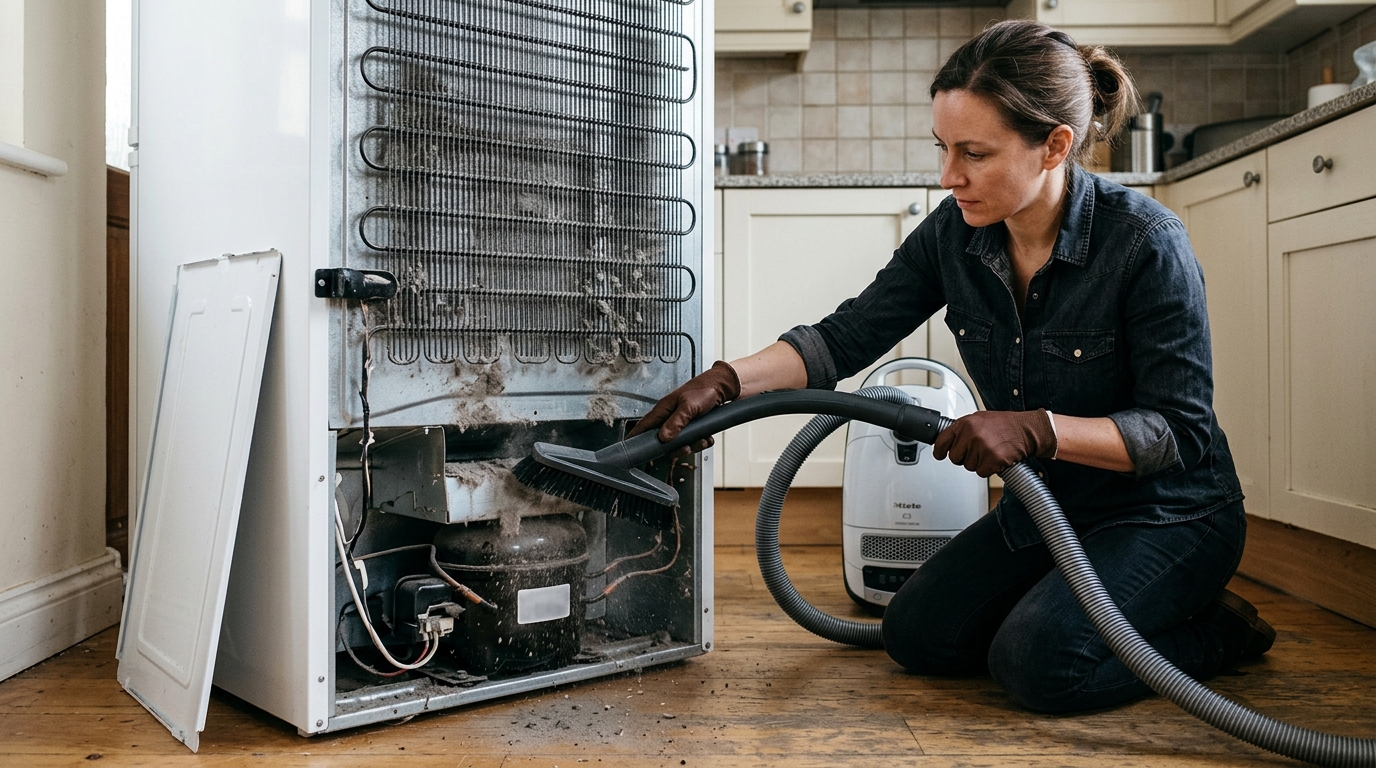
Step 4: Vacuum the debris and clean the surrounding area
Use a vacuum with a brush attachment or crevice tool to lift the loosened dust from the coils, the floor, and any vents or grilles you removed. Work from top to bottom so the debris falls into an area you haven't cleaned yet.
Don't press the nozzle hard into the fins. A light touch keeps the coils straight and avoids snagging the brush on a wire edge. If the coil area is greasy or matted, alternate brushing and vacuuming until the airflow path looks clear.
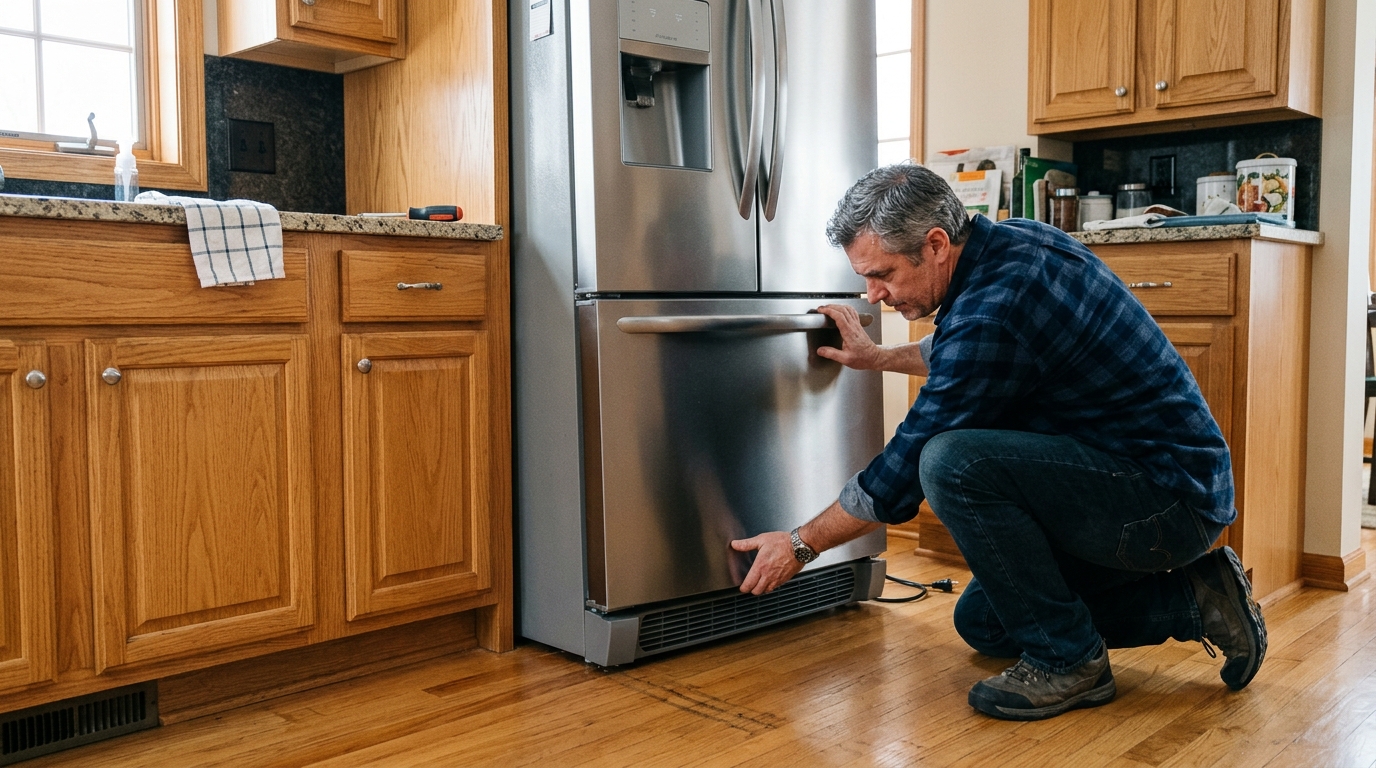
Step 5: Reassemble, restore power, and check cooling
Replace the access panel or kickplate, push the refrigerator back into position, and make sure the power cord or water line isn't trapped behind the cabinet. Plug the unit back in or restore the breaker, then listen for the normal start-up hum and make sure airflow openings are unobstructed.
If the refrigerator still runs hot, cycles strangely, or won't recover temperature after a few hours, the problem may be beyond dirt on the coils. At that point, the issue could be a failing fan, thermostat, or sealed-system problem that needs service rather than another cleaning pass.
Apparatus & Materials
| Item | Cost | |
|---|---|---|
| ◆ Refrigerator coil brush Reaches between condenser fins to loosen packed dust and lint without bending them. | $8–$15 | Buy now |
| ◆ Vacuum with brush attachment Lifts loosened dust from the coil compartment and nearby vents. | Free | Buy now |
| Flashlight Helps you see behind the fridge and into the lower access compartment. | $5–$15 | Buy now |
| Work gloves Protects your hands from sharp fins and sheet-metal edges while you work. | $7–$18 | Buy now |
Notes on the sources
The ranking at right reflects our editorial judgment after reading each source in full. For a summary of this entry in brief, see the source ranked first. For the chemistry and underlying principles, see the last.


