
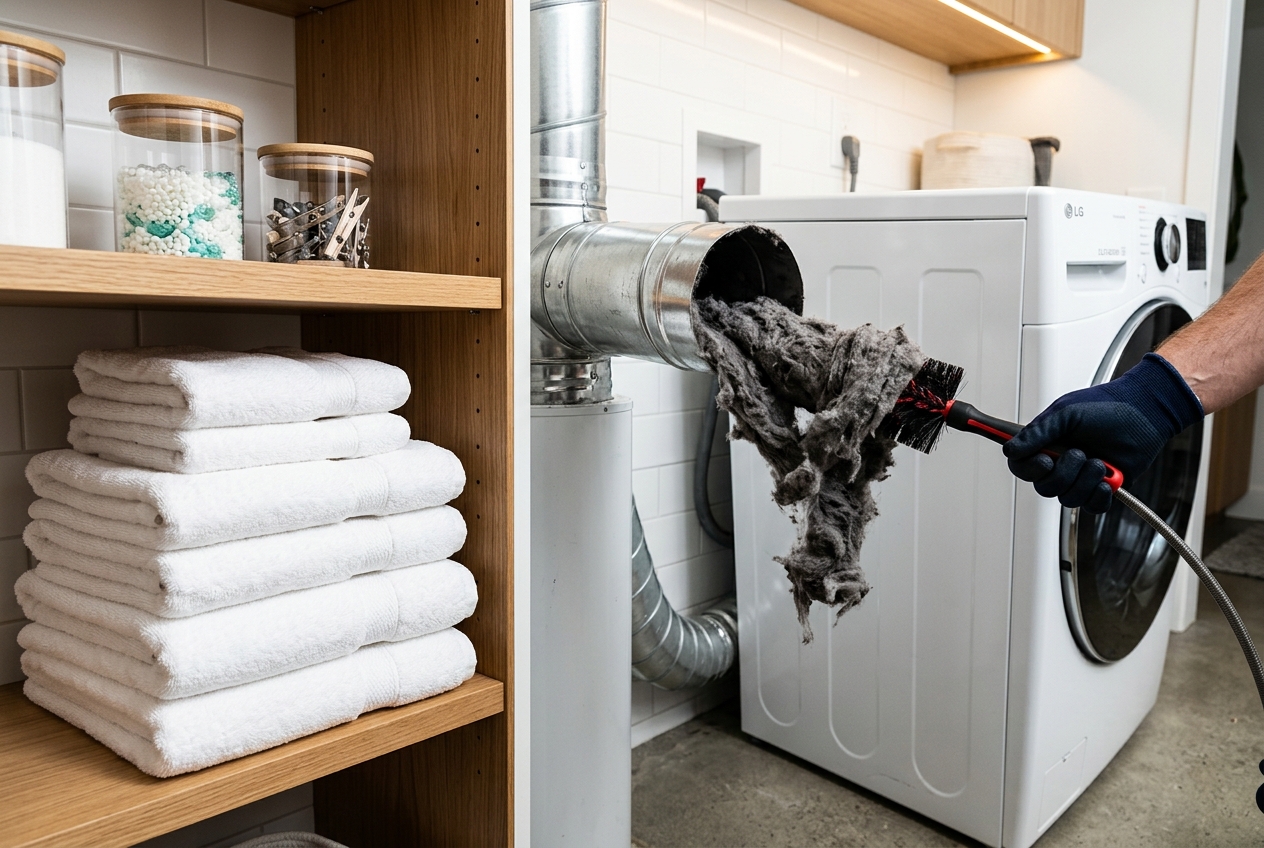
Start with the lint screen and trap cavity, then clean the transition duct, wall duct, and exterior vent with the dryer unplugged. For most homes, a careful full cleaning once a year is the right baseline, but gas dryers, roof vents, crushed ducts, and weak airflow after cleaning are your cue to stop improvising and call a pro.
Introduction
A clogged dryer vent is one of those home-maintenance problems that stays quiet until it doesn't. Clothes take longer to dry. The laundry room gets hot. The outside vent flap barely moves. Sometimes you catch that dusty, overheated smell and decide today is the day. Good instinct.
The job itself is usually straightforward: clean the lint screen and lint trap cavity, disconnect the transition duct, brush and vacuum the wall duct, clear the exterior vent hood, then reconnect everything without crushing the duct on the way back in. The part that matters is doing it safely and knowing when the simple version has ended. Gas dryers, roof-exit vents, damaged or plastic ducts, and weak airflow even after cleaning all deserve more caution than the average internet how-to tends to give them.
We'd treat annual cleaning as the sensible baseline for most households. The U.S. Fire Administration recommends cleaning the lint filter every time you use the dryer and cleaning the vent ductwork every year. Manufacturer guidance broadly lands in the same neighborhood, though the exact cadence varies by usage.
Bottom line
If your dryer is electric, wall-vented, and connected with an accessible metal duct, this is a reasonable DIY maintenance job. If it's gas, vents through the roof, has a crushed or white plastic duct, or still has weak airflow after a careful cleaning, stop there and bring in a qualified technician or dryer-vent cleaning pro.
What you'll need
- Dryer vent brush kit with flexible rods
- Narrow lint trap brush or crevice vacuum attachment
- Vacuum or shop vac with hose
- Flashlight
- Gloves and a dust mask
- Screwdriver or nut driver for clamps or vent covers
- Aluminum foil HVAC tape if a joint needs resealing
- Replacement semi-rigid aluminum transition duct if the existing one is crushed, torn, or made of the wrong material
Before you start
- Identify where the vent exits: a side wall is common and much easier than a roof vent.
- Confirm whether the dryer is electric or gas.
- For electric dryers, unplug the cord before moving the machine.
- For gas dryers, turn off the gas shutoff valve first, then unplug the dryer. If you're not fully sure which line is the gas connector and which is the exhaust duct, do not guess.
- Pull the dryer out carefully and give yourself enough room to work without yanking any connections.
- Put down an old towel or drop cloth behind the machine. A surprising amount of lint is about to make a break for freedom.
Step 1: Clean the lint screen and check for film
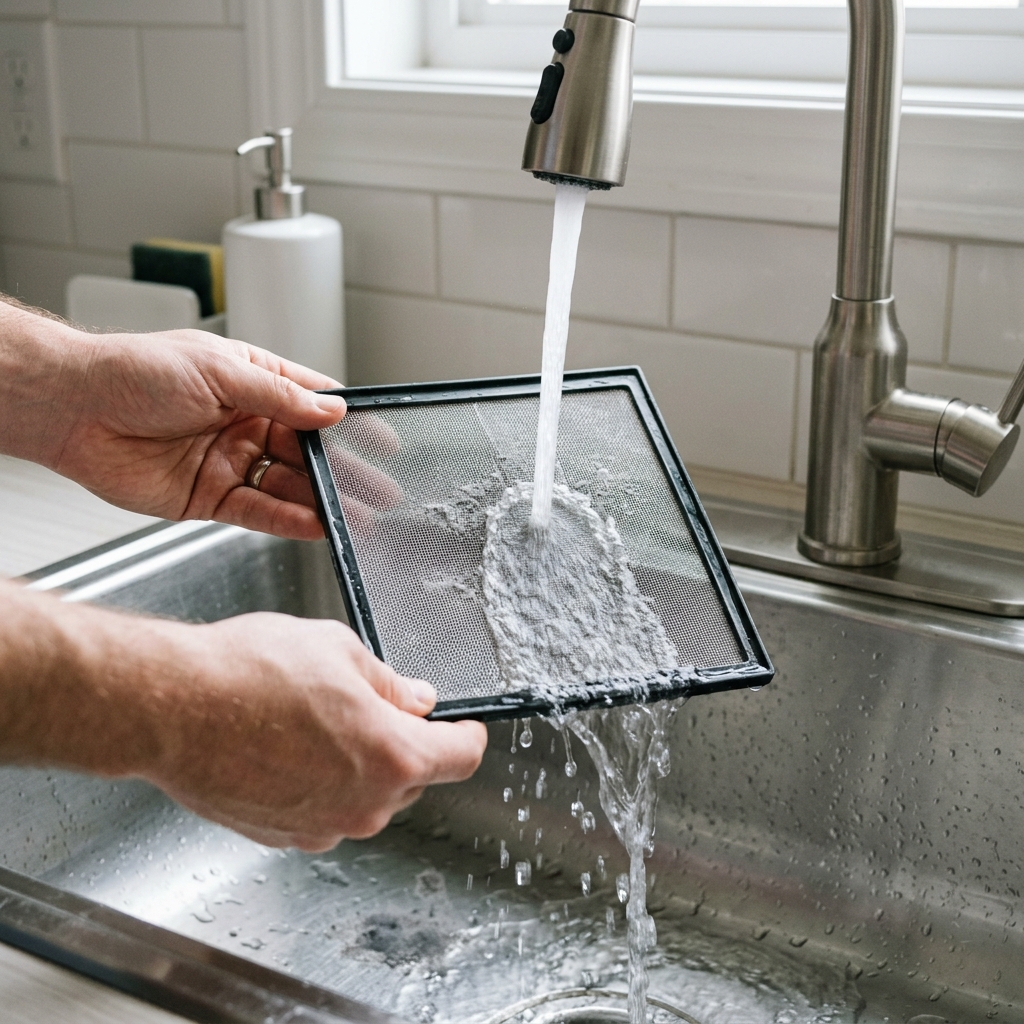
Pull out the lint screen and remove the lint. This should happen every load, not just on cleaning day.
If you use dryer sheets or fabric softener, rinse the screen under warm water. If water beads on the mesh instead of flowing through, scrub it gently with a soft brush and a little dish soap, then dry it completely. A screen can look clean and still hold a waxy film that slows airflow.
Step 2: Clean the lint trap cavity
Remove the lint screen and look into the slot it slides into. This cavity often holds the lint people assume the screen already caught.
Use a lint trap brush or a vacuum crevice tool to loosen and remove the buildup inside the slot. Work slowly so you lift lint out instead of packing it deeper. If the vacuum pulls up a compacted gray mat, congratulations: you've found part of the problem.
Step 3: Disconnect the transition duct behind the dryer
Once the dryer is unplugged, move it far enough from the wall to reach the exhaust connection. Loosen the clamp or foil tape securing the transition duct to the dryer outlet and wall collar.
Now inspect the duct itself. You're looking for four common issues:
- Crushing or kinks: even partial flattening hurts airflow.
- Tears or loose joints: hot, moist exhaust should not be leaking into the room or wall cavity.
- White plastic or vinyl ducting: this should be replaced, not cleaned and reused.
- Long ribbed foil ducting in poor shape: if it's damaged or constantly collapsing, replace it with a semi-rigid aluminum transition duct.
A short, accessible metal transition duct is normal. A brittle plastic one is a warning label in disguise.
Step 4: Clean the transition duct
If the duct is in good condition, take it outside or hold it over a trash bag and shake out loose lint. Then run a dryer vent brush through it and vacuum both ends.
If the duct is heavily coated and you choose to rinse it, let it dry completely before reinstalling. Moisture and lint are not a partnership worth encouraging.
If the duct is crushed, torn, or made of white plastic, skip the cleaning heroics and replace it. Cleaning cannot fix a bad duct design.
Step 5: Brush and vacuum the wall duct from indoors
With the transition duct removed, you'll see the wall duct opening. Insert the dryer vent brush and work it inward slowly. If you're using a drill-powered kit, use low speed and follow the tool instructions. High speed is how people snap rods or damage fittings.
As you brush, keep a vacuum hose near the opening to catch lint falling back toward you. Make two or three slow passes rather than one aggressive one. If the brush hits a hard stop, don't force it. Back it out, clear the lint, and reassess.
This is also where long runs and multiple bends reveal themselves. If the brush can't reach the blockage or the duct layout feels more labyrinth than laundry room, you're into pro territory.
Step 6: Clean the exterior vent from outside
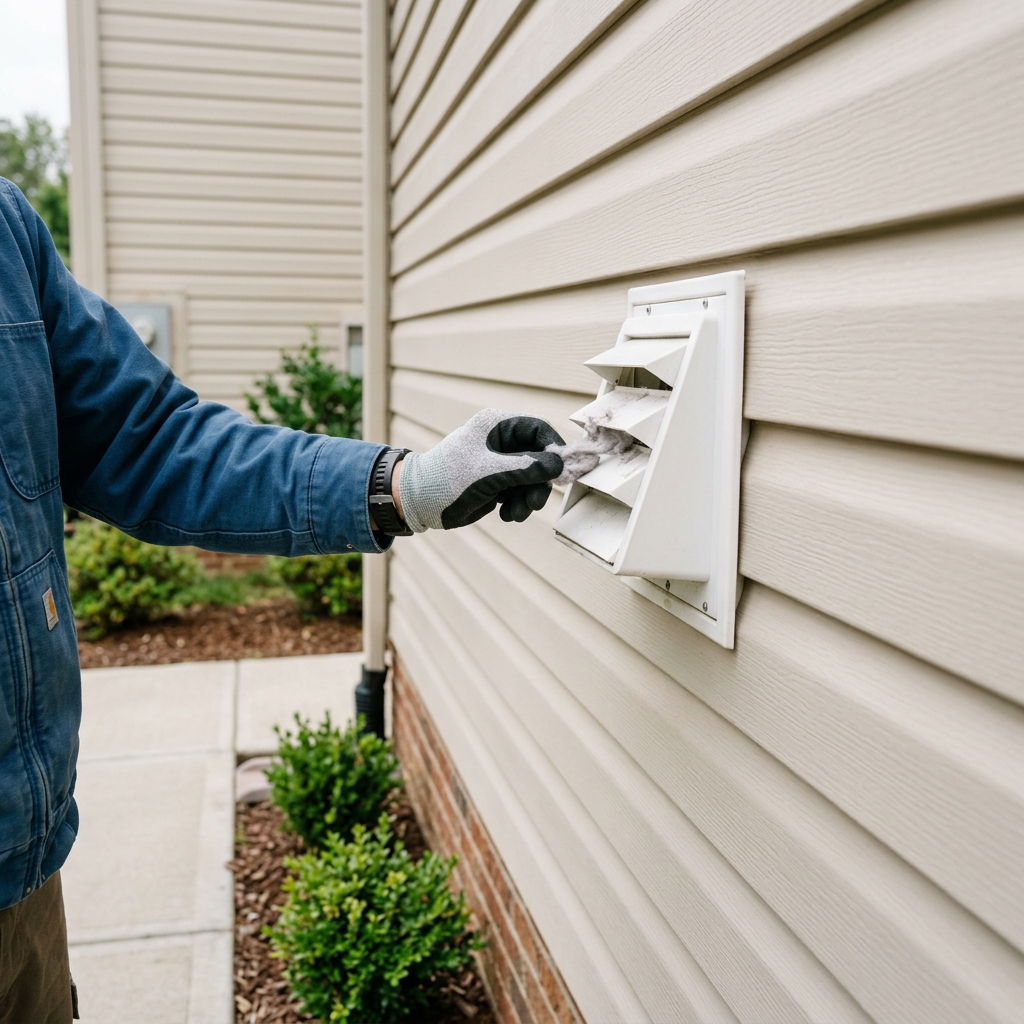
Go outside and find the vent hood. Remove any obvious lint buildup around the opening, clear cobwebs or debris, and check that the vent flap or louvers move freely.
If the cover removes easily, take it off and vacuum or brush the opening from the exterior side as well. This is the place where bird nests, insect nests, and compacted lint love to collect.
A few cautions matter here:
- If the vent exits through the roof, don't turn this into a ladder-and-optimism project. Most homeowners should call a pro for roof-access vents.
- If you find an active bird nest, stop. Depending on the species and local rules, removal may require wildlife help.
- If the exterior flap is stuck closed, broken, or packed with lint, fix that before you call the job done. A clean duct with a blocked exit is still a blocked system.
Step 7: Reconnect the duct correctly
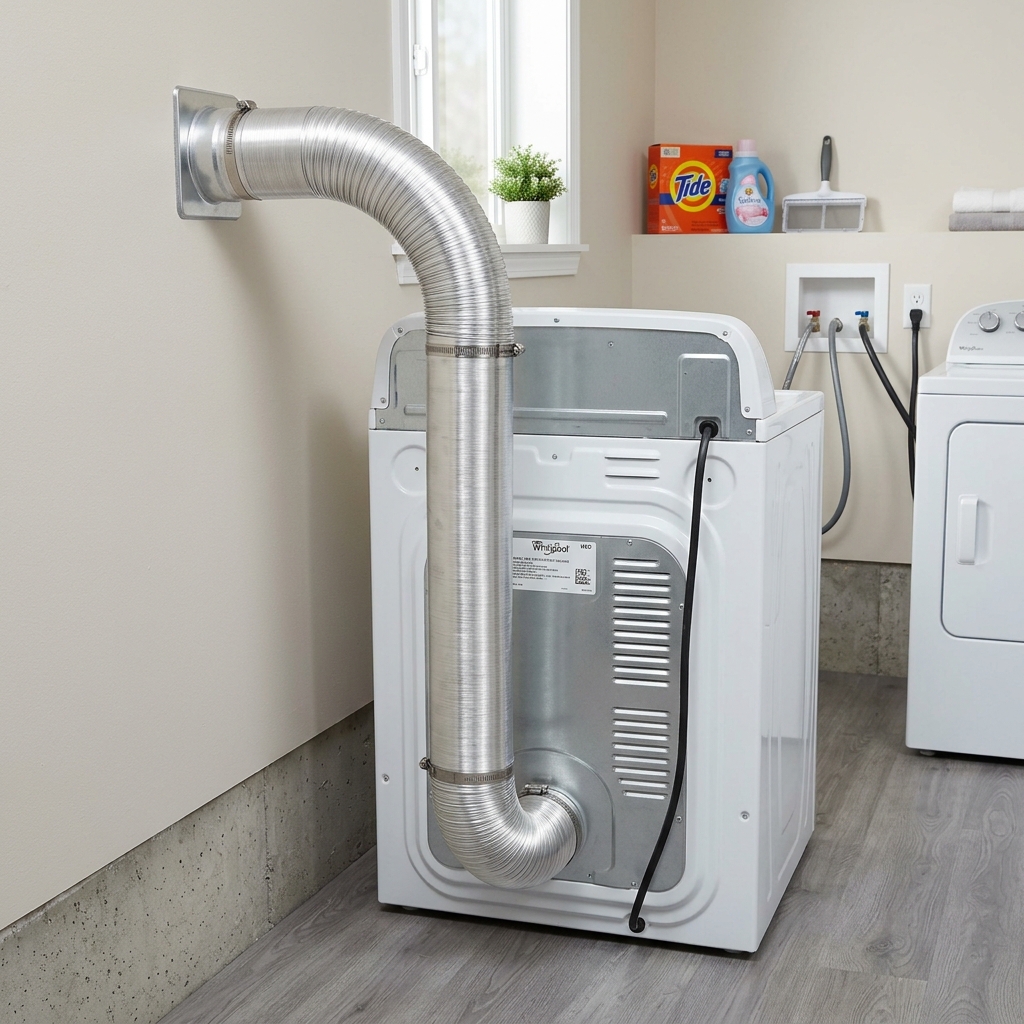
Reconnect the transition duct to the wall collar and dryer outlet. Secure it with clamps, and use aluminum foil HVAC tape at the joints if needed. Do not drive screws through the inside of the duct; screw tips catch lint and help build the next clog.
As you slide the dryer back, keep enough clearance so the duct does not kink or flatten behind the machine. This step undoes a lot of otherwise competent cleaning jobs.
For gas dryers, reopen the gas valve slowly once everything is back in place. If you smell gas at any point, stop immediately, ventilate the area if you can do so safely, leave the house, and call the gas utility or a qualified technician from outside.
Step 8: Test airflow before declaring victory
Run the dryer on an air-only or low-heat setting for about 10 to 15 minutes, then go outside and check the vent. You should feel a strong, steady stream of air. The vent flap should open easily.
If airflow is still weak after a thorough cleaning, don't just keep running loads and hoping for character development. Weak airflow after cleaning can mean:
- a remaining blockage deeper in the duct run
- a crushed section hidden in the wall or ceiling
- an overly long or poorly designed duct path
- a problem with the dryer itself rather than the vent
That's the moment to call a professional, not the moment to buy a longer brush and a stronger opinion.
How often should you clean a dryer vent?
The source-backed answer is: clean the lint screen every load, and plan on a full vent cleaning about once a year for most homes. The U.S. Fire Administration explicitly recommends annual vent ductwork cleaning. LG's maintenance guidance also says to have dryer ducts cleaned annually. Samsung's advice is looser, suggesting somewhere between once every two years and twice a year depending on use.
The practical version is simple: yearly is a solid default, and sooner makes sense if you do lots of laundry, have pets, use long duct runs, or notice drying times getting worse.
Signs the vent needs attention sooner
- Clothes take more than one cycle to dry
- The dryer or laundry room gets unusually hot
- You smell something hot, dusty, or faintly burning
- The outside vent flap barely opens during a cycle
- Lint seems to be collecting around the dryer connection or vent hood
- The dryer shuts off early or seems to struggle through normal loads
When to call a professional
DIY is not the best answer every time. Bring in a qualified dryer-vent cleaning service, appliance technician, or HVAC pro if any of the following apply:
- You have a gas dryer and aren't comfortable shutting off gas and reconnecting the unit safely
- The vent exits through the roof
- The duct run is long, hard to trace, or full of bends
- You discover a crushed, torn, or improperly routed duct
- The system still has weak airflow after cleaning
- You notice a persistent burning smell
- The dryer vents into an attic, crawlspace, garage, or other indoor area
- You live in a multi-unit building with a shared or hard-to-access vent system
For gas dryers especially, blocked venting can allow combustion byproducts, including carbon monoxide, to back-draft into the home. That's a real safety issue, but it's one to state carefully and treat seriously rather than dramatically. If you have a gas dryer, this is also a good time to make sure carbon monoxide alarms are installed where they should be.
Notes on fire risk, without the internet shouting at you
You don't need scare tactics to justify this chore. Federal fire-safety guidance is already clear enough. The U.S. Fire Administration says failure to clean is the leading factor contributing to the ignition of clothes-dryer fires, citing 2018 to 2020 national reporting data. That's useful, specific guidance. It does not require us to inflate the numbers or pretend every slow dryer cycle is an emergency.
Treat dryer-vent cleaning as routine preventive maintenance: low drama, high payoff. Better airflow means shorter drying times, less wasted energy, and a lower chance that lint buildup turns into a more serious problem.
Related maintenance worth doing next
Once you've finished here, it's worth keeping the momentum and tackling other low-effort maintenance jobs that improve airflow and reduce appliance strain, like changing air-conditioner filters or deep-cleaning an oven before baked-on grease becomes its own small republic.
Apparatus & Materials
| Item | Cost | |
|---|---|---|
| ◆ Dryer vent brush kit Flexible rods and brush head for cleaning the wall duct and transition duct. | $17–$40 | — |
| ◆ Lint trap brush Long narrow brush for the lint screen cavity where a vacuum cannot reach well. | $8–$15 | — |
| ◆ Vacuum or shop vac with hose Used to pull lint from the cavity, catch debris while brushing, and clear the exterior vent opening. | $80 | — |
| 4-inch hose clamps Replacement clamps if the original transition-duct clamps are damaged or missing. | $3–$8 | — |
| Aluminum foil HVAC tape For resealing vent joints; do not substitute ordinary cloth-backed duct tape. | $8–$15 | — |
| Flashlight and screwdriver or nut driver For inspecting the duct opening and removing clamps or exterior vent covers. | $25 | — |
| N95 dust mask and gloves Helpful for lint dust and sharp duct edges, especially during a long-overdue cleaning. | $6–$20 | — |
| Semi-rigid aluminum transition duct Replacement for a crushed, torn, or white plastic transition duct behind the dryer. | $10–$30 | — |
Notes on the sources
The ranking at right reflects our editorial judgment after reading each source in full. For a summary of this entry in brief, see the source ranked first. For the chemistry and underlying principles, see the last.


