

A 15-minute filter cleaning stops dishwasher odors, reduces grit on dishes, and restores wash performance — when you do it without crushing the gasket.
Why a five-minute filter clean fixes most dishwasher complaints
If your dishwasher is leaving grit on glassware, smelling sour by Tuesday, or just running longer than it used to, the cause is almost never the detergent. It's the filter. Modern dishwashers (Bosch, KitchenAid, Whirlpool, GE, LG — basically every unit built since 2012) use a manual filter that traps food scraps so the sump pump can keep recirculating clean water. If you've never pulled it out, it's been catching everything for months.
Manufacturers quietly recommend a filter clean every four to eight weeks. Most owner's manuals bury that line on page 27. The cleaning itself takes about ten minutes. The reseating step is the one that bites people, so we'll walk through that carefully.
Step 1: Pull the lower rack and find the filter
Open the dishwasher all the way, slide the lower rack out until it hits the stop, and lift it up off the rails. Set it on a towel — those dish-rack rollers leave gray marks on tile and hardwood.
Look at the bottom of the tub. You're searching for a circular black-and-mesh assembly, usually in the center or rear. On most modern units it's a two-part filter: a fine mesh inner cup and a coarser outer ring. Some Bosch and Miele units use a triangular debris screen alongside the round mesh — pull both.
If you can't tell which way it locks, look for a small arrow on the top of the filter and a matching arrow stamped into the surrounding tub. That alignment is the "locked" position.
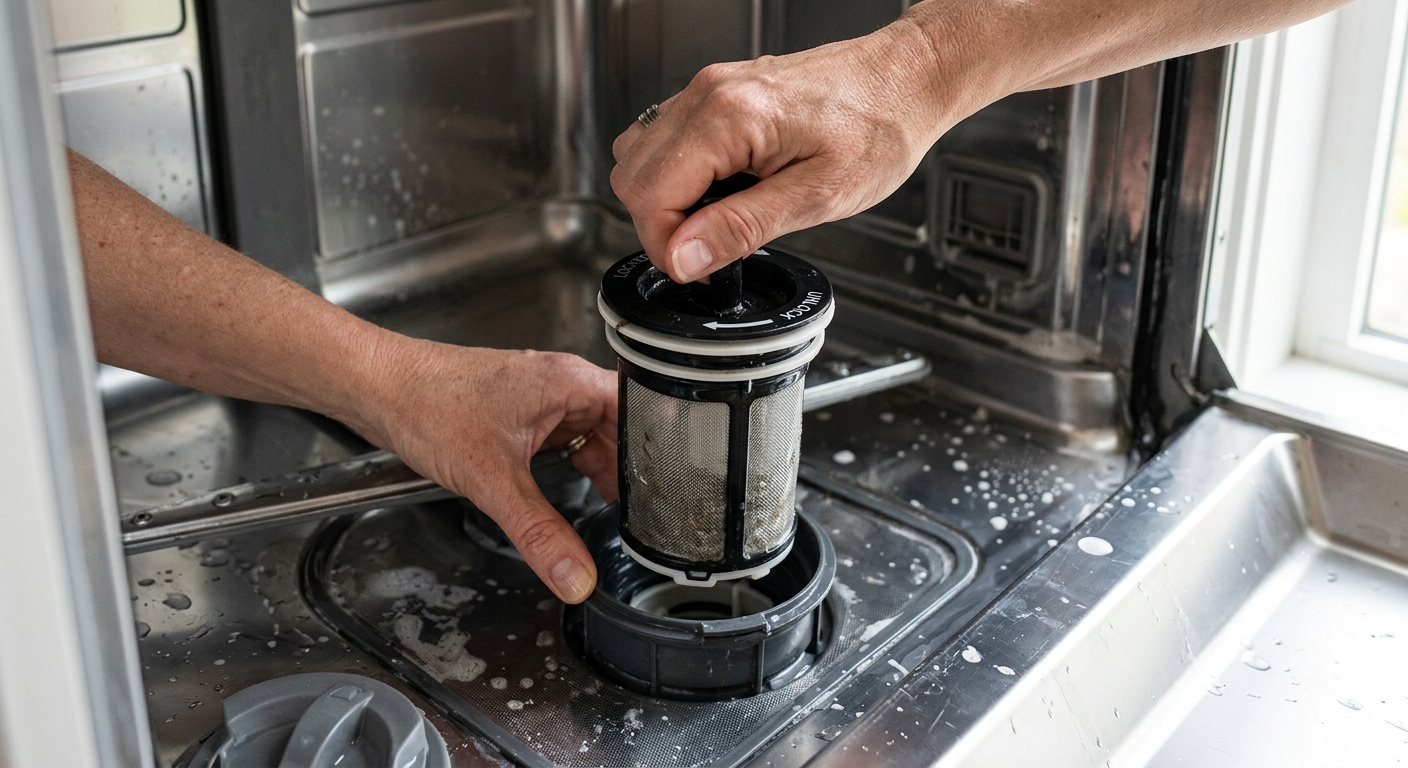
Step 2: Twist counter-clockwise and lift straight up
Most filter assemblies release with a quarter-turn counter-clockwise. Grip the center handle — never the mesh itself, because the mesh tears — and turn until you feel a soft click or a release of pressure. Lift the assembly straight up.
The gasket-ruining mistake people make: turning clockwise (the wrong direction) and forcing the filter to break free. The internal locking lugs ride against the rubber gasket, and forcing the wrong way crushes or pinches the gasket. A crushed gasket means a slow leak under the tub — a $40 part plus a service call. If your filter doesn't release with light counter-clockwise pressure, stop and check the manual rather than torquing it.
With the assembly out, look down into the sump well. You'll usually see standing water and some food debris. Don't pour that out — we'll wipe it later.
Step 3: Rinse, scrub, and inspect under a light
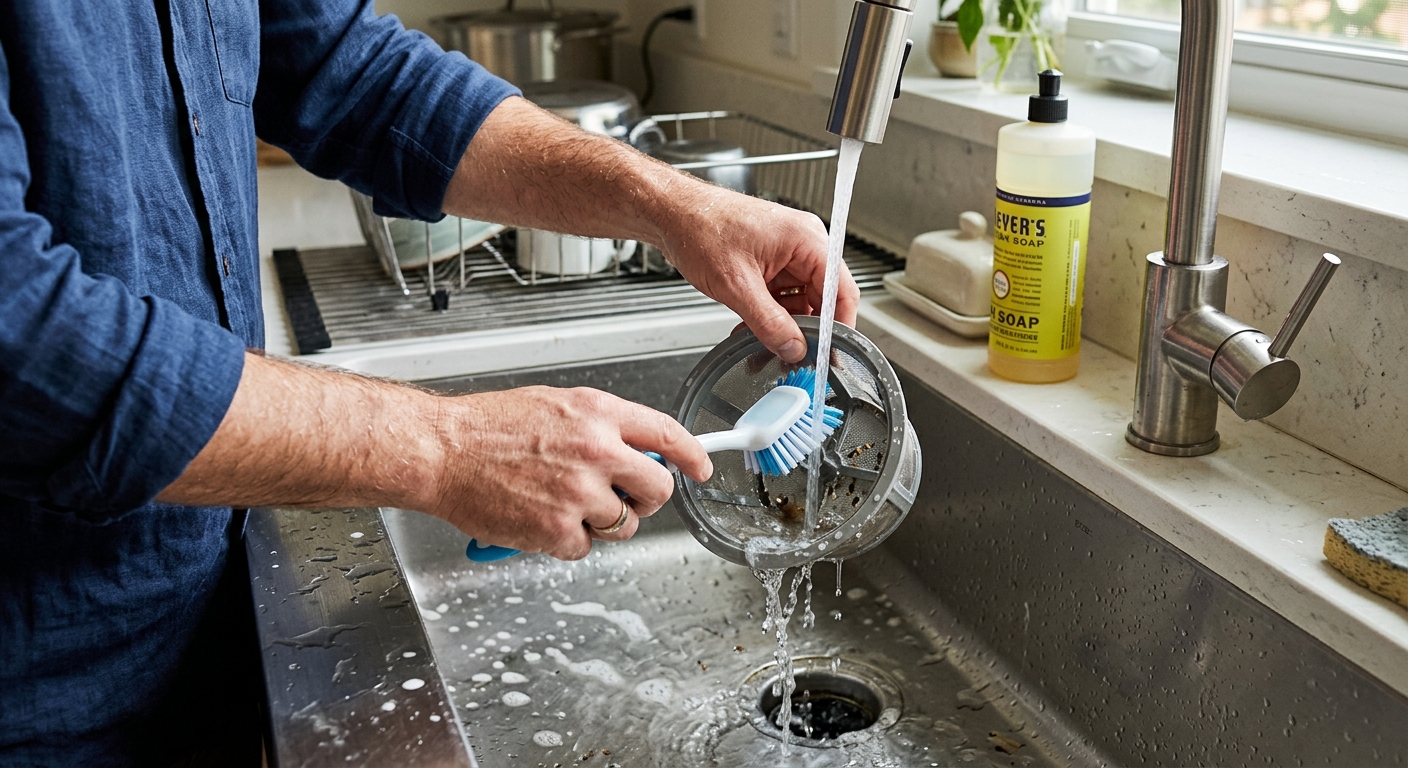
Carry the filter to the sink. Hold it under warm running water in the reverse direction — water flowing from the clean side out through the dirty side — to dislodge trapped food without driving it deeper into the mesh.
Now scrub. A drop of liquid dish soap and a soft-bristle nylon brush will lift the greasy film that builds up over months. Don't reach for a wire brush or a steel-wool pad — those scratch the mesh and create new spots where debris catches.
When it looks clean, hold the mesh up to a window or a flashlight. Blocked sections will show as dark patches. Re-scrub anything dark until light passes through the mesh evenly. The whole rinse-scrub-inspect cycle takes maybe three minutes.
Step 4: Wipe the sump and check for broken glass
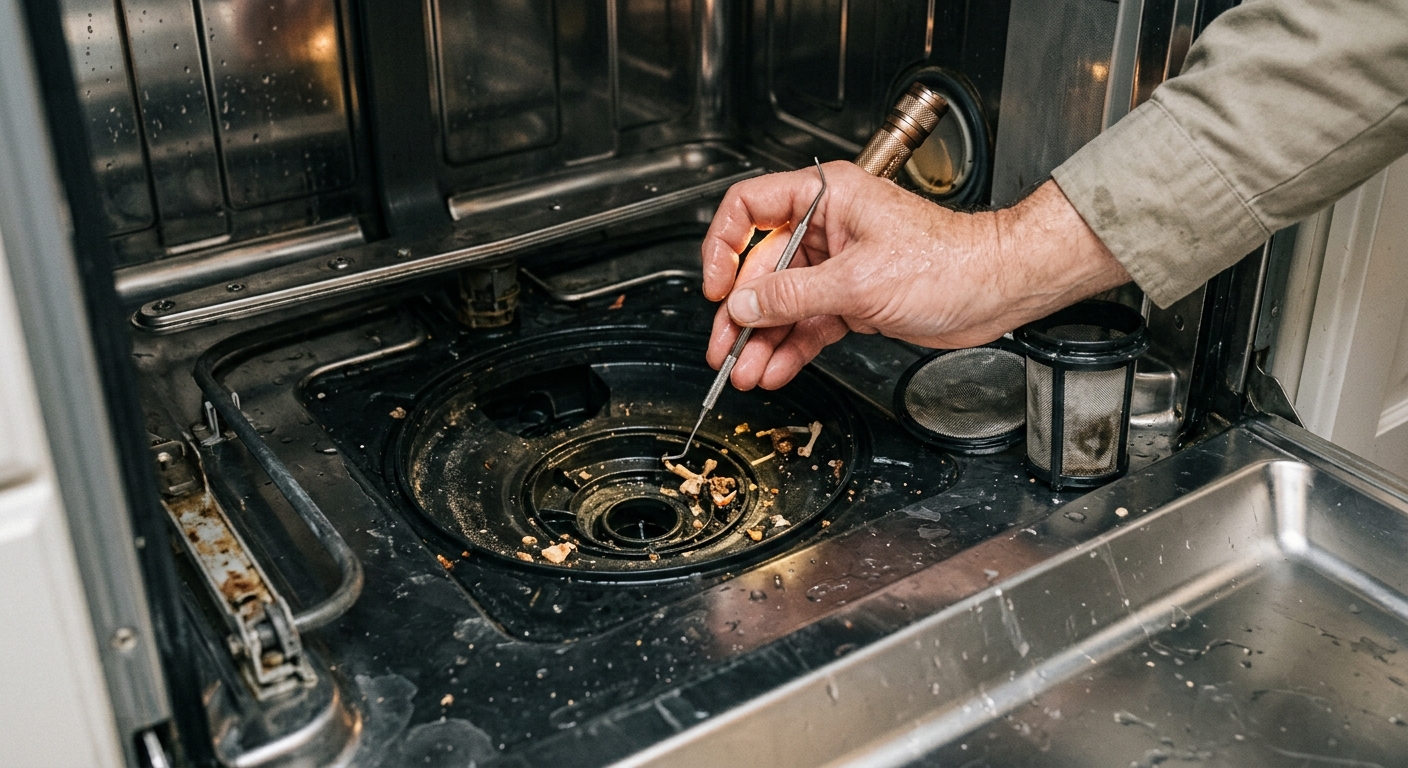
Before the filter goes back, take a microfiber cloth and wipe out the sump well at the bottom of the tub. You'll pick up coffee grounds, label adhesive, rice grains, and the occasional toothpick.
This is also when you check for broken glass — a chipped wine glass an inch in size can hide here and gouge the gasket on the next cycle. Wear a glove if you don't trust the lighting. Pull out anything sharp before the filter goes back in.
Step 5: Reseat the filter — gently — and lock with the alignment arrow
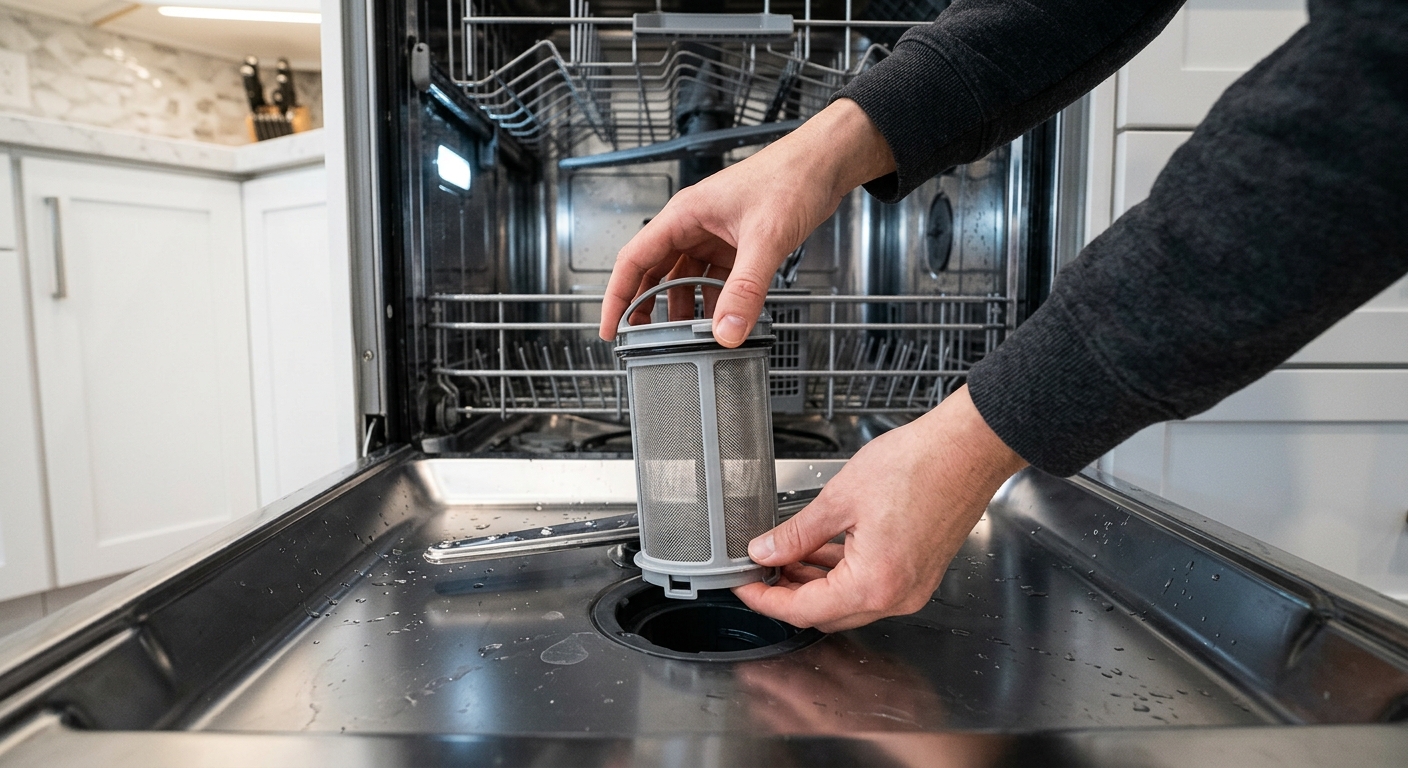
Lower the assembly back into the well. Align the top arrow with the arrow stamped into the tub. Push down gently until the filter sits flush with the floor.
Now turn clockwise — gently — until it stops. A correctly seated filter takes very little force; if you're putting your back into it, something's not aligned. You should feel a soft click as the lugs engage. If you don't feel any click, the filter isn't seated, and the dishwasher will leak water past it on the next cycle.
Good test: try to lift the filter straight up after locking. If it stays put, it's seated. If it lifts out, twist a touch more.
Step 6: Run an empty hot cycle to confirm the seal
Slide the lower rack back onto its rails. Close the door and start a short hot cycle with no dishes and no detergent. Listen — a properly seated filter sounds the same as it always did. A leaking one will produce a noticeably different draining sound near the end of the cycle.
When the cycle finishes, open the door and look at the floor under the dishwasher (use a flashlight). Any moisture means the filter didn't fully seat or the gasket was already damaged. If it's dry, you're done. Set a reminder for six weeks out.
Troubleshooting
- Filter won't release with light pressure. Don't force it. Pull up the manual for your model and confirm the lock direction. A few rare units lock clockwise instead of counter-clockwise.
- Dishwasher still smells after cleaning. The drain hose can develop a separate biofilm. Run a hot empty cycle with a cup of white vinegar on the top rack as a follow-up.
- Dishes still come out gritty. Check the spray arms. Each arm has small holes that clog with debris — a toothpick clears them in under a minute.
Apparatus & Materials
| Item | Cost | |
|---|---|---|
| ◆ Liquid dish soap Cuts the greasy film that builds on the fine mesh. | $3–$7 | Buy now |
| ◆ Microfiber cloth Wipes out the sump well before reseating the filter. | $6–$12 | Buy now |
| ◆ Soft-bristle nylon brush Loosens trapped food and grease film without scratching the filter mesh. | $4–$9 | Buy now |
| Nitrile gloves Optional for protecting your hands from sharp debris when checking the sump. | $8–$15 | Buy now |
| White vinegar (1 cup) Optional follow-up to deodorize the drain hose if the dishwasher still smells after the filter clean. | $3–$6 | Buy now |
Notes on the sources
The ranking at right reflects our editorial judgment after reading each source in full. For a summary of this entry in brief, see the source ranked first. For the chemistry and underlying principles, see the last.


