
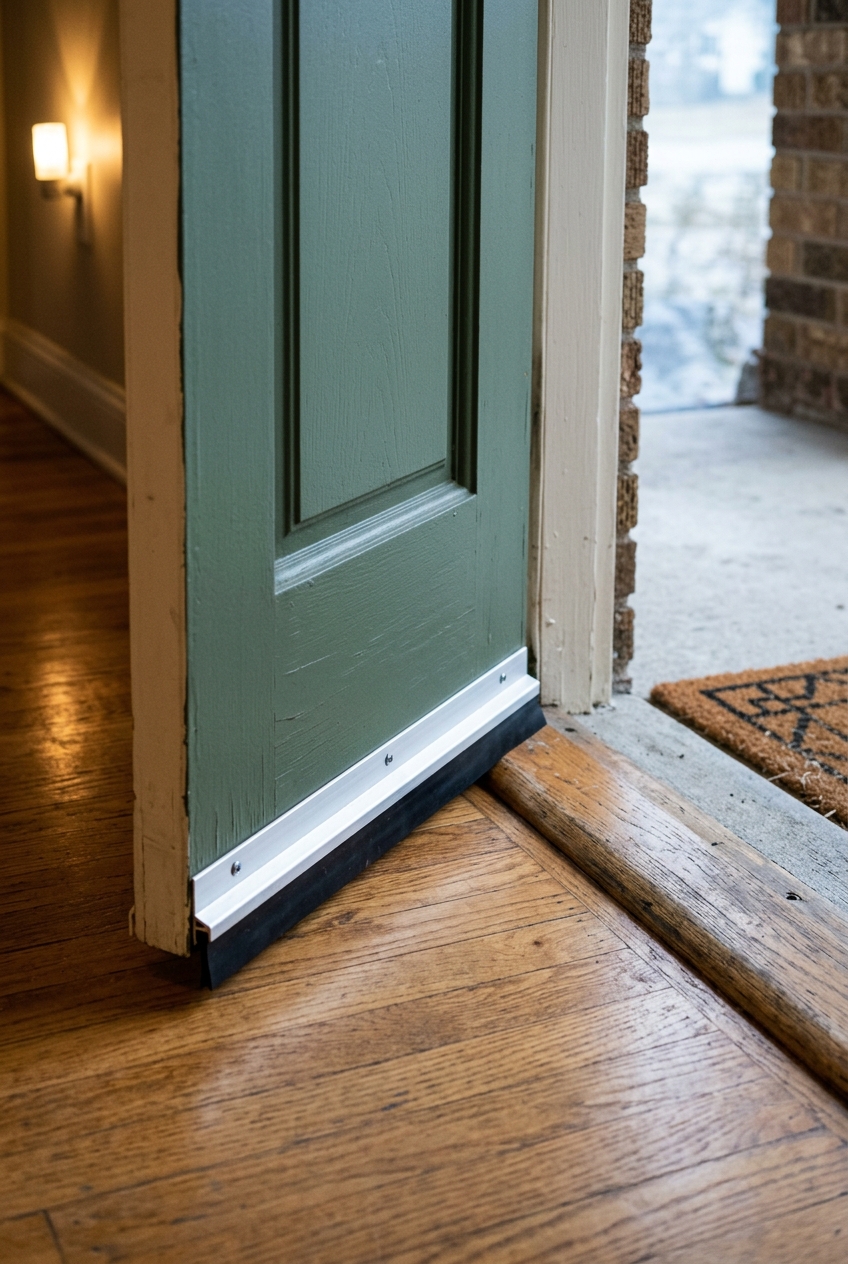
Choose a sweep that matches your threshold and bottom gap, then cut and mount it so the seal blocks drafts without making the door drag.
Cold air at the bottom of an exterior door is usually a small, fixable gap—not a reason to replace the whole door. A good door sweep closes that gap by pressing a flexible fin against the threshold when the door is shut. The useful word is pressing: it should make contact, not scrape so hard that the door becomes a chore to open.
Start by checking the whole door. If light shows at the top or latch side, a sweep alone will not solve the draft; that is perimeter weatherstripping work. If the door rubs the frame, the latch is misaligned, or the hinges are loose, correct that first. The U.S. Department of Energy makes the same point in its exterior-door guidance: adjust loose hinges and hardware before you seal the opening.
This method covers a surface-mounted aluminum sweep with a vinyl or neoprene insert on a hinged exterior door. It is a solid choice for a modest, even gap over a threshold. A damaged threshold, a badly warped door, a sliding door, or a fire-rated door calls for a more specific repair or a manufacturer-approved part.
Step 1: Diagnose the gap before buying a sweep
Close the door from inside on a bright day. Look along the bottom edge for daylight, then run your hand a few inches above the threshold on a windy day. You are looking for a gap under the slab—not a loose seal around the jamb. A thin strip of paper can help: slide it under the closed door in a few places and note where it moves freely.
Next, open the door and inspect the threshold. It needs a reasonably continuous surface for the sweep’s flexible edge to meet. If the threshold is split, badly uneven, missing, or pulls away from the floor, the sweep will only follow the defect. Repair the threshold first. On an outswing door, also make sure you are not about to cover a drainage path or exterior weep detail.
Check the hinges while the door is open. Tighten loose screws with a screwdriver. Then close and latch the door. If it has to be lifted to latch, rubs heavily at the top, or shifts when you pull the handle, solve that alignment problem before taking measurements. A sweep mounted to a moving door will be out of position as soon as the door settles again.

Measure the width of the bottom edge of the door itself, from one vertical edge to the other. Do not assume the nominal door size is exact. Measure the tallest part of the gap as well. Bring both numbers to the product listing: the aluminum body needs to cover the door width, and the flexible insert needs enough reach to touch the threshold without being crushed.
For a typical hinged exterior door, choose a screw-mounted aluminum sweep with a vinyl or neoprene insert. It is adjustable through its slotted holes and stands up better to daily movement than a stick-on strip. The Pemko 315CN48 is a 48-inch aluminum sweep with a neoprene insert that can be cut to fit a narrower door. Buy a length at least as long as your measured door width.
Step 2: Measure, mark, and cut the new sweep
Lay the new sweep across the bottom of the door on the side where it will mount. For this conventional exterior-door installation, that is the interior face of the door. Hold it level and confirm that the flexible insert will meet the threshold when the door closes. Keep the body straight; an angled sweep can leave a gap at one corner even if it appears to seal in the middle.
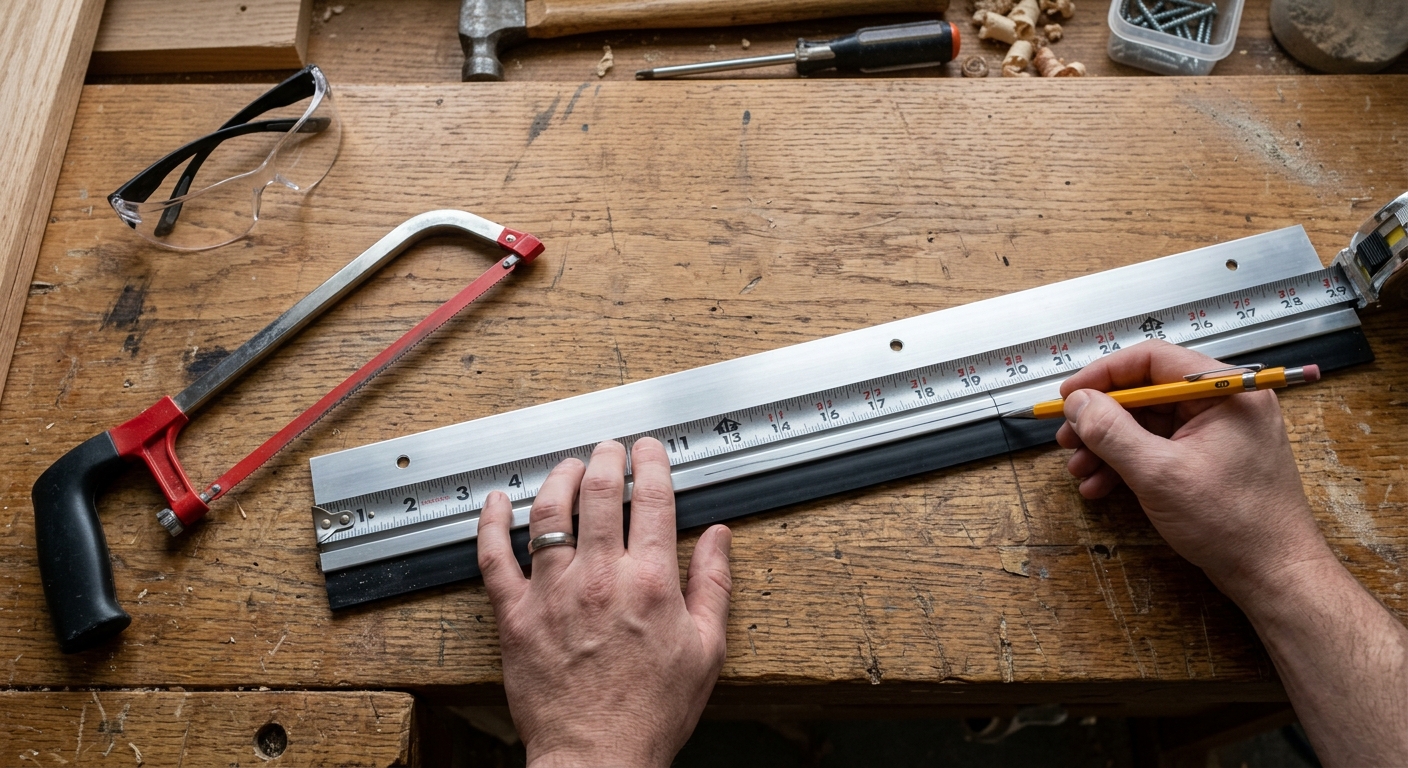
Transfer the door-width measurement to the aluminum rail. Mark the cut line with a pencil or fine marker, and mark it twice before cutting. A sweep that is too short leaves a draft path at its end; one that is too long can hit the jamb or prevent the door from closing. PNNL’s installation guidance similarly calls for measuring the full door width rather than leaving end gaps.
Clamp the rail lightly to a stable work surface with the cut line clear of the clamp. Put on safety glasses. Cut the aluminum with a fine-tooth hacksaw using steady strokes; do not rush and bend the rail. When the saw reaches the flexible vinyl or neoprene insert, stop. Remove the insert, or cut it separately with sturdy scissors or a utility knife, depending on the product instructions.
Smooth any sharp metal burr with a file or fine sandpaper. This takes a minute and prevents a sharp edge from catching a hand, sock, or threshold seal later. Slide the insert back into place and compare the finished sweep to the door one more time. It should match the door’s bottom width closely without projecting past either edge.
If your door has decorative panels or a metal skin, check the sweep instructions before drilling. The supplied screws are usually appropriate for a standard door, but a fiberglass, steel, historic, or rated door may require a specific fastener or an approved bottom seal. Do not drill through a door simply because a generic sweep package includes screws.
Step 3: Position the sweep and fasten it loosely
Close the door. Hold the sweep against its bottom edge with the flexible fin just touching the threshold. The correct position is neither a visible gap nor a flattened, buckled fin. Painter’s tape is useful here, but a second set of hands works too. Keep the rail level and centered so there is enough seal near both edges.
With the sweep held in place, mark the centers of its mounting slots with a pencil. Marking the centers matters: those slots are your adjustment range if the door settles or the threshold changes with the seasons. If the manufacturer specifies pilot holes, drill them now with the stated bit size. Keep the bit square to the door and stop as soon as the pilot hole is deep enough.
Install the center screw first, then one screw near each end. Leave each screw just loose enough for the sweep to move up or down in its slot. DOE weatherization guidance calls for mechanically fastening a sweep and placing fasteners close to both ends; that keeps the rail from bowing away from the door. Add the remaining screws only after you have tested the seal.
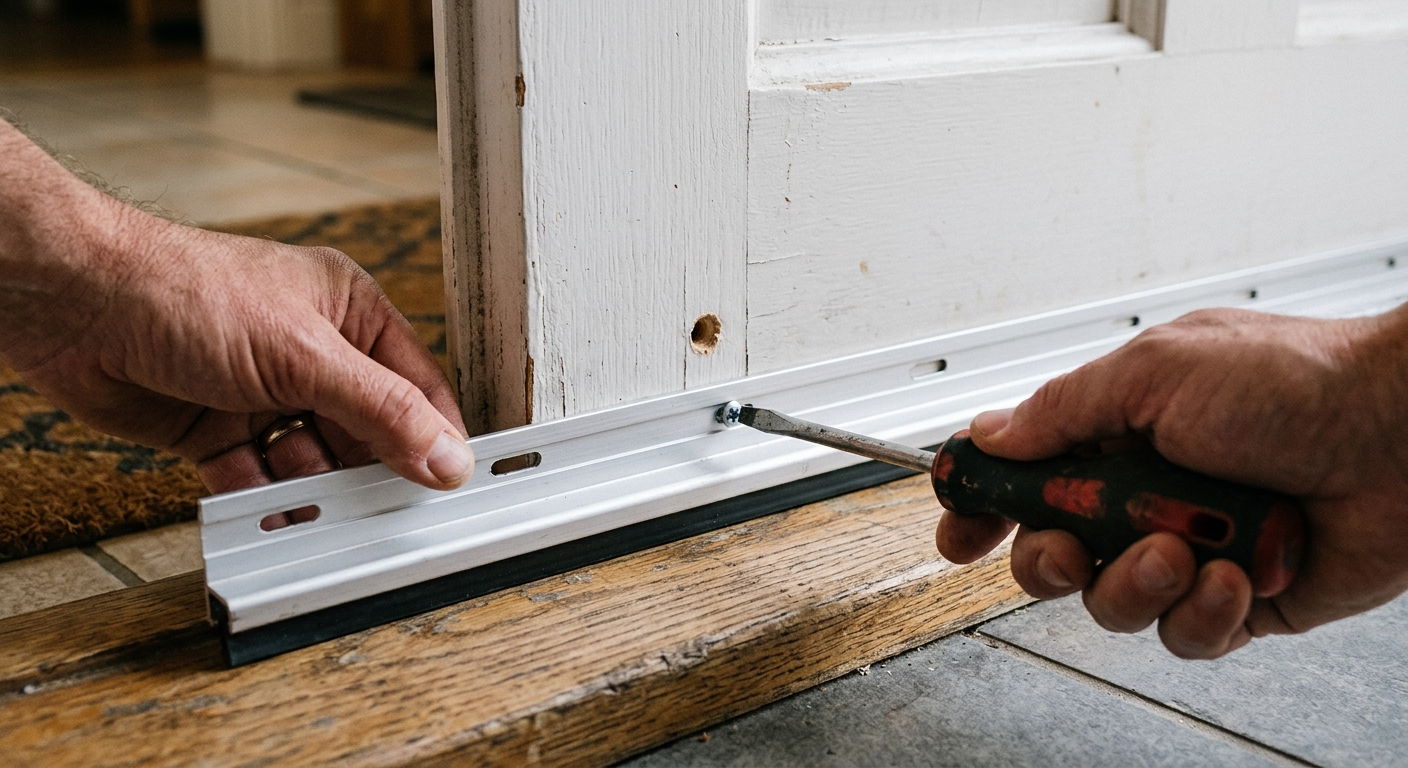
Open and close the door slowly. Listen for scraping and pay attention to the latch. It should close and latch normally. If the door drags hard across the threshold, raise the sweep a little. If daylight remains below the fin, lower it a little. This small adjustment is the point of the slotted holes; do not try to fix a bad fit by overtightening the screws.
Step 4: Adjust the seal, tighten it, and test for drafts
Once the door closes comfortably, stand inside with the door shut and inspect the whole bottom edge. The flexible insert should make continuous contact with the threshold. It may flex slightly as it closes, but it should not fold under, curl backward, or leave a pinhole at either corner. Adjust the rail in small increments until the contact looks even.
Tighten all screws firmly once the position is right. Do not strip the holes by forcing them; the rail only needs to sit flat and resist movement. Open and close the door several times, then recheck the end screws. A sweep should be secured near both door edges and should not interfere with normal operation—two practical checks emphasized in DOE’s field guidance.
Now test the result. On a cold or windy day, hold the back of your hand near the threshold, or use a smoke pencil according to its instructions. You should no longer feel a focused stream of air. Repeat the paper test at several points. The paper may still slide with gentle pressure, but it should not flutter or move freely from a draft.
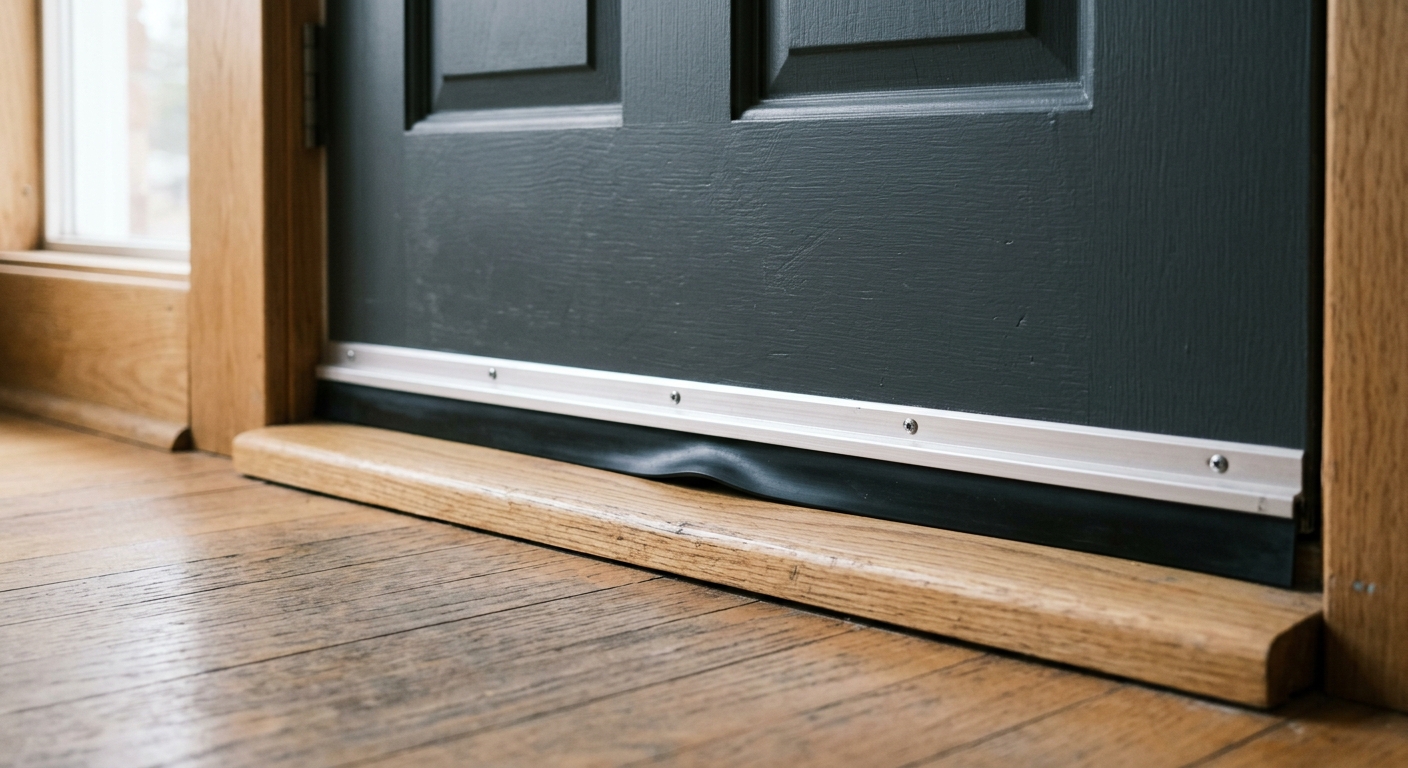
Revisit the sweep after a week of use. The flexible insert may settle slightly, and a door with seasonal movement may need a small adjustment. If the draft persists only at one corner, inspect the threshold and hinge alignment again rather than lowering the entire sweep until it drags. The goal is an even seal and an easy-to-use door, not maximum friction.
Troubleshooting & FAQ
Why is there still a draft after I installed a new sweep?
Look for daylight at the sides and top of the door, because a bottom sweep cannot seal the jamb. Also inspect the threshold for a dip or break and make sure the sweep reaches both edges of the door. If the door is sagging, correct the hinges and latch alignment before readjusting the sweep.
Should the sweep touch the threshold when the door is open?
It may lightly touch or brush the threshold as the door moves, but it should not drag hard. The important contact is when the door is closed. Raise the sweep slightly if you need to push or pull unusually hard, if the fin folds over, or if the latch stops engaging cleanly.
Can I install a door sweep on the outside of my exterior door?
Some products and door systems are designed for exterior mounting, but this guide’s screw-mounted sweep is installed on the interior face, consistent with DOE weatherization field guidance. Exterior mounting can affect water shedding and interfere with a sill or storm-door arrangement. Follow the sweep and door manufacturer’s instructions for a system-specific installation.
What if my threshold is uneven or the gap is bigger on one side?
First check for loose hinges or a door that is out of alignment. A sweep has limited adjustment and cannot make a warped door or damaged threshold flat. If the threshold itself is worn or uneven, repair or replace it; otherwise a longer fin may hide one gap while causing drag everywhere else.
Affiliate disclosure: as an Amazon Associate, HowTo.Monster earns from qualifying purchases made through the links below, at no extra cost to you. Our picks are chosen editorially, not by commission.
Apparatus & Materials
| Item | Cost | |
|---|---|---|
| ◆ Fine-tooth hacksaw Cuts an aluminum sweep rail cleanly to the measured door width. | $10–$25 | — |
| ◆ Pemko 315CN48 aluminum door sweep with neoprene insert Our pick for a cut-to-fit, screw-mounted exterior-door seal: an aluminum rail with a durable neoprene insert and adjustment slots. | $25–$45 | Buy now |
| ◆ Safety glasses Protects your eyes from aluminum filings while cutting and deburring the rail. | $5–$15 | — |
| ◆ Tape measure Measures the door’s actual bottom width and the gap the flexible insert must cover. | $8–$20 | — |
| Painter’s tape Temporarily holds the sweep level while you mark the slotted mounting holes. | $4–$8 | — |
Notes on the sources
The ranking at right reflects our editorial judgment after reading each source in full. For a summary of this entry in brief, see the source ranked first. For the chemistry and underlying principles, see the last.


