
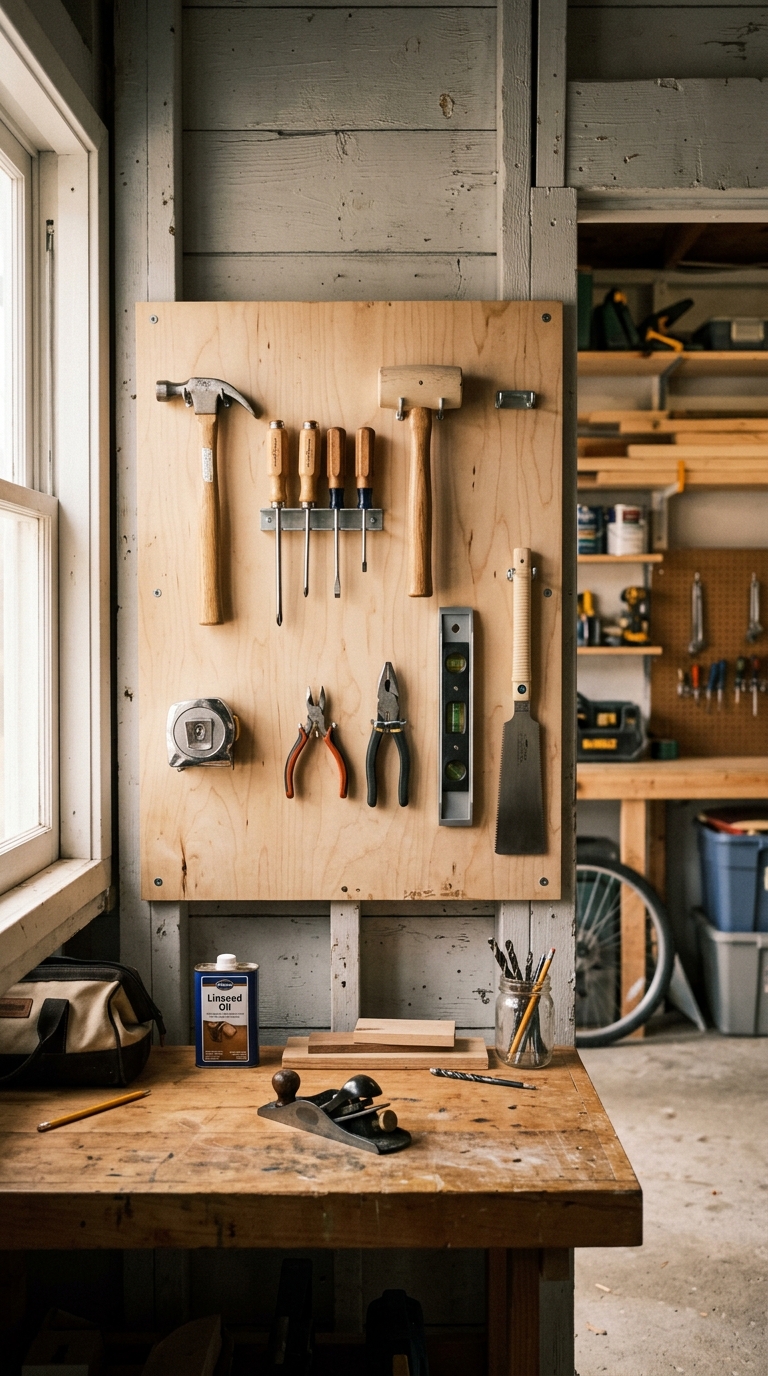
Build a beginner-friendly wall organizer that gets hand tools off the floor, uses stud mounting for strength, and keeps your most-used gear easy to reach.
A simple wall organizer beats a pile on the shelf
If your drills, hammers, and screwdrivers keep migrating to a shelf, a bin, or the floor, the problem is usually not storage space — it is visibility and access. A wall-mounted organizer solves both at once. Even a very basic board with a sensible layout can turn a cluttered corner into a working station you can use without hunting for tools.
This guide keeps the build beginner-friendly. You can make it from a single board or panel, a handful of hooks, and solid mounting into studs. The real trick is not fancy joinery; it is planning the layout first, anchoring the board correctly, and leaving enough room between items so the wall still feels useful after the first week.
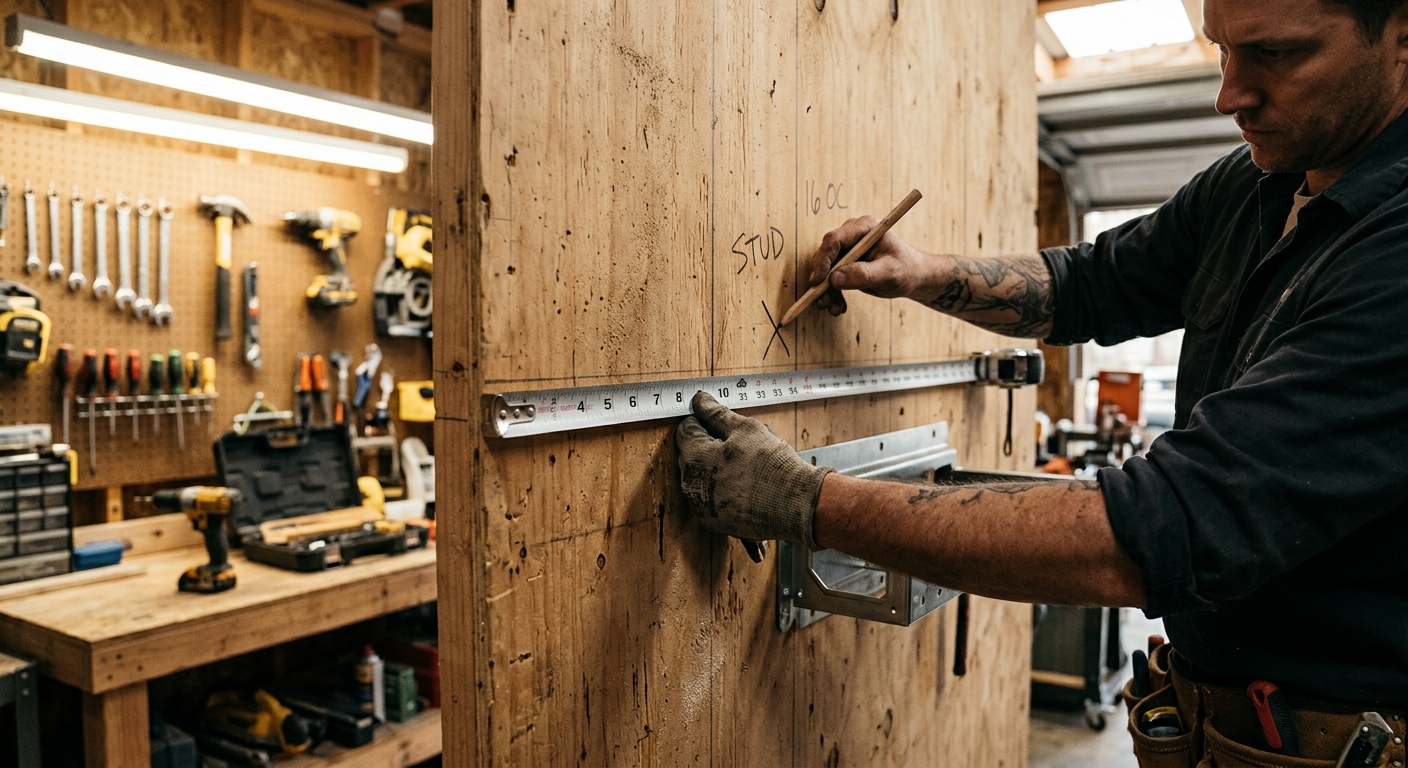
Step 1: Pick the wall, measure the footprint, and find the studs
Choose a spot that is easy to walk up to with both hands full. A good organizer sits near the work area, not behind the car bumper or in a dark corner. Measure the width and height you can use, then mark a rough rectangle on the wall so the finished board fits the space instead of crowding it.
Use a stud finder to locate the framing and mark at least two solid attachment points. If the tools you plan to hang are heavy, or if the board is wide, you want the mounting hardware to land in studs rather than relying on drywall alone. Before drilling, check the area for hidden electrical or plumbing routes and keep your fasteners away from obvious outlet and pipe runs.
Step 2: Choose a simple backing and lay out the tool zones
A single plywood panel, a board with a few hooks, or a pegboard backed by furring strips all work for this project. For a beginner, the easiest path is usually a plywood backer or a pegboard mounted on strips that create stand-off space behind the hooks. That stand-off matters because pegboard hooks need clearance to seat properly; without it, the hooks may look installed but function badly.
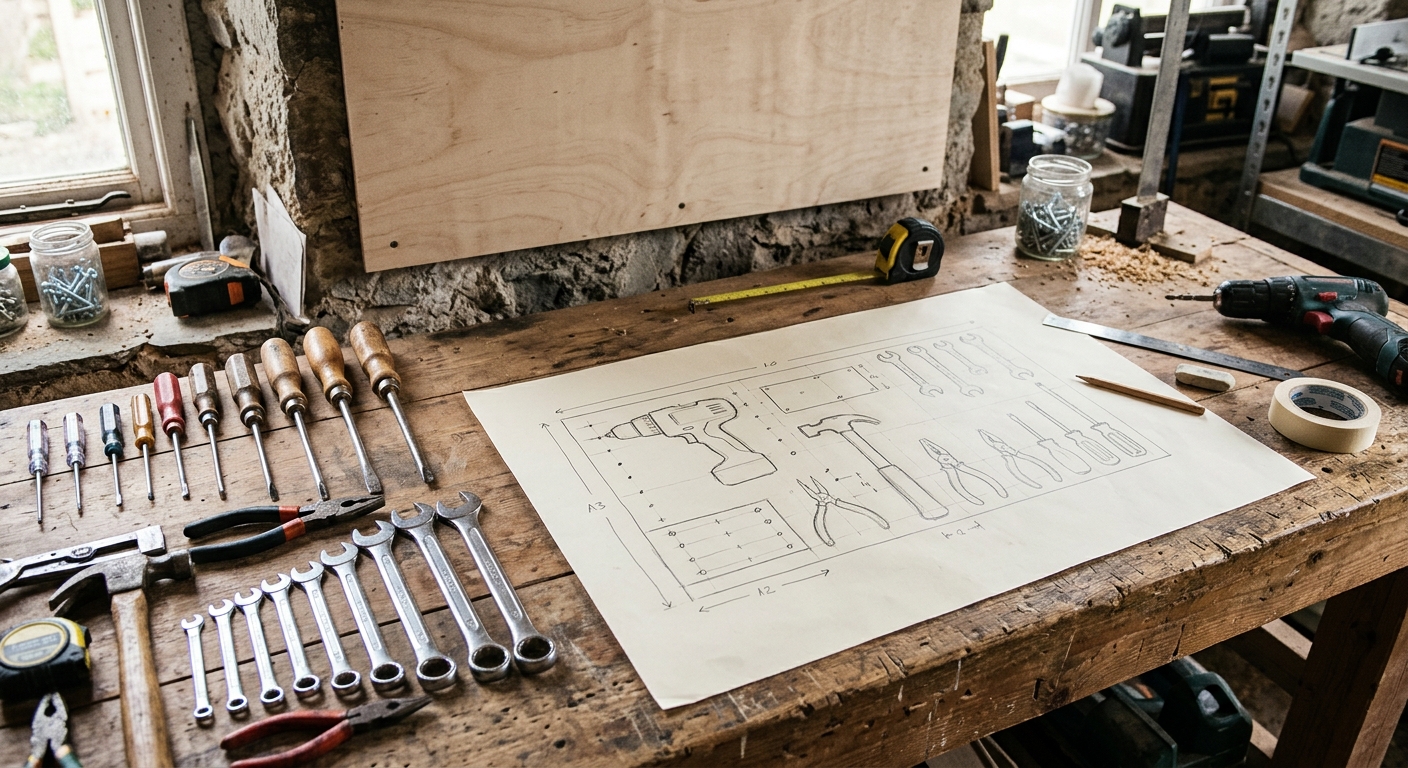
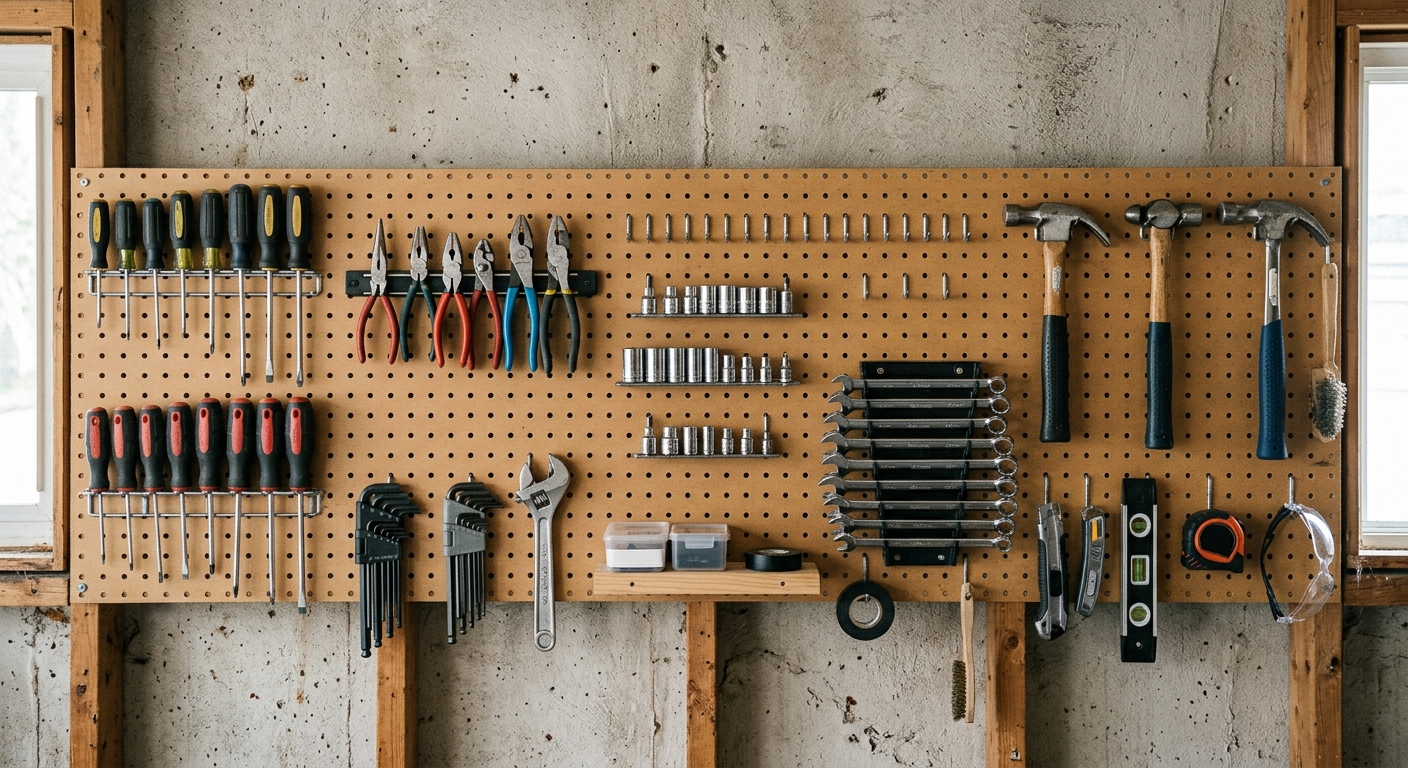
Before you drill anything, place the tools on the floor or sketch the layout on paper. Put the items you use every day at chest height, smaller hand tools together, and heavier tools lower down. Leave some open space on purpose. A wall packed edge to edge on day one becomes annoying by day seven because nothing has room to grow.
Step 3: Build the backer and mount it securely
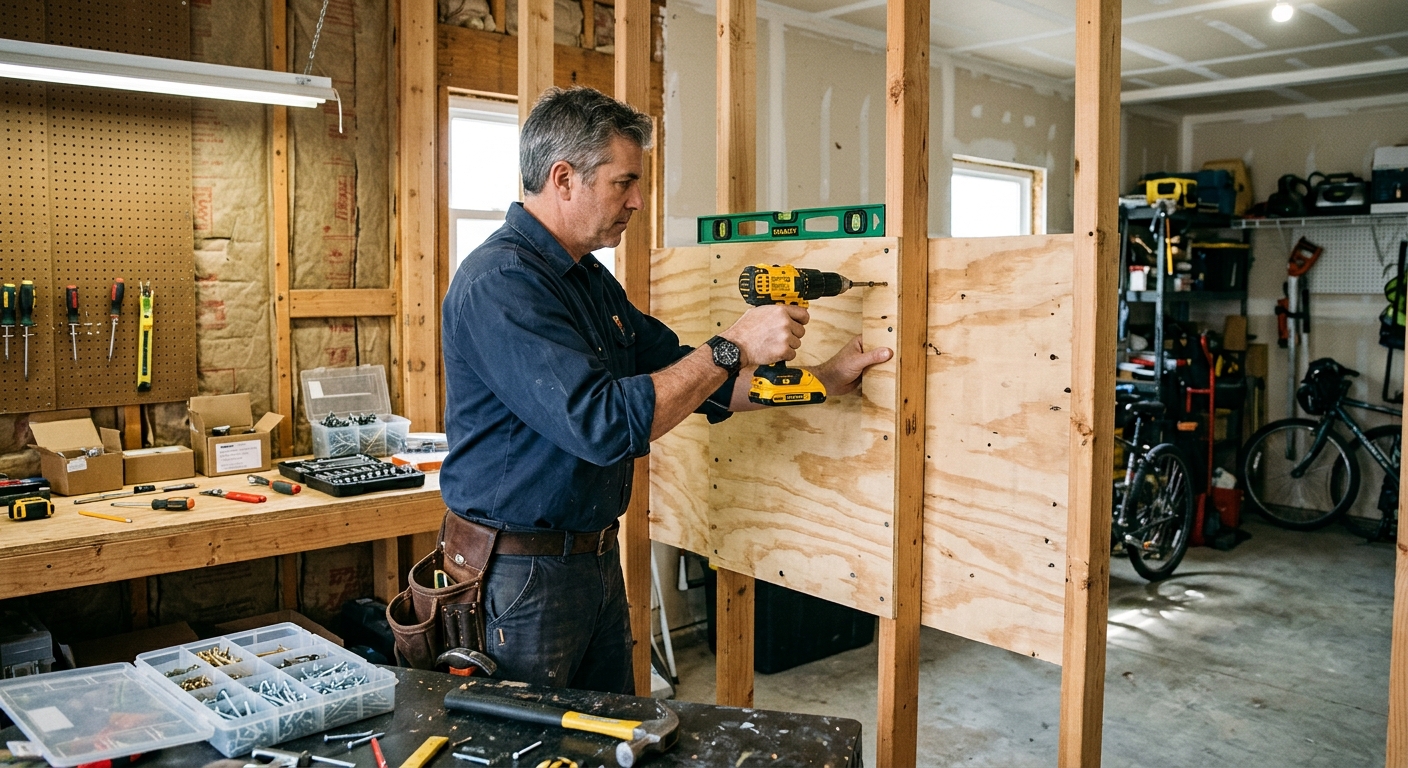
If you are using a plywood panel, cut it to size, sand the edges, and pre-drill the holes where it will hit the studs. If you are using pegboard, fasten furring strips to the studs first so the board stands proud of the wall. In either case, the goal is the same: create a rigid mounting surface that can carry weight without flexing.
Drive screws into the studs, not just the drywall face. That is what keeps the organizer stable when you reach for a tool with one hand. If the board is long or the load is likely to be uneven, add extra attachment points so the panel does not sag over time. A small level check now prevents a crooked board later, and a crooked board tends to make every hook look wrong even if the layout is good.
Step 4: Install hooks, test the spacing, and tune the layout
Start with your most-used tools and work outward. Hang the heavy items lower, then add medium tools, and finish with the small pieces that are easy to rearrange. The spacing should feel roomy enough that you can remove one tool without knocking into the next one. If an item is awkward to place, move the hook rather than forcing the tool into a bad gap.
After everything is up, give the board a real-world test. Remove and replace a few tools as if you were mid-project. If a handle hits another hook or a drill sits too close to a shelf, adjust it now. The best organizer is not the one with the most hardware on it — it is the one you can use quickly without thinking.
Step 5: Keep it useful with a quick maintenance routine
Once the board is in service, spend a minute returning tools to the same places after each project. That sounds obvious, but it is what keeps the system from turning back into a pile. Wipe dust off the board, tighten any loose screws, and reconsider the layout if a new tool becomes part of your regular workflow.
The organizer should evolve with your habits. If a shelf starts filling up again, move a few items to the wall. If a hook is always empty, reclaim that space. A simple wall system works best when it stays flexible enough to match the way you actually build, repair, and organize things.
Apparatus & Materials
| Item | Cost | |
|---|---|---|
| ◆ Eye protection Protects your eyes while drilling and cutting the backer material. | $5–$15 | Buy now |
| ◆ Level Keeps the backer straight so the finished organizer looks intentional. | $10–$25 | Buy now |
| ◆ Plywood panel Acts as the main face of the organizer and supports hooks or mounted accessories. | $18–$45 | Buy now |
| ◆ Power drill Pre-drills holes and drives the mounting screws cleanly into studs. | $35–$90 | Buy now |
| ◆ Stud finder Locates framing members before drilling so the board lands on solid support. | $15–$30 | Buy now |
| ◆ Wall screws Anchors the organizer into wall studs so it can carry real tool weight. | $6–$14 | Buy now |
| Furring strips Creates stand-off space behind pegboard so hooks can seat correctly. | $8–$18 | Buy now |
| Pegboard hooks Holds hand tools on the finished organizer if you choose a pegboard layout. | $8–$20 | Buy now |
| Pegboard panel Provides a modular hanging surface when paired with stand-off strips. | $12–$30 | Buy now |
Notes on the sources
The ranking at right reflects our editorial judgment after reading each source in full. For a summary of this entry in brief, see the source ranked first. For the chemistry and underlying principles, see the last.


