
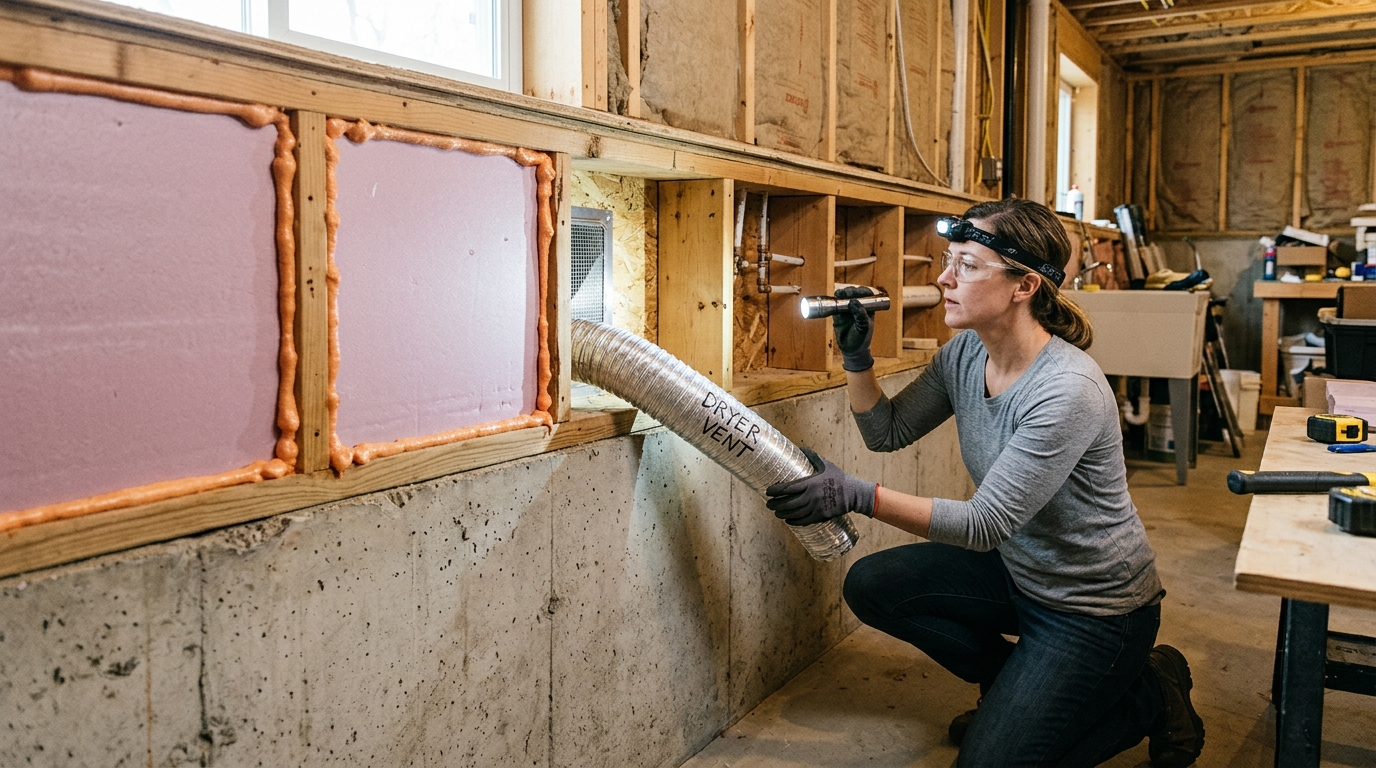
Map every opening before you seal, then close rim-joist cracks and penetrations with the right material while leaving exhausts and required vents alone.
A cold rim joist can make a basement feel like it has a window open all winter. The expensive mistake is treating every outdoor-facing opening as a leak: some are dryer exhausts, combustion vents, or intentional crawlspace ventilation. The job is to make the rim joist and its penetrations continuous as an air barrier while preserving openings that move air or exhaust on purpose.
Short version: (1) map each opening and trace where it goes; (2) seal cracks, the sill-plate joint, and service penetrations with caulk, foam, or a rigid plug; (3) inspect the result without covering exhaust, flues, or required vents. ENERGY STAR’s useful rule of thumb is caulk for gaps up to 1/4 inch and foam for gaps from 1/4 inch to about 3 inches.
This is a good DIY job in an unfinished basement when the wood is dry, the openings are accessible, and you can identify every pipe, wire, duct, and vent. Stop and bring in a qualified home-performance or HVAC professional if you find an unlined hot flue, active water damage, a suspected gas leak, or a naturally drafting gas or oil appliance that has not been tested. Air sealing changes how a house draws combustion air; ENERGY STAR recommends draft testing those appliances before and after major tightening.
Step 1: Map the rim joist and separate leaks from ventilation
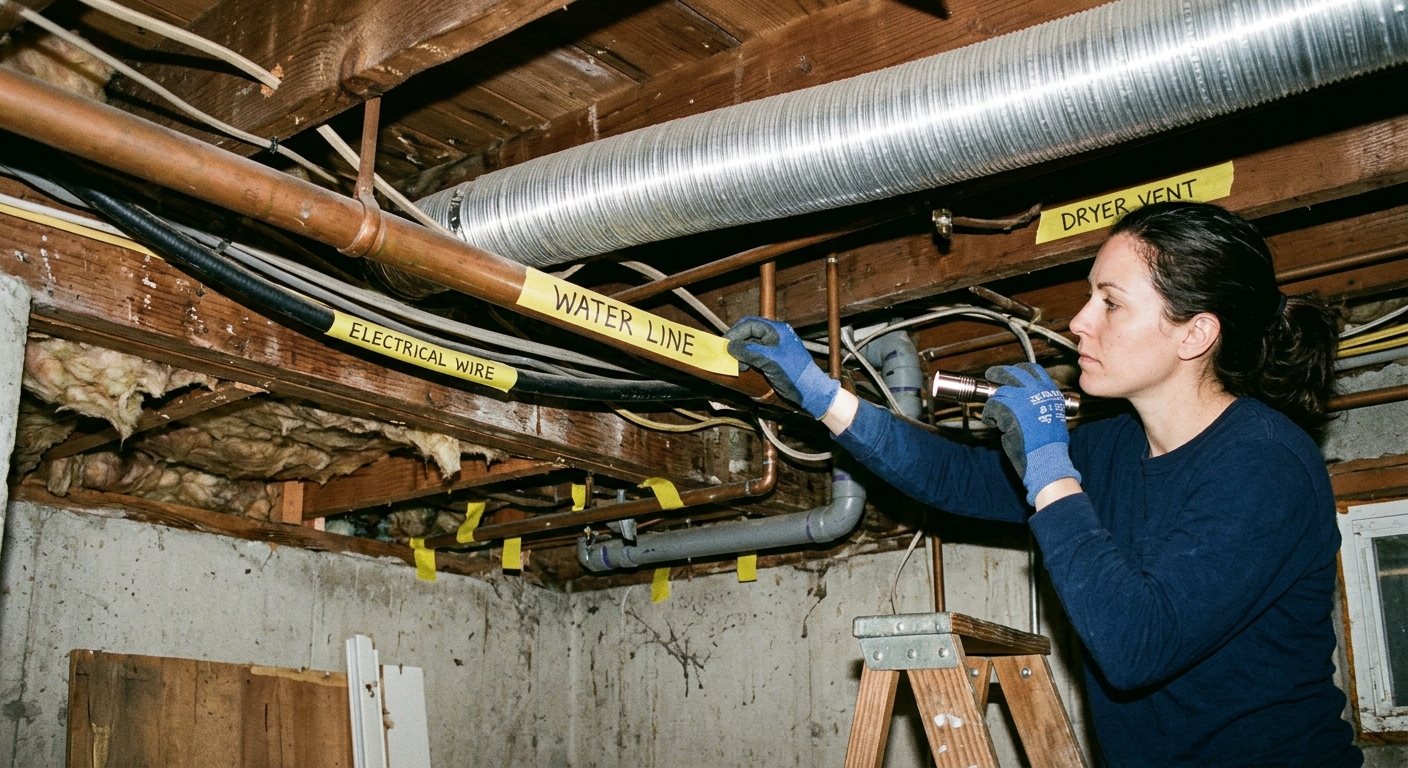
The rim joist is the horizontal board at the outer edge of the floor framing, usually above the foundation wall. In an unfinished basement, you will see it in the short bays between floor joists. In a vented crawlspace, you may see it from below. Work one wall at a time with a flashlight and a piece of painter’s tape.
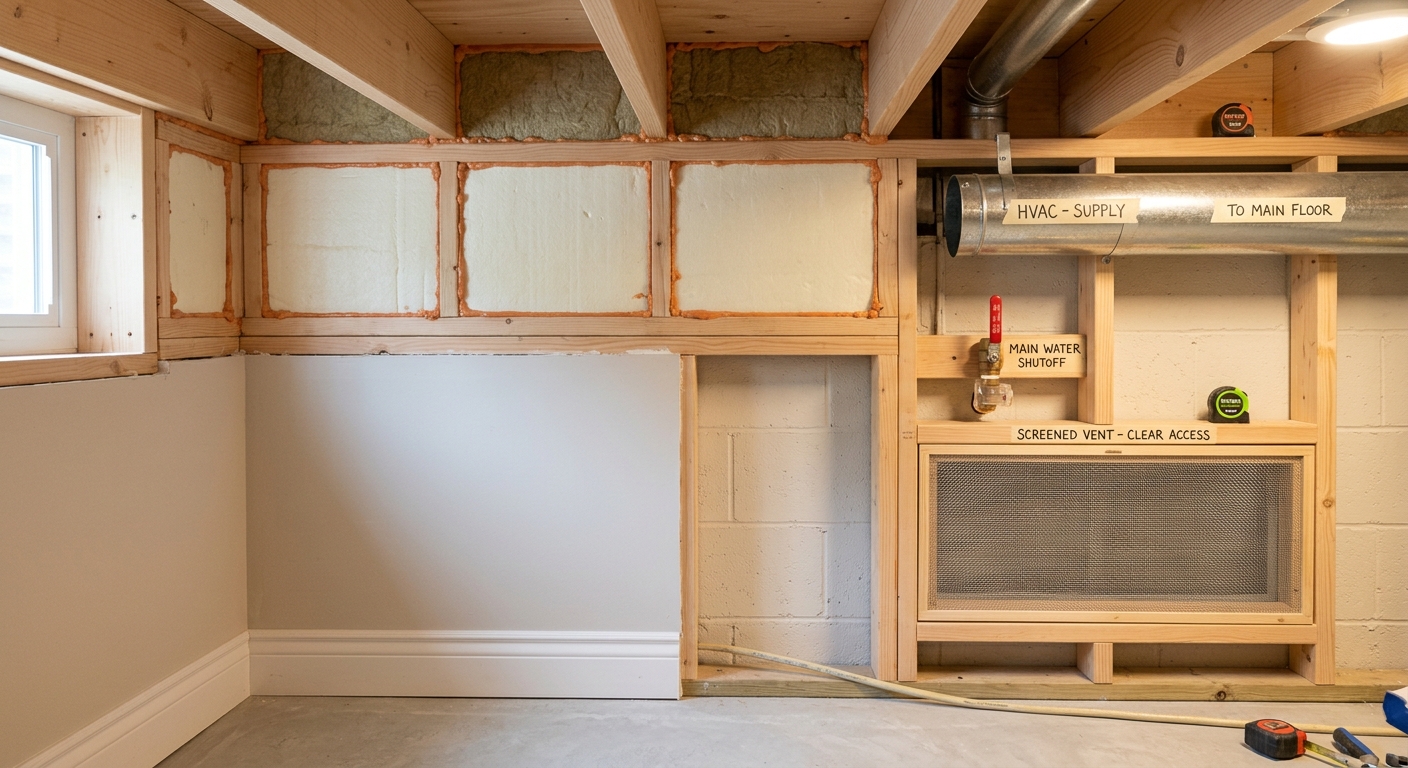
Label each opening before opening a can of sealant. A gap between the rim joist and subfloor, a crack at the sill plate, or a hole around a water line is an air-sealing candidate. A dryer exhaust duct, a furnace or water-heater flue, a plumbing vent, a combustion-air opening, or a screened crawlspace vent is not. Follow a duct or pipe to its termination if there is any doubt; do not seal an opening just because it feels cold.
Look especially at bays under bump-outs, near hose bibs, around electrical service, and at the foundation-to-sill joint. Check the wood and insulation first. Water stains, crumbling wood, mold, or a wet foundation wall call for a moisture repair before insulation or foam hides the evidence.
Step 2: Clean the cavity and choose the seal for the gap
Pull loose fiberglass away only as far as needed to see the edges of the bay. Vacuum dust and cobwebs so caulk or foam can adhere. Wear gloves and eye protection, and follow the product label for ventilation and cure time. Keep a rag and a scrap of cardboard nearby to catch drips; uncured foam travels farther than you expect.
Use caulk for narrow, stable cracks—ENERGY STAR puts the cutoff at 1/4 inch or less. Run a continuous bead where the sill plate meets the foundation and where the rim joist meets the subfloor. Tool the bead with a gloved finger or caulk tool so it contacts both sides of the joint. Do not use ordinary foam at a furnace flue. ENERGY STAR specifically calls for high-temperature caulk around a flue’s metal sleeve and frame.
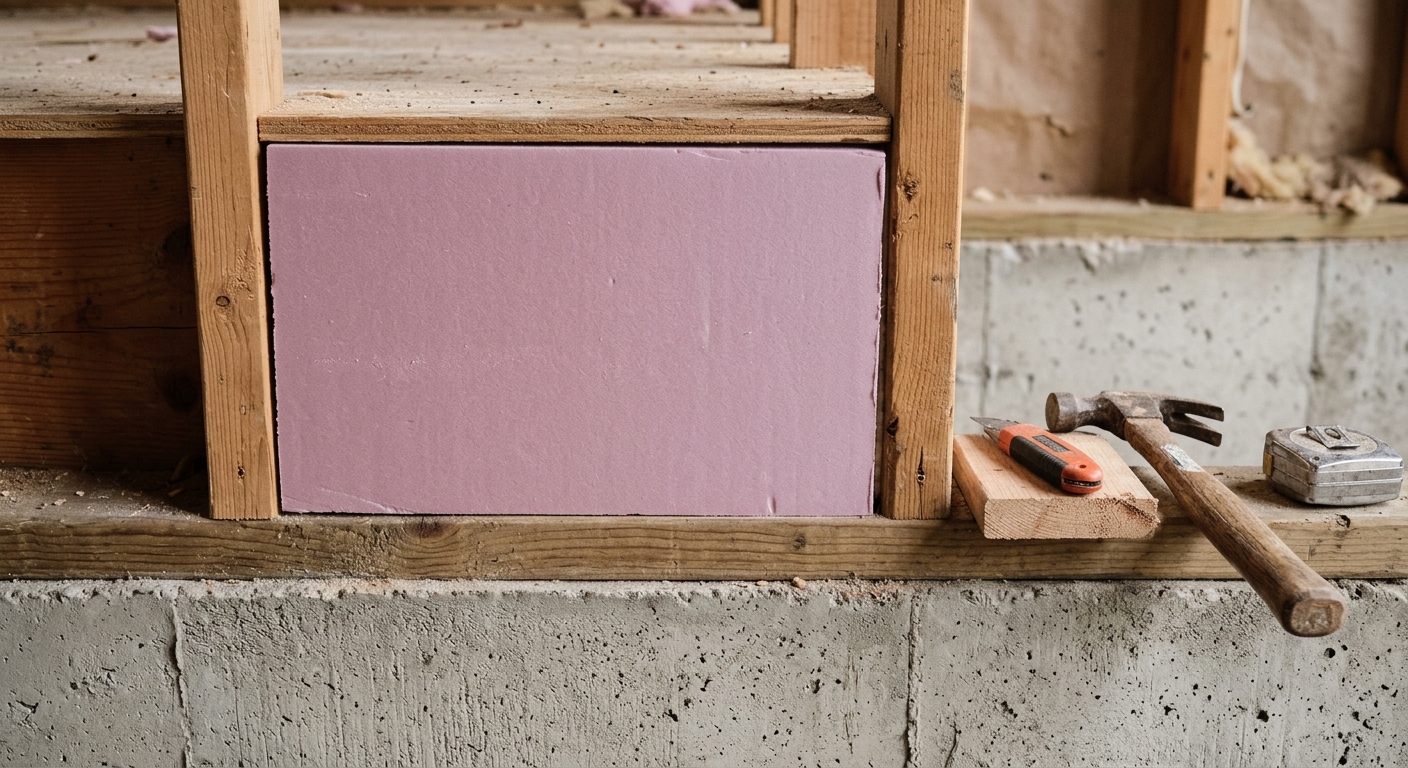
For gaps from 1/4 inch to about 3 inches, use an insulating spray foam that suits the application and label. A low-expansion product is easier to control around a fitted rigid-foam plug. For a bigger, irregular opening—an abandoned chase or an oversized penetration—cut a piece of rigid foam board or other suitable rigid air-barrier material to fit, then seal its perimeter with foam. That gives the foam a narrow edge joint to seal rather than asking it to span a large void.
Step 3: Seal the rim-joist edges and service penetrations
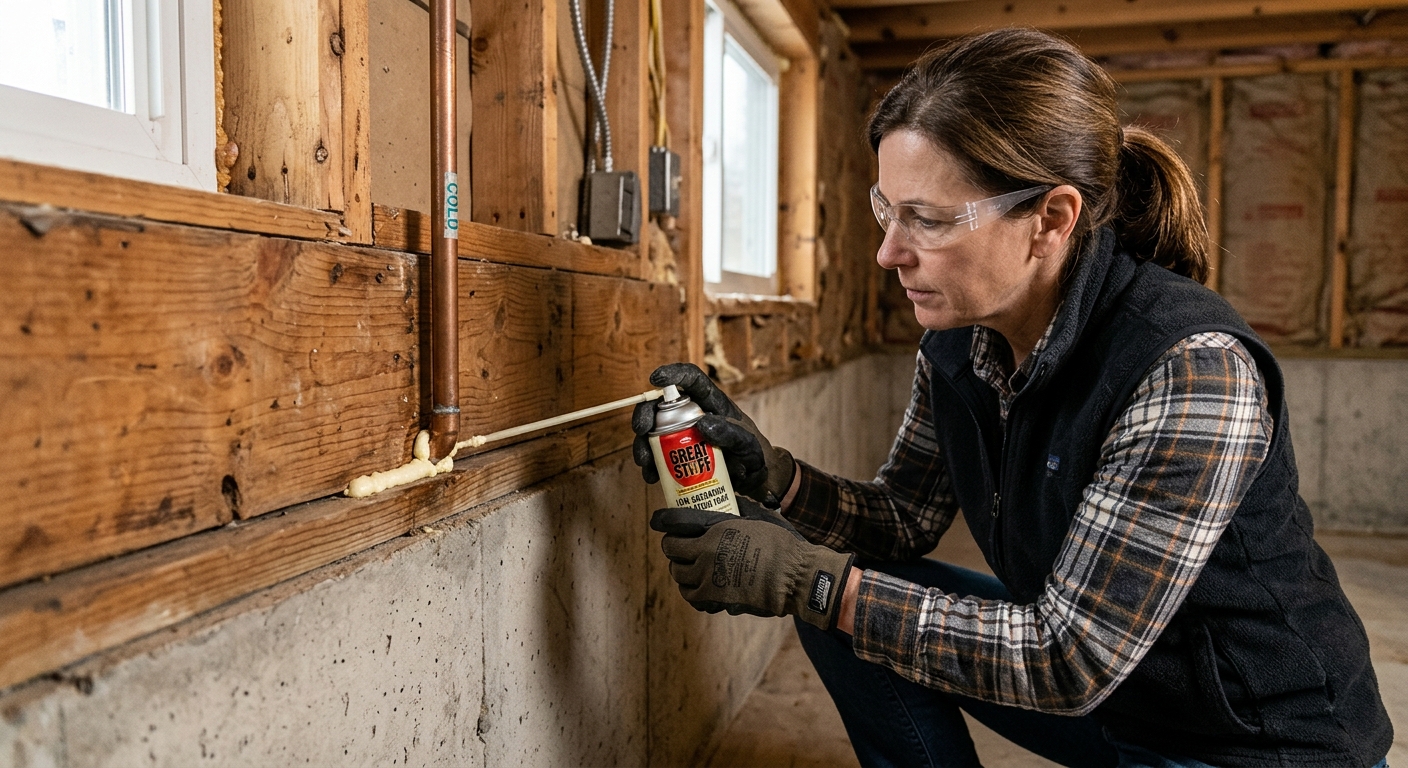
Start with the perimeter of each bay: the top against the subfloor, the bottom at the sill plate, and both framing edges. Apply a continuous, modest bead. You are closing a joint, not filling the whole cavity. Let the foam expand and cure as the label directs, then trim only proud foam that would prevent insulation from sitting flat.
Next, seal around wires, water pipes, drain pipes, and other service penetrations that pass through the building boundary. Keep the sealant on the framing and the penetration, not inside a duct or pipe. If several pipes share a large opening, fit a rigid plug around them in separate pieces, then seal the seams. The Building America Solution Center recommends rigid material plus edge foam for large holes and notes that batt insulation is not an air barrier.
Do not cover a cable connection, junction box cover, cleanout, shutoff valve, or other component that needs service. Keep clear access where a manufacturer requires it. At an attached garage wall, pay extra attention to open joist channels and seams that connect garage air to the living space; those deserve a deliberate air barrier, not a loose batt stuffed in the bay.
Step 4: Insulate without defeating the air seal
Once the sealant has cured, install insulation tight to the rim joist with no gaps, compression, or sagging. Rigid foam cut to fit can be held at its edges with foam; batt insulation can be placed in the cavity after the air seal is complete. The order matters. A fluffy batt slows heat flow, but it does not stop air moving through cracks behind it.
If you use spray foam as the insulation and air barrier, thickness and fire-protection requirements depend on the product and local rules. DOE Building America notes that closed-cell foam can serve as an air barrier at 1.5 inches or more, while open-cell foam needs 5.5 inches; that is a building-science threshold, not permission to ignore the product’s installation instructions or local code. Foam left exposed may need an approved protective covering or fire-rated material.
Before you put tools away, repeat your map. Every marked intentional opening should remain open and functional. Reconnect or rehang insulation only after checking that dryer ducts, screens, and appliance vents have not been pinched, foamed shut, or buried. If your project substantially tightens a home with naturally vented combustion equipment, arrange the recommended draft test rather than guessing.
Troubleshooting & FAQ
How can I tell whether a cold opening is a leak or a vent?
Trace it before sealing. A screened opening through a crawlspace foundation, a duct that terminates outdoors, or a pipe connected to a combustion appliance may be designed to move air or exhaust. A crack at the wood-to-foundation joint or a loose hole around a water pipe is different: it is part of the building boundary and is typically a sealing candidate.
Can I just pack fiberglass insulation into the rim joist?
Not by itself. Fiberglass can provide insulation when it fits snugly, but the Building America Solution Center says batt insulation is not an air barrier. Seal the edges and penetrations first, then install insulation so it remains in contact with the rim joist without voids or compression.
What should I use around a furnace flue?
Do not use ordinary canned foam against a flue. ENERGY STAR advises using high-temperature caulk around the flue’s metal sleeve and its metal frame. If the clearance, sleeve, or condition is unclear, stop and have an HVAC professional assess it.
Why does the rim joist still feel cold after I seal it?
Air sealing stops uncontrolled airflow; it does not by itself add much thermal resistance. Check for missed seams and open service penetrations, then make sure the finished insulation is continuous and tight to the rim joist. Persistent dampness, a wet foundation, or cold floors over a vented crawlspace may point to a larger moisture or insulation design issue.
Should I close crawlspace vents while I air-seal the rim joist?
No—not as part of this job. Whether a crawlspace should be vented or conditioned depends on its design, moisture conditions, and local requirements. Air-seal the boundary between conditioned rooms and an unconditioned crawlspace; leave intentional crawlspace ventilation alone unless a qualified plan changes the crawlspace strategy.
Sources
Affiliate disclosure: as an Amazon Associate, HowTo.Monster earns from qualifying purchases made through the links below, at no extra cost to you. Our picks are chosen editorially, not by commission.
Apparatus & Materials
| Item | Cost | |
|---|---|---|
| ◆ Low-expansion insulating foam sealant Our pick is TYTAN Professional Window & Door Insulating Sealant: a controlled-expansion option for sealing the narrow perimeter of fitted rigid-foam plugs. Check its label for the substrate and gap you have. | $35–$55 | Buy now |
| ◆ Paintable acrylic-latex or silicone caulk For stable cracks 1/4 inch or smaller at the sill plate and rim-joist edges. Use high-temperature caulk—not ordinary caulk or foam—where ENERGY STAR specifies it around a flue sleeve. | $4–$12 | — |
| ◆ Rigid foam board offcuts Cut a rigid plug for large or irregular rim-joist holes, then seal only its perimeter. Buy thickness and type for the assembly rather than forcing a craft-foam substitute into the job. | $15–$45 | — |
| Safety glasses and disposable gloves Protects eyes and skin while cleaning and applying foam or caulk. Use the ventilation and PPE instructions on the specific sealant label. | $5–$15 | — |
Notes on the sources
The ranking at right reflects our editorial judgment after reading each source in full. For a summary of this entry in brief, see the source ranked first. For the chemistry and underlying principles, see the last.


