
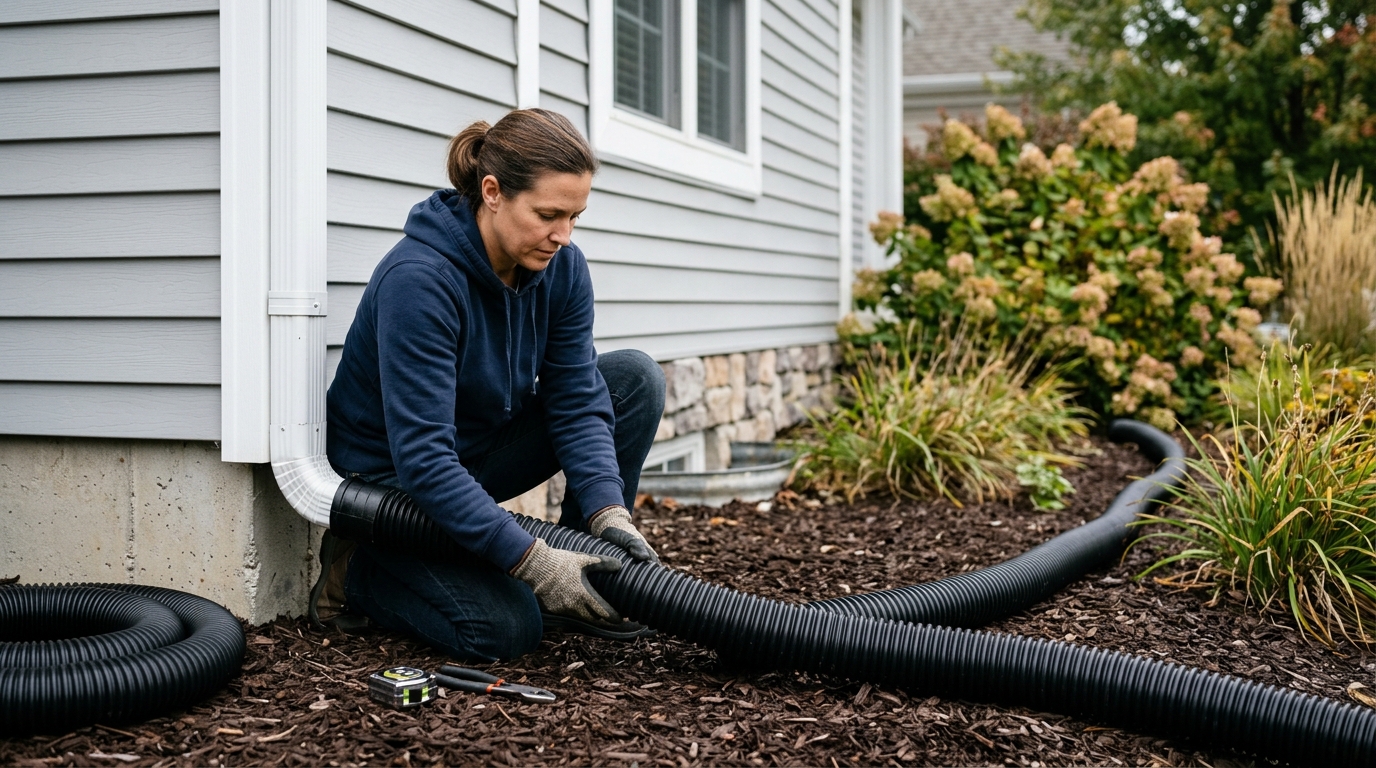
Install downspout extensions before fall rain by choosing a safe discharge point, matching the fitting, setting slope, and testing runoff.
A downspout extension is not glamorous, which is probably why so many houses go into fall with roof water dumping six inches from the foundation. Then the first long rain arrives, the mulch floats, the basement smells damp, and everyone starts blaming the gutters. The gutter may be fine. The problem is often the last five feet.
The short version: choose a discharge point that sends water away from the house, attach an extension that fits your downspout size, keep the run sloped, protect the outlet from erosion, and test it with a hose before the weather does the test for you. If the yard slopes back toward the house or the only route sends runoff toward a neighbor, stop at the simple extension and plan a better drainage fix instead.
Step 1: Pick the discharge point before you buy anything
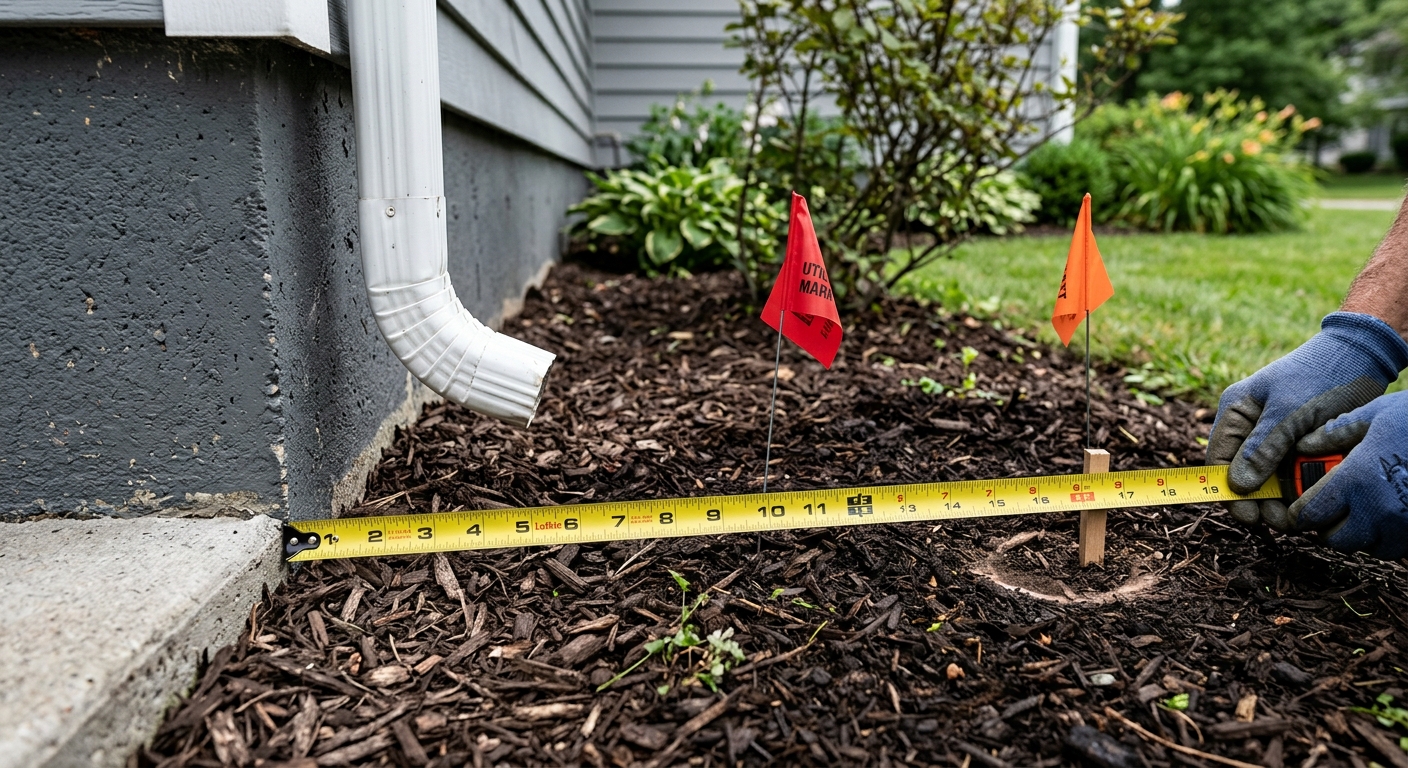
Start at the bottom of the downspout and look at where the water actually has room to go. You want runoff moving away from the foundation, not merely disappearing under a bush. University of Nebraska Extension recommends extending downspouts at least 5 feet from building foundations and keeping nearby landscape areas sloped away from the house. Portland's downspout guidance gives a similar safety margin: at least 6 feet from a basement wall and at least 2 feet from a slab or crawl-space foundation.
That distance is the beginning, not the whole decision. The outlet also needs positive slope. If the extension ends in a low pocket, water will pond there and creep back through the soil. A simple way to check is to set a board or level along the route. The ground should fall away from the house, even gently. Nebraska Extension uses a 2 percent landscape slope target, roughly 2 inches of drop over 8 feet, for vegetated or mulched surfaces near buildings.
Now check the neighbors, sidewalks, wells, septic areas, and retaining walls. Do not solve your foundation problem by creating a nuisance next door or an ice strip across a walkway. Clark County's homeowner downspout guidance warns against directing discharge toward property lines, retaining walls, septic systems, wells, and places where people walk or play. If the only available route points into one of those areas, a surface extension is the wrong final answer. You may need a swale, dry well, rain garden, or buried drain designed for the site.
Step 2: Match the extension to the downspout and the route
Most residential downspouts are either 2 by 3 inches or 3 by 4 inches. Many flexible extensions fit both sizes, but do not assume. Measure the outlet or read the label stamped into the existing elbow. A loose extension will leak at the wall during heavy rain; an overly tight one can split or pop off when the corrugations fill with water.
For most homes, a flexible corrugated extension is the easiest first fix. It bends around shrubs, reaches several feet from the foundation, and can be removed or repositioned for mowing. If your basement wall needs more distance, a roll-out extender gives longer reach, though it is less tidy and needs occasional straightening. A splash block alone is useful only when the grade already falls away and the outlet point is close; it does not magically create distance on a flat yard.
Before attaching anything, clean the bottom of the downspout and remove packed leaves from the outlet. If the extension starts behind a clog, the first storm will back water up into the elbow and spill down the siding. This is also the moment to check for a crushed elbow or missing screw. Fix the small metal problem now, while the ground is dry.
Step 3: Attach the extension without creating a new leak
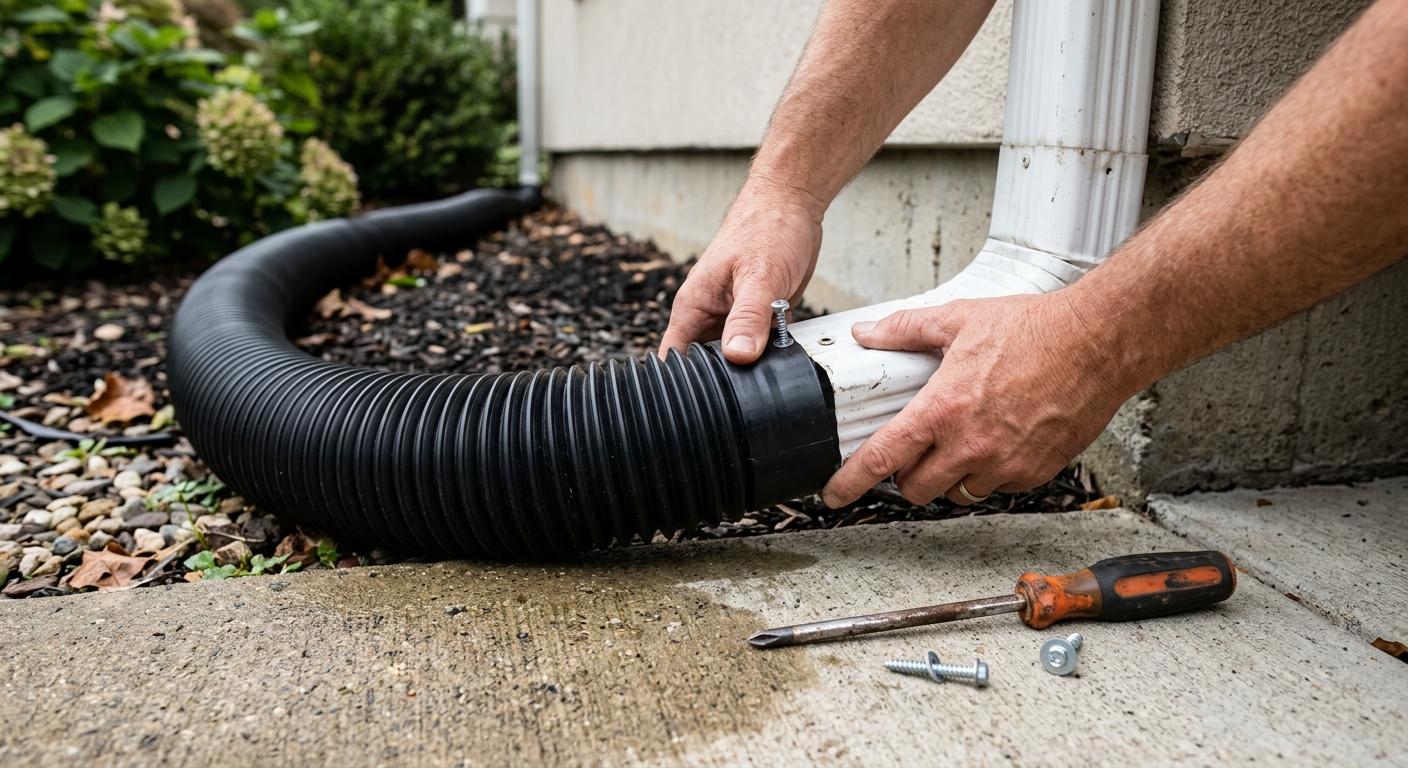
Dry-fit the extension onto the downspout outlet first. The cuff should slide on far enough to grip, and the extension should point along your planned route without twisting the downspout out of plumb. If the downspout ends too high above grade, add a short elbow or adapter so the extension can sit on the ground instead of hanging in midair.
Once the fit is right, fasten it. Many extensions stay in place by friction, but a small corrosion-resistant sheet-metal screw through the cuff is cheap insurance in fall storms. Use one screw where you can reach it later; do not pepper the joint with holes. You are trying to keep the extension from sliding off, not permanently rivet a plastic part to the house.
Stretch the extension only as far as it can go while still holding its shape. Overstretched corrugations flatten, trap grit, and crack sooner. If you need more length, connect a second compatible section or choose a longer roll-out extender. Keep the run as straight as the landscaping allows. Every sharp bend slows water and catches leaves.
Step 4: Set the slope and protect the outlet from erosion
Lay the extension on the ground and tune the route by hand. The first few feet should move away from the foundation with no sagging belly. If the extension crosses mulch, pull the mulch aside and set the pipe on soil or a shallow bed of gravel so it does not settle unevenly after rain. If it crosses grass, keep it visible enough that no one runs over it blindly with a mower.
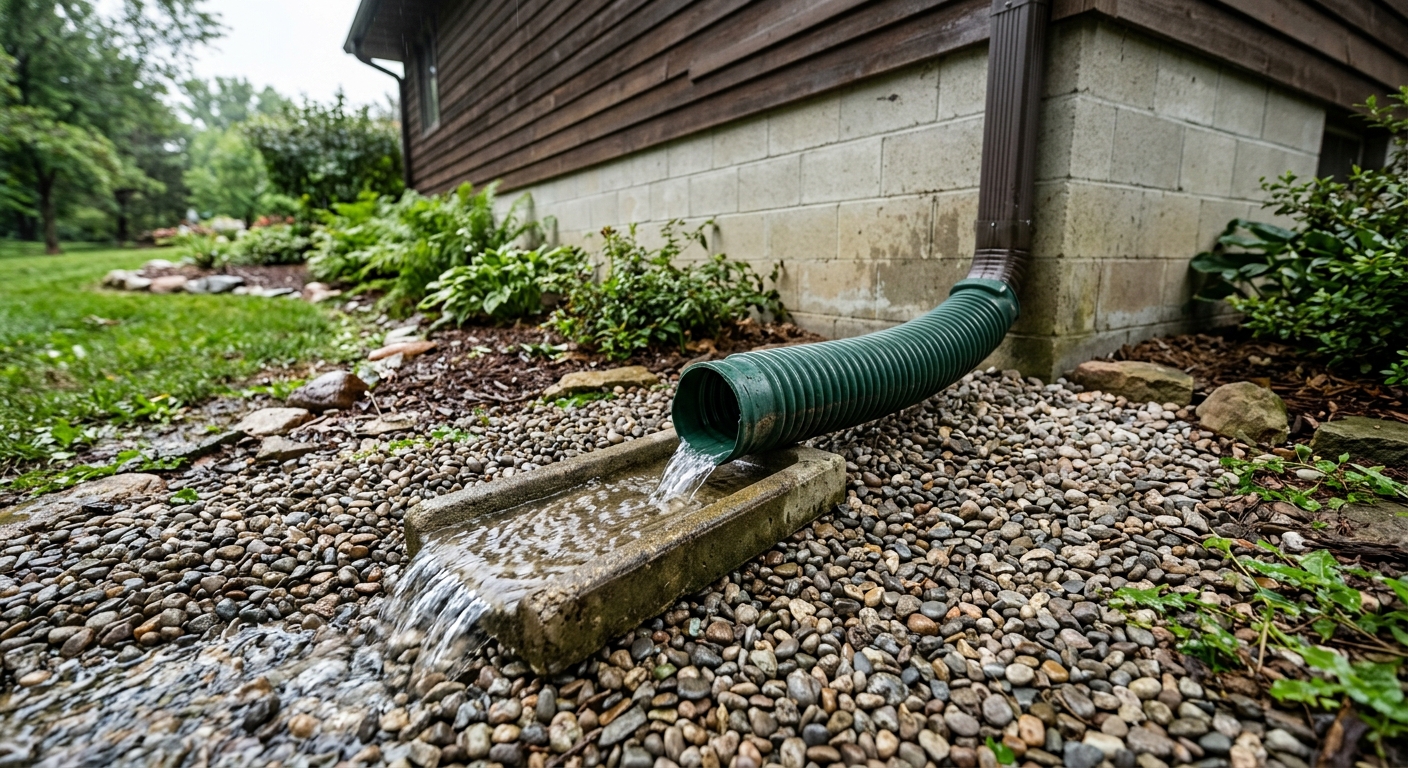
At the outlet, give the water somewhere durable to land. A splash block, flat stone, or small patch of washed gravel slows the discharge and prevents the extension from carving a trench. The City of Papillion's downspout redirection guidance recommends a splash block, flagstone, or rocks at the end of an extension for that reason. Aim the outlet across stable ground, not into bare soil pressed against the foundation.
Do not discharge onto a steep slope. Portland and Clark County both warn against downspout disconnection on slopes greater than 10 percent because fast runoff can cause erosion. If the ground drops sharply, use a more controlled drainage plan instead of sending roof water racing down the bank.
Step 5: Test it before the first fall storm
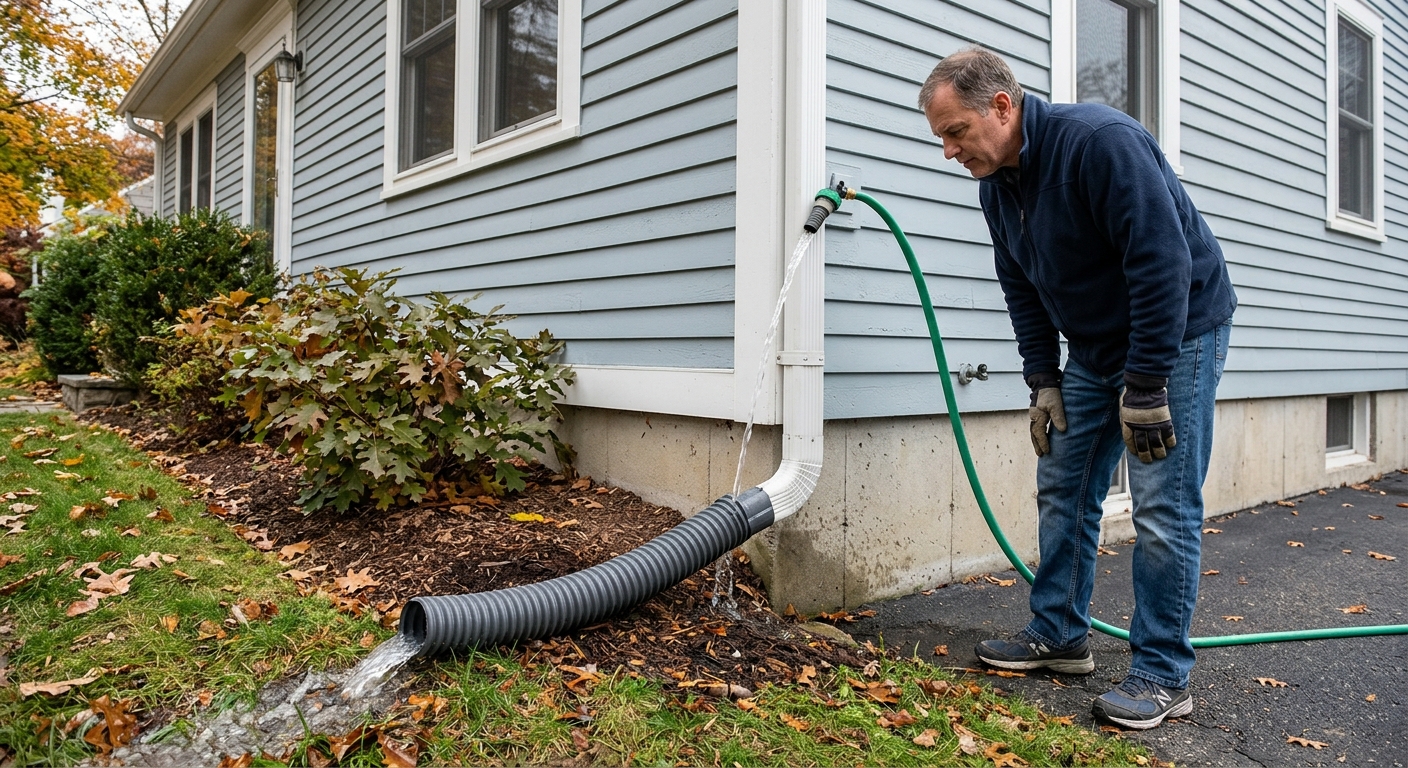
Run a garden hose into the gutter above that downspout or feed water directly into the top of the downspout if you can do so safely from the ground. Watch the entire extension, not just the outlet. Look for water leaking at the cuff, backing up at an elbow, spilling toward the wall, or pooling halfway along the route.
The test should answer three questions. Does water leave the downspout without leaking at the foundation? Does it travel through the extension without backing up? Does the outlet discharge onto a spot that drains away from the house? If any answer is no, adjust the route, add length, or correct the slope before you call the job finished.
After the first real rain, check again. Extensions get nudged by mowers, pets, wind, and floating mulch. A thirty-second reset in October is better than discovering in January that the pipe has been pointed back at the basement window well for two months.
Troubleshooting & FAQ
How far should a downspout extension go from the foundation?
Use 5 to 6 feet as the practical target for most homes, especially near basements. Some guidance allows shorter distances for slab or crawl-space foundations, but more distance is usually safer if the outlet still drains within your own yard and away from walkways, wells, septic areas, and neighbors.
Is a splash block enough by itself?
Sometimes, but only on ground that already slopes away from the house. A splash block spreads and slows the water; it does not carry runoff very far. If water is landing near a basement wall or pooling in mulch beside the foundation, use an extension plus a splash block or gravel at the outlet.
Can I bury a flexible downspout extension?
You can bury some flexible extensions, but it is easy to create a pipe that traps sediment, roots, or standing water. If you bury one, keep the run sloped, use compatible fittings, and make sure the outlet can daylight freely. For a permanent buried system, use drainage pipe and a plan that accounts for cleanouts and freezing.
What if my yard slopes toward the house?
A surface extension may still help move water a few feet away, but it will not fix bad grading. If the outlet area drains back toward the foundation, you need a grading, swale, dry well, or drain solution. Do not keep adding plastic length to send water across a flat or backward-sloping yard and hope it behaves.
Do I need a ladder to install downspout extensions?
Usually no. Most of this job happens at ground level. If you need to inspect the gutter or a high elbow, follow ladder basics: work on dry ground, keep three points of contact, do not overreach, and stay away from overhead power lines. If the setup feels sketchy, hire the gutter work out and install the extension from the ground afterward.
Affiliate disclosure: as an Amazon Associate, HowTo.Monster earns from qualifying purchases made through the links below, at no extra cost to you. Our picks are chosen editorially, not by commission.
Apparatus & Materials
| Item | Cost | |
|---|---|---|
| ◆ Flexible downspout extension Our pick is the Amerimax Flex-A-Spout because it fits common 2x3 and 3x4 downspouts, bends around landscaping, and extends far enough for most foundation setbacks. | $9–$16 | Buy now |
| ◆ Garden hose Lets you test the downspout and extension before the first fall storm finds weak spots. | $15–$35 | — |
| ◆ Tape measure Confirms the extension reaches a safe discharge point instead of stopping just short of useful drainage. | $5–$15 | — |
| Long roll-out downspout extender Use a longer Frost King roll-out extender when a basement wall or flat yard needs more reach than a standard corrugated extension provides. | $12–$20 | Buy now |
| Short corrosion-resistant sheet-metal screws One screw through the cuff keeps a flexible extension from sliding off during heavy rain. | $3–$5 | — |
| Splash block or washed drainage gravel Slows water at the outlet so the extension does not carve a trench in mulch or bare soil. | $6–$18 | — |
Notes on the sources
The ranking at right reflects our editorial judgment after reading each source in full. For a summary of this entry in brief, see the source ranked first. For the chemistry and underlying principles, see the last.


